Field Editor
Field Editor Interface
The Field Editor shows all customfields with contexts you have permissions for in a table.
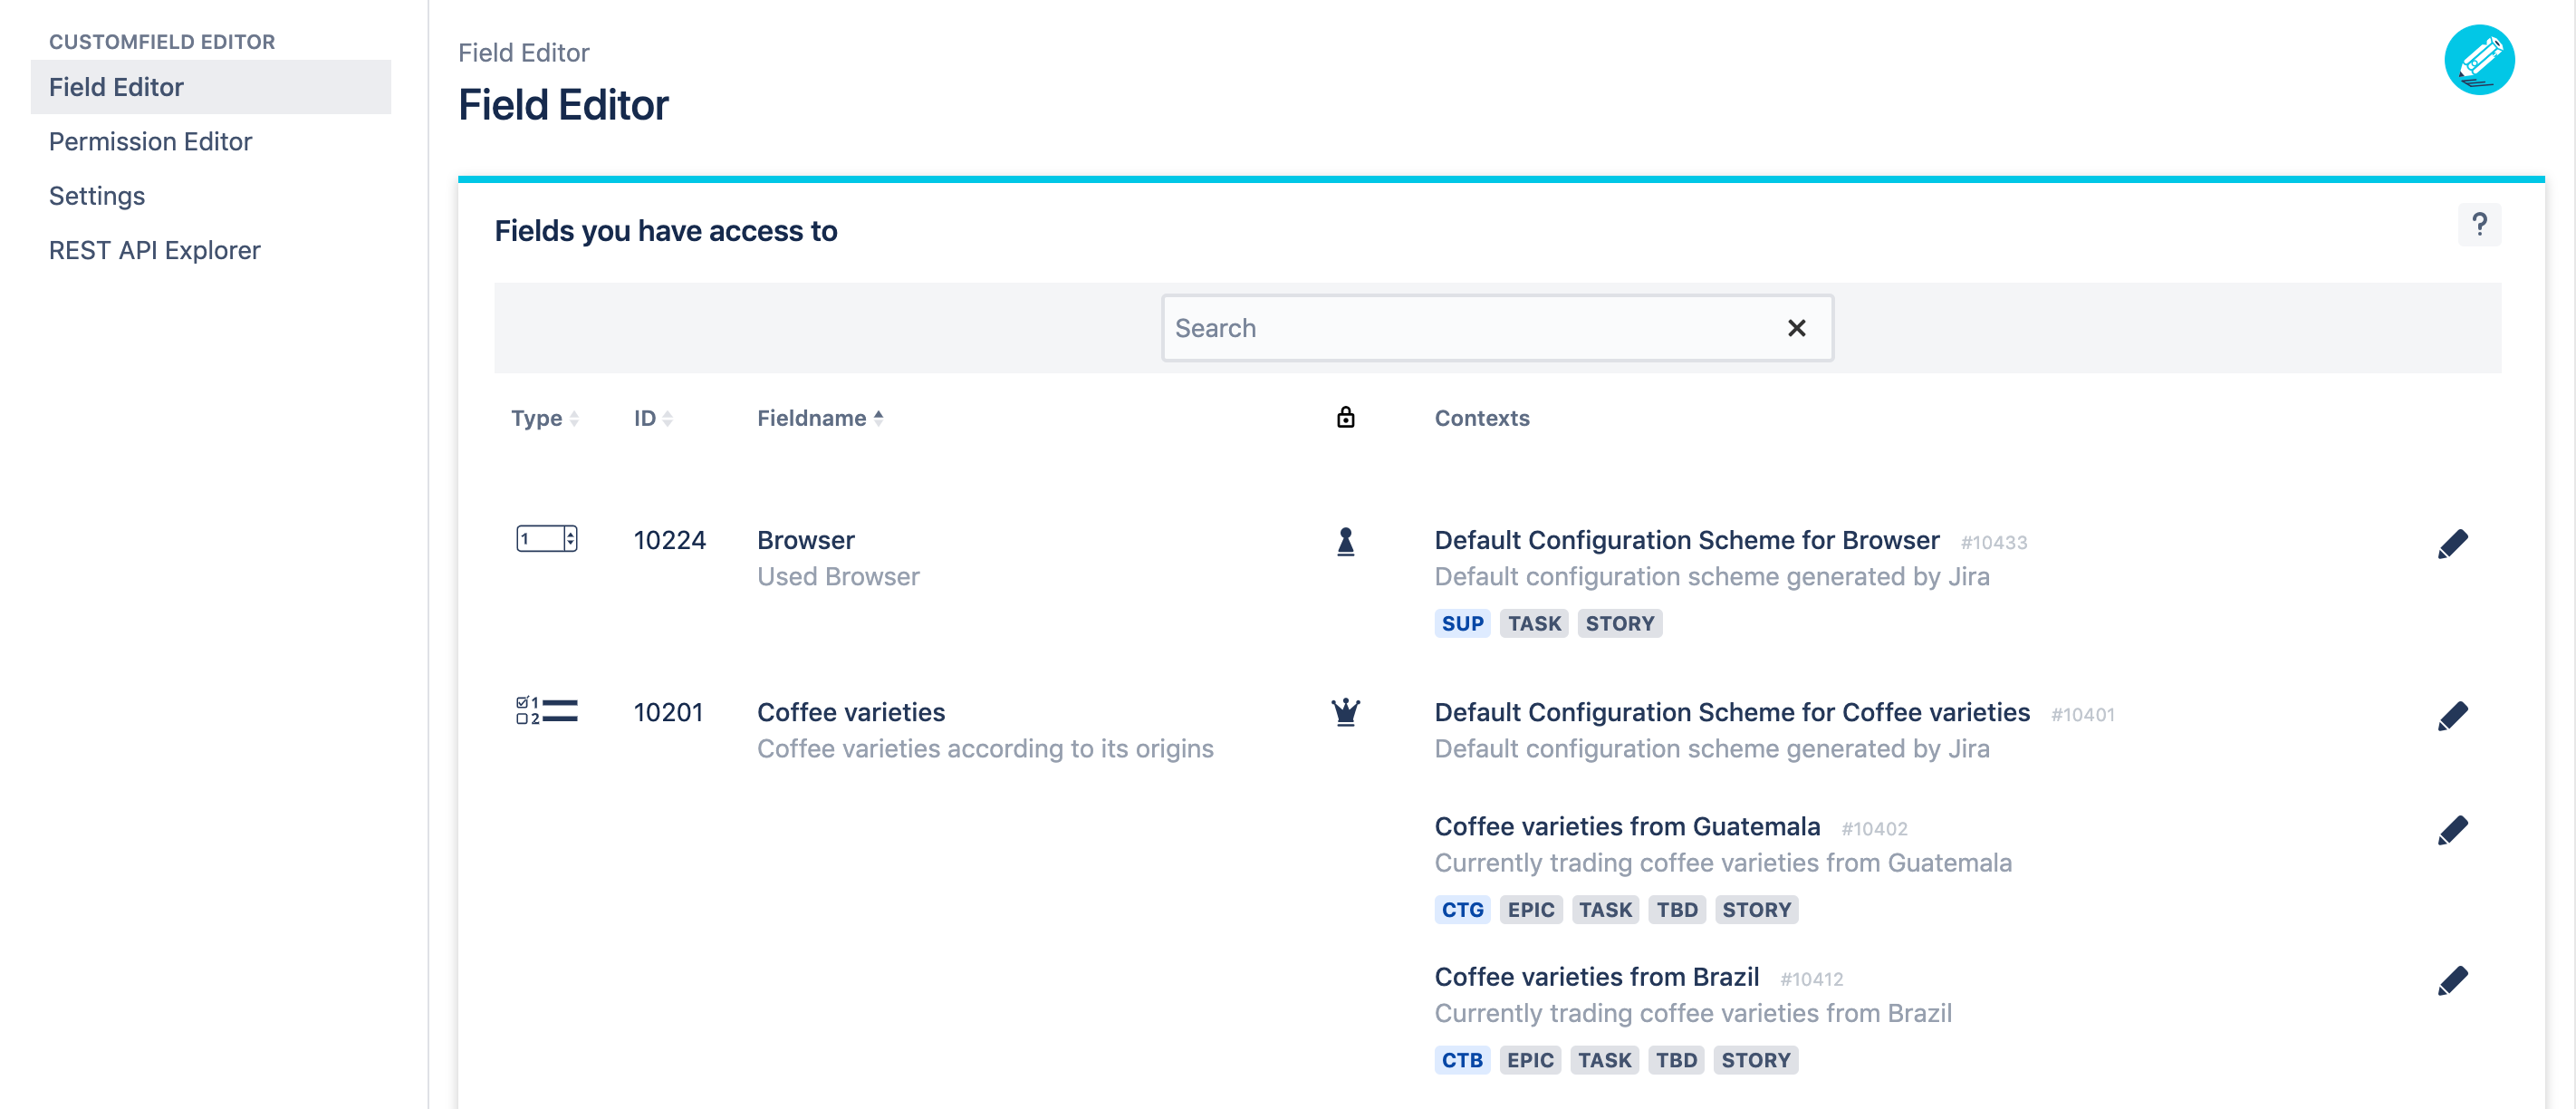
Use the searchbar at the top of the table to filter for customfield ID, name or description.
The Type column shows the field type of your customfield as an icon.
Every customfield has a unique ID. The ID column shows this customfield ID.
The Fieldname column contains the name and description of your customfield.
The permissions column displays the permission your Jira administrator has granted you:
When you see the
 queen icon you have full permission, meaning for this specific customfield you can work on all contexts.
If you see the
 pawn icon you have permission for this specific customfield in this specific context.
The contexts column lists all contexts you have permission for. Every context is displayed with its description, its unique ID and the assigned projects and issues.
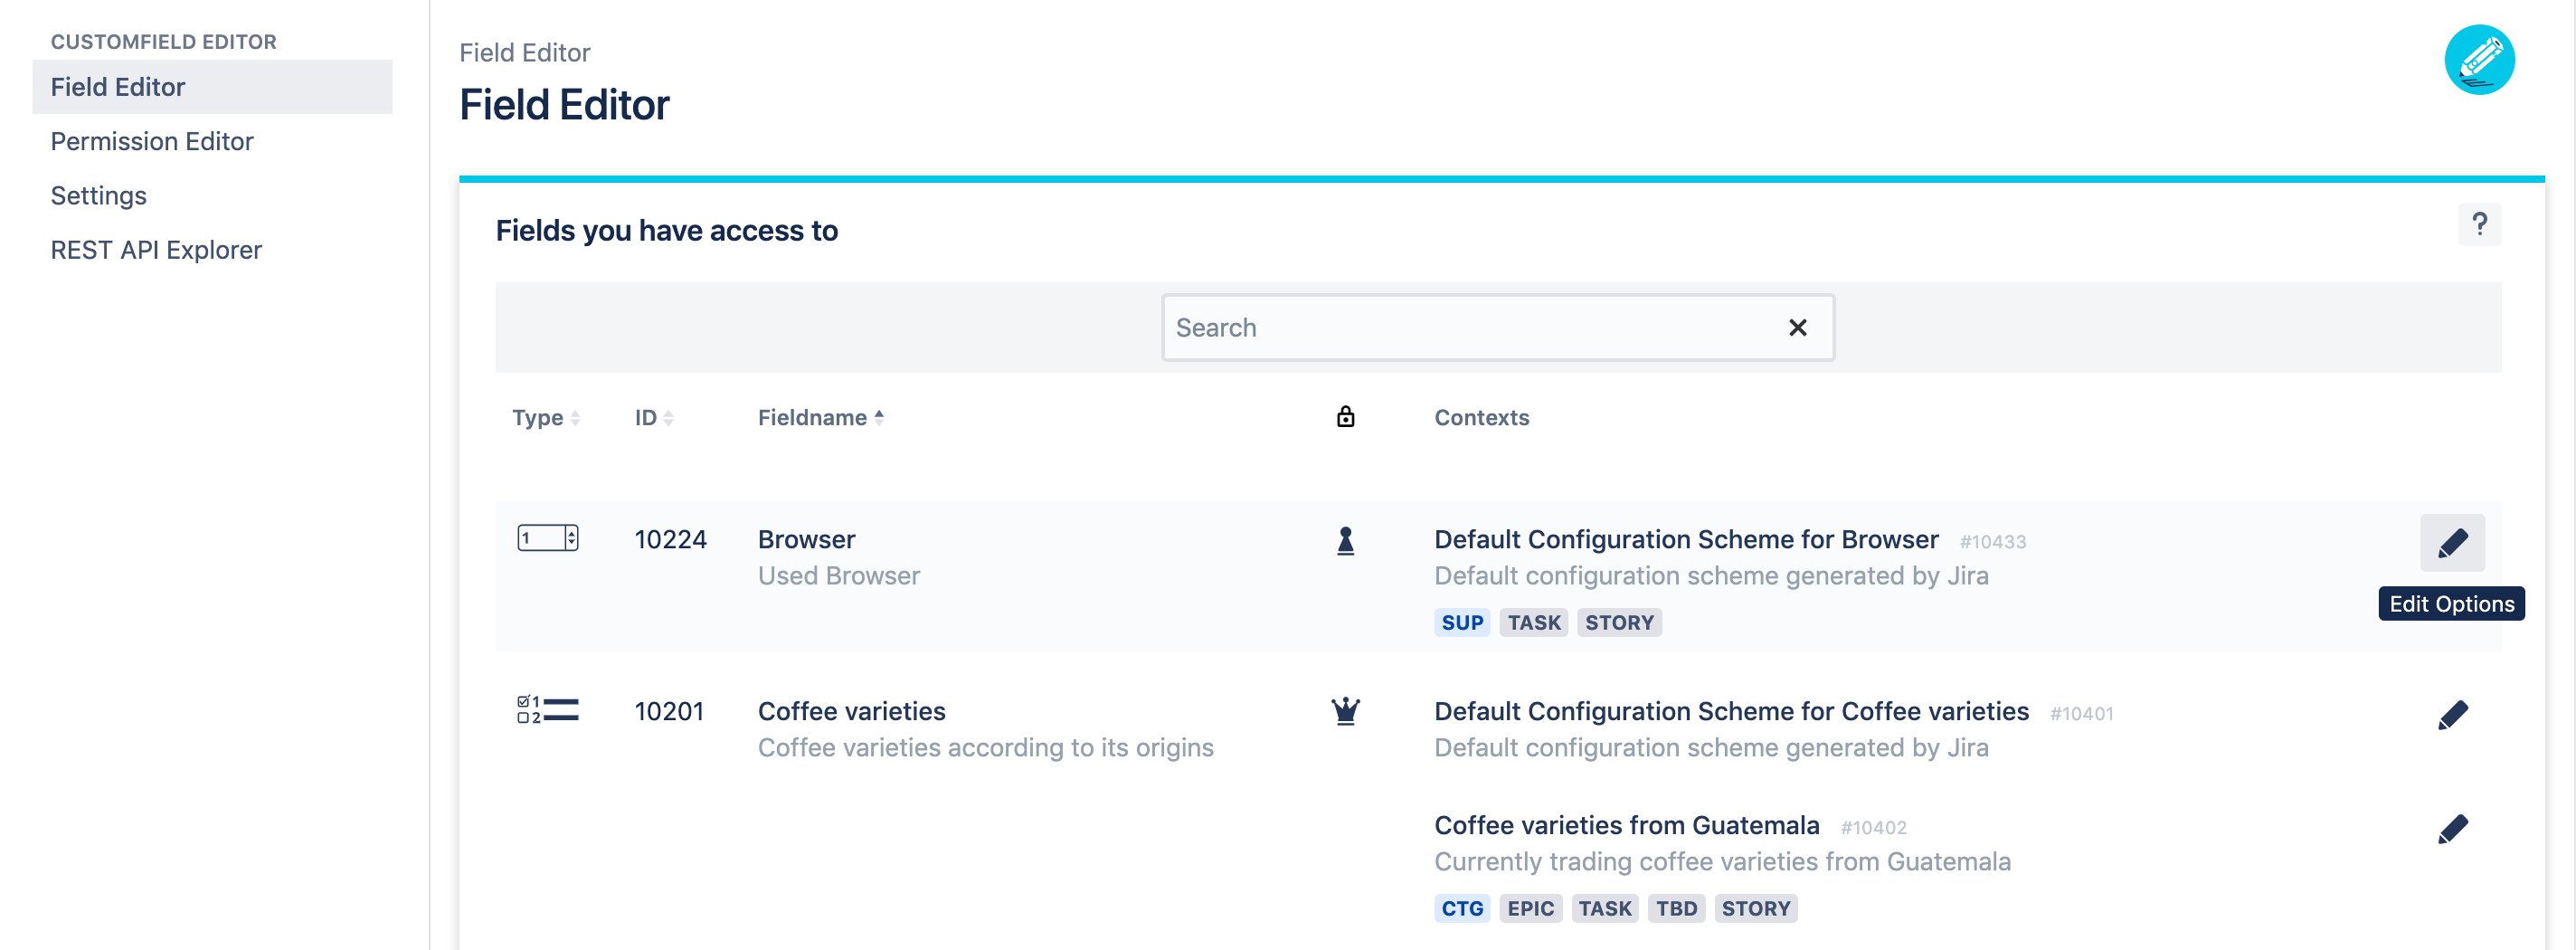
Selecting customfield and context
Look for the customfield and the specific context you want to work on and click on the respective pen icon to edit the options.
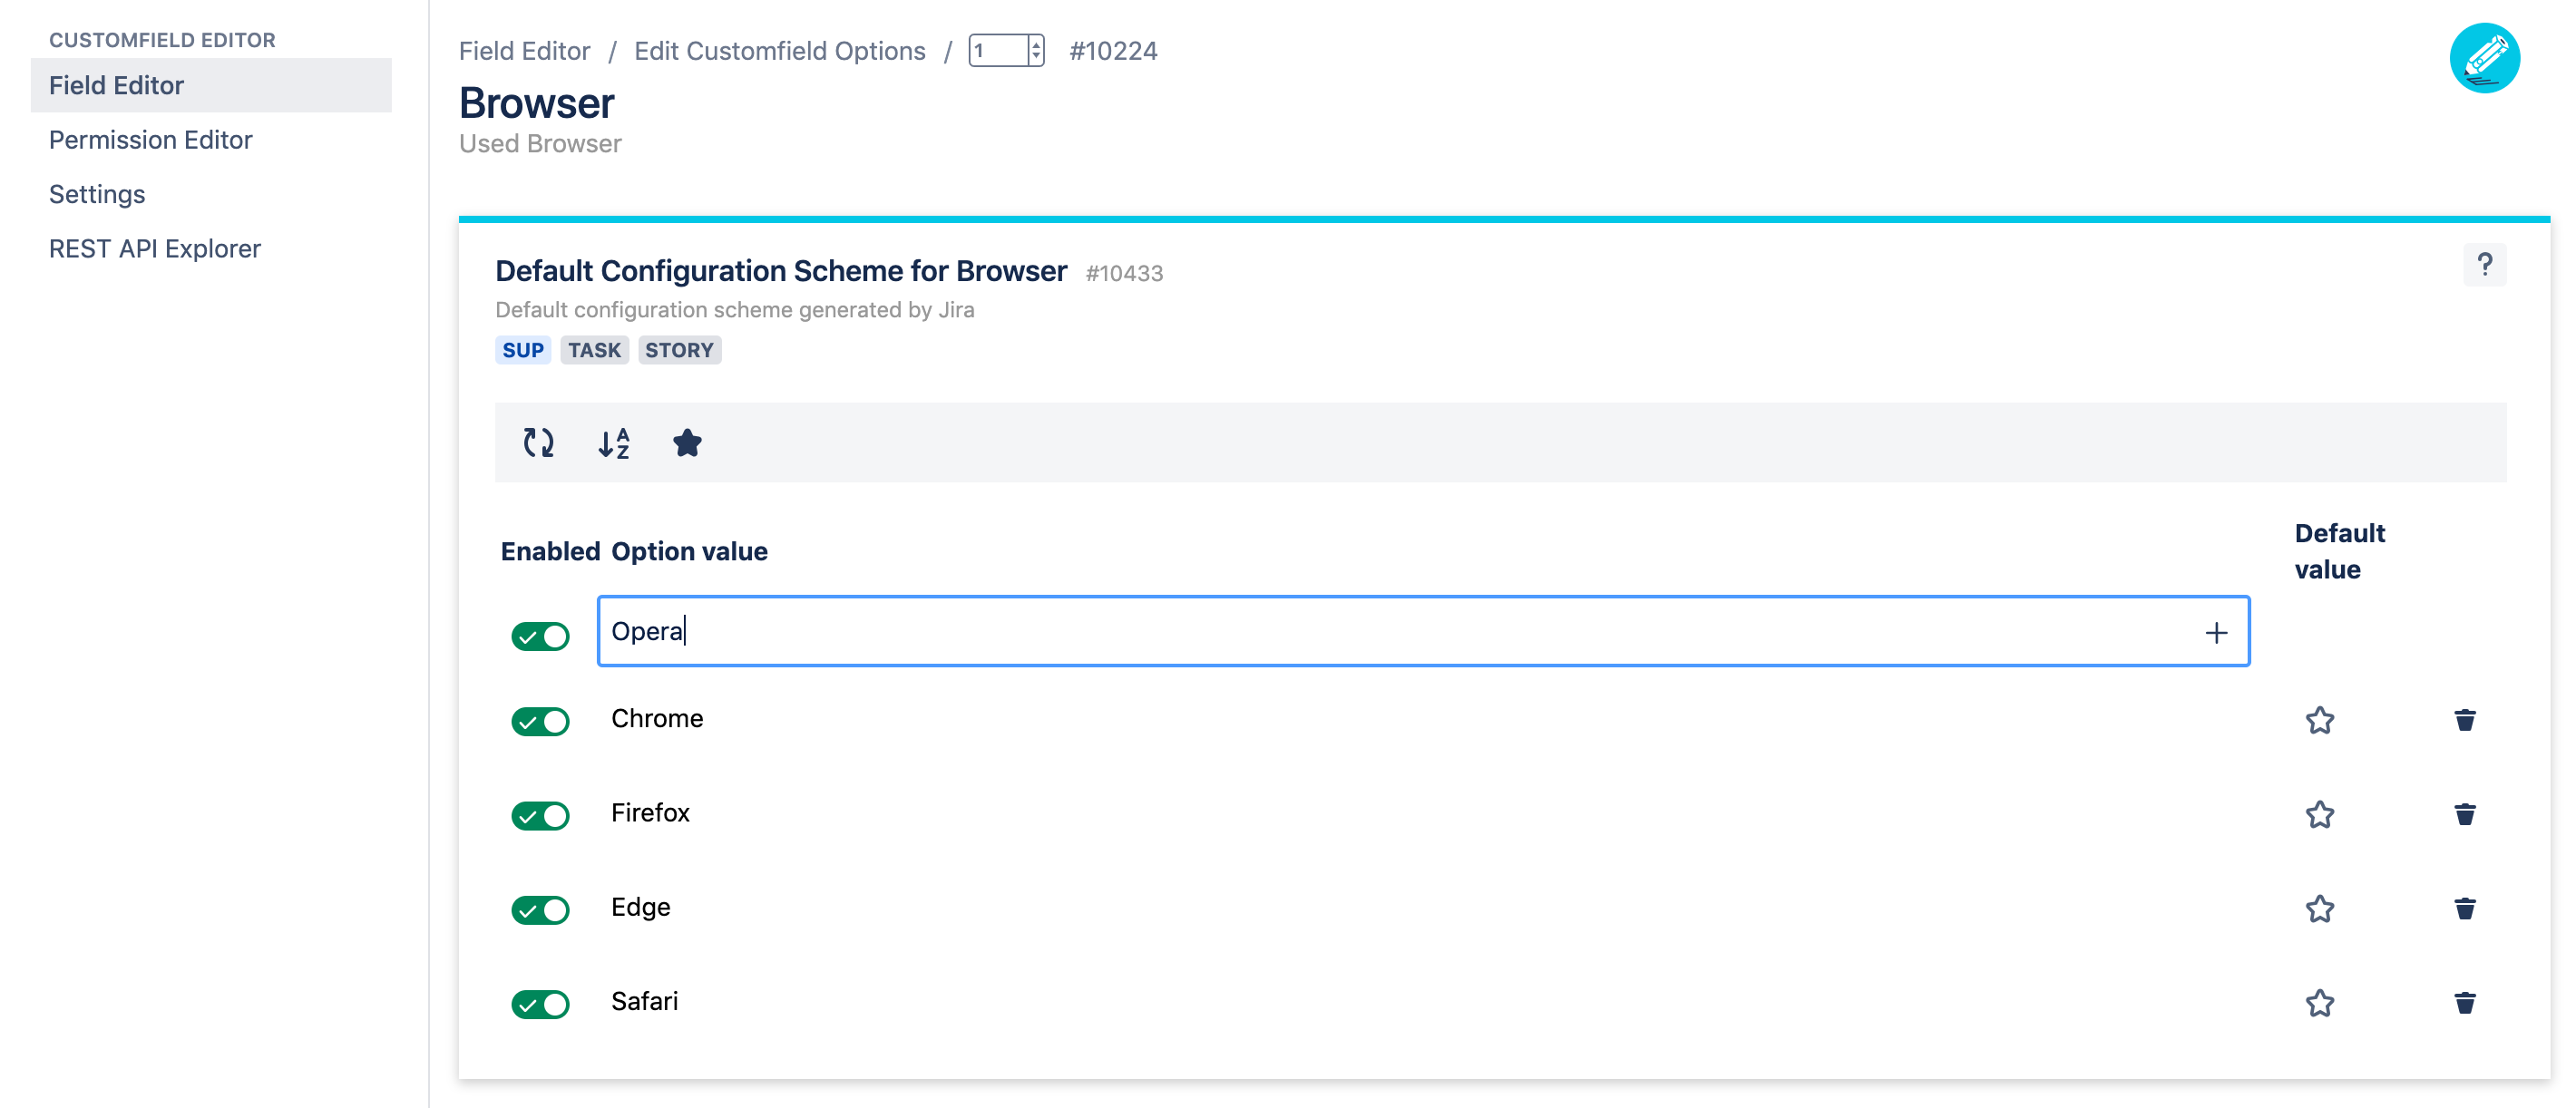
Edit customfield options
The Edit customfield options page is your playground to add new options, edit existing options or delete options. Furthermore you can enable or disable options, change the order by drag and drop, sort options alphabetically and set the default value.
The basic operations on options (CRUD) are equal for all supported field types:
Add new options by simply write your text in the textbox and click on add (or type enter). Decide to enable or disable the option by clicking the switcher.
Edit existing options by clicking on the option to edit it.
Delete options by clicking on the trash icon.
Note: Remember before deleting an option that it may be selected in a Jira Issue! A better solution could be to just disable this option to prevent changing values on Issues.
The field type Select List (cascading) represents an exception because each option has additional child options. If you edit the options of a customfield with this field type you can still perform the same actions. The table will just be extended with a child options column.
To edit the child options click on the child icon to open a modal. Here you will see a identical table with the same action possibilities.

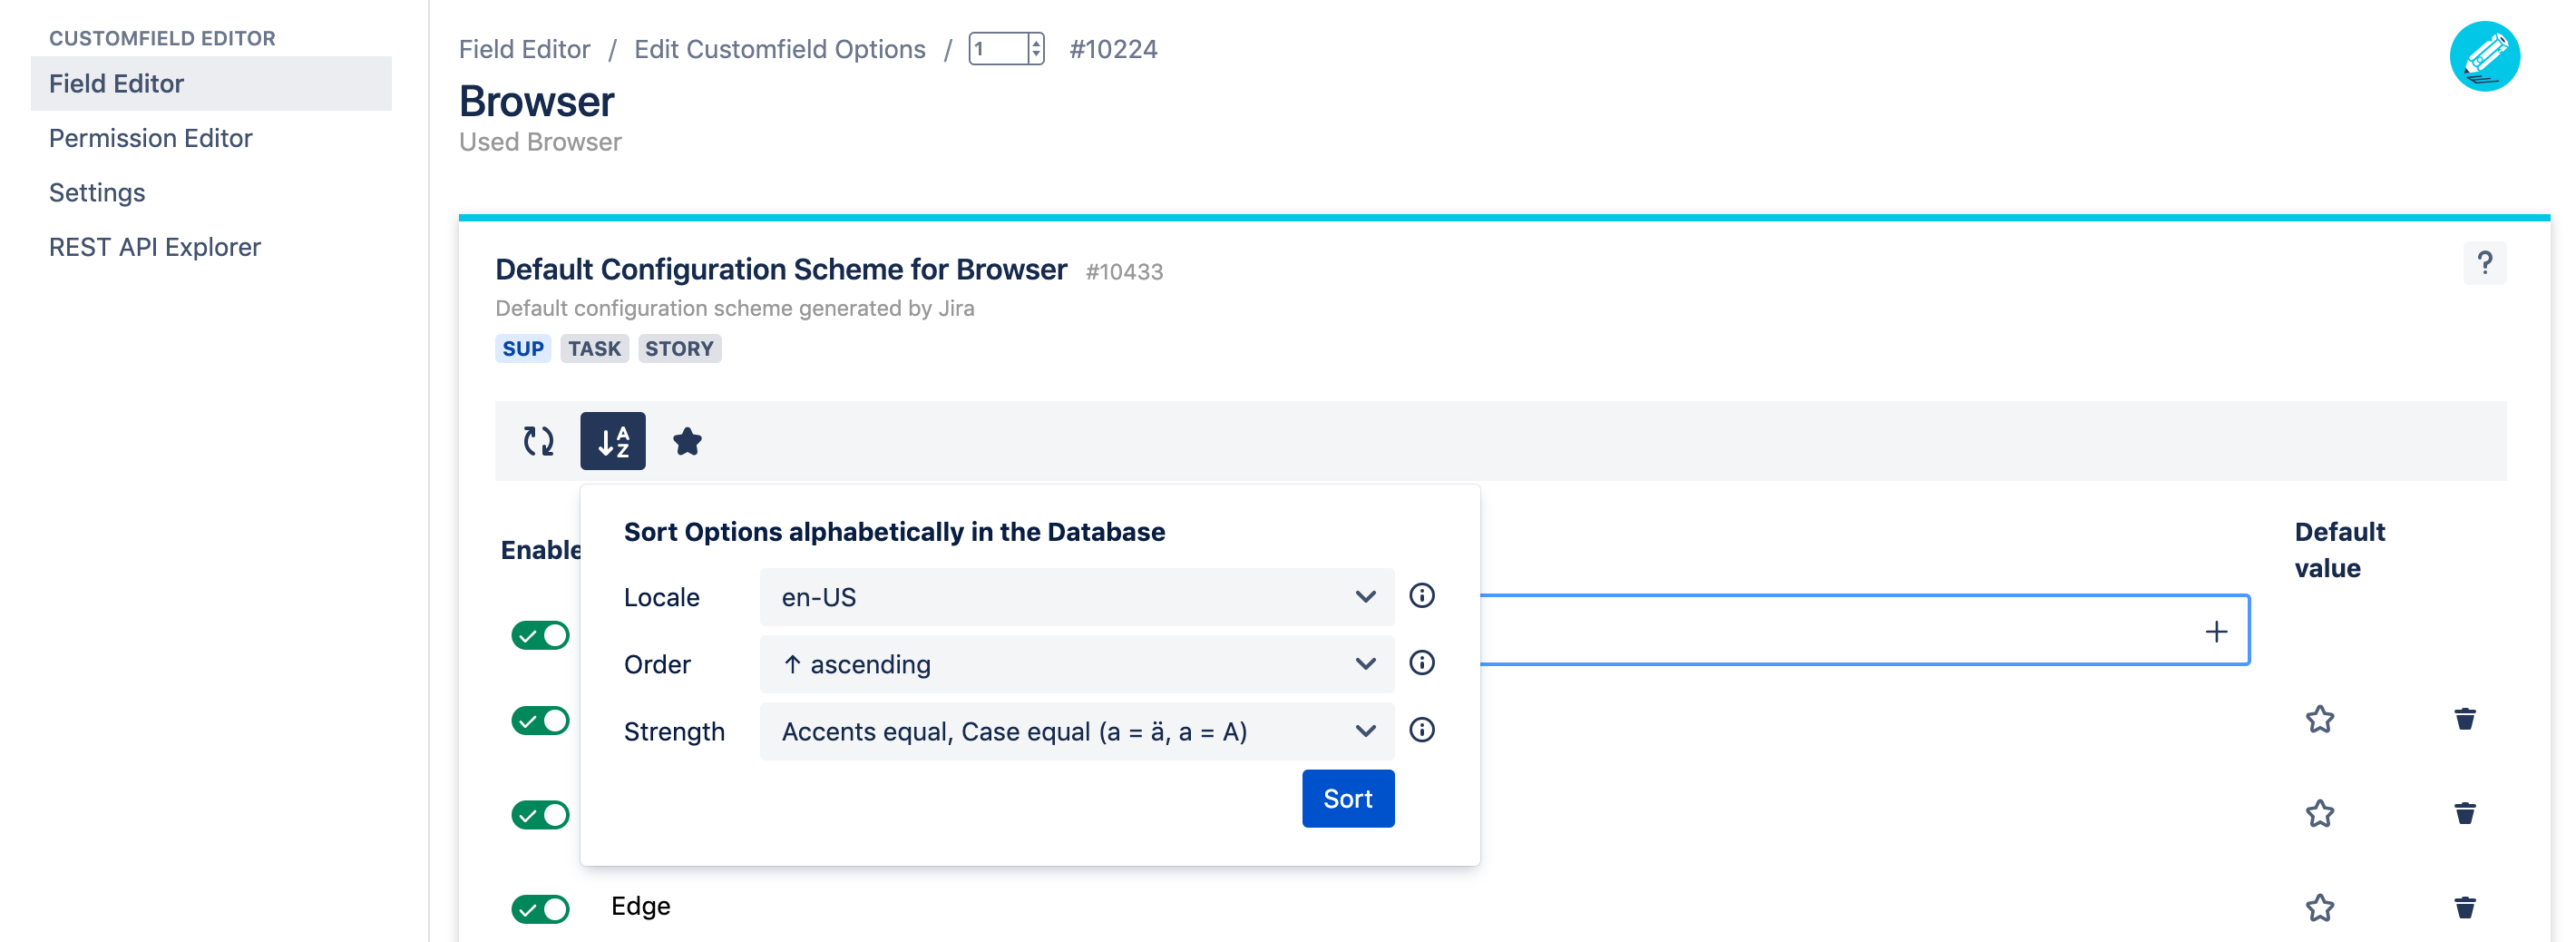
Sorting options alphabetically
At the toolbar of the edit customfield options page you will find the action sort options alphabetically in the database.
You first have to define your Locale, because sorting is language specific. Define the locale that corresponds to the language of the option values for correct sorting.
Next define your Order. Ascending for A to Z sorting and descending for Z to A sorting.
And you can set the Strength for fine tuning. Define how similar characters a treated while sorting. Accents equal, Case equal for ... Accents unequal, Case equal for ... Accents unequal, Case unequal for ...
Finally click on sort.
Here also applies: The sorting action is equal for all supported field types except for the field type Select List (cascading) where each option has additional child options which need to be sorted seperately in the edit child modal.
Ordering options
If you want to declare your own order for your cutomfield options, you can do this by simply drag and drop the option values.

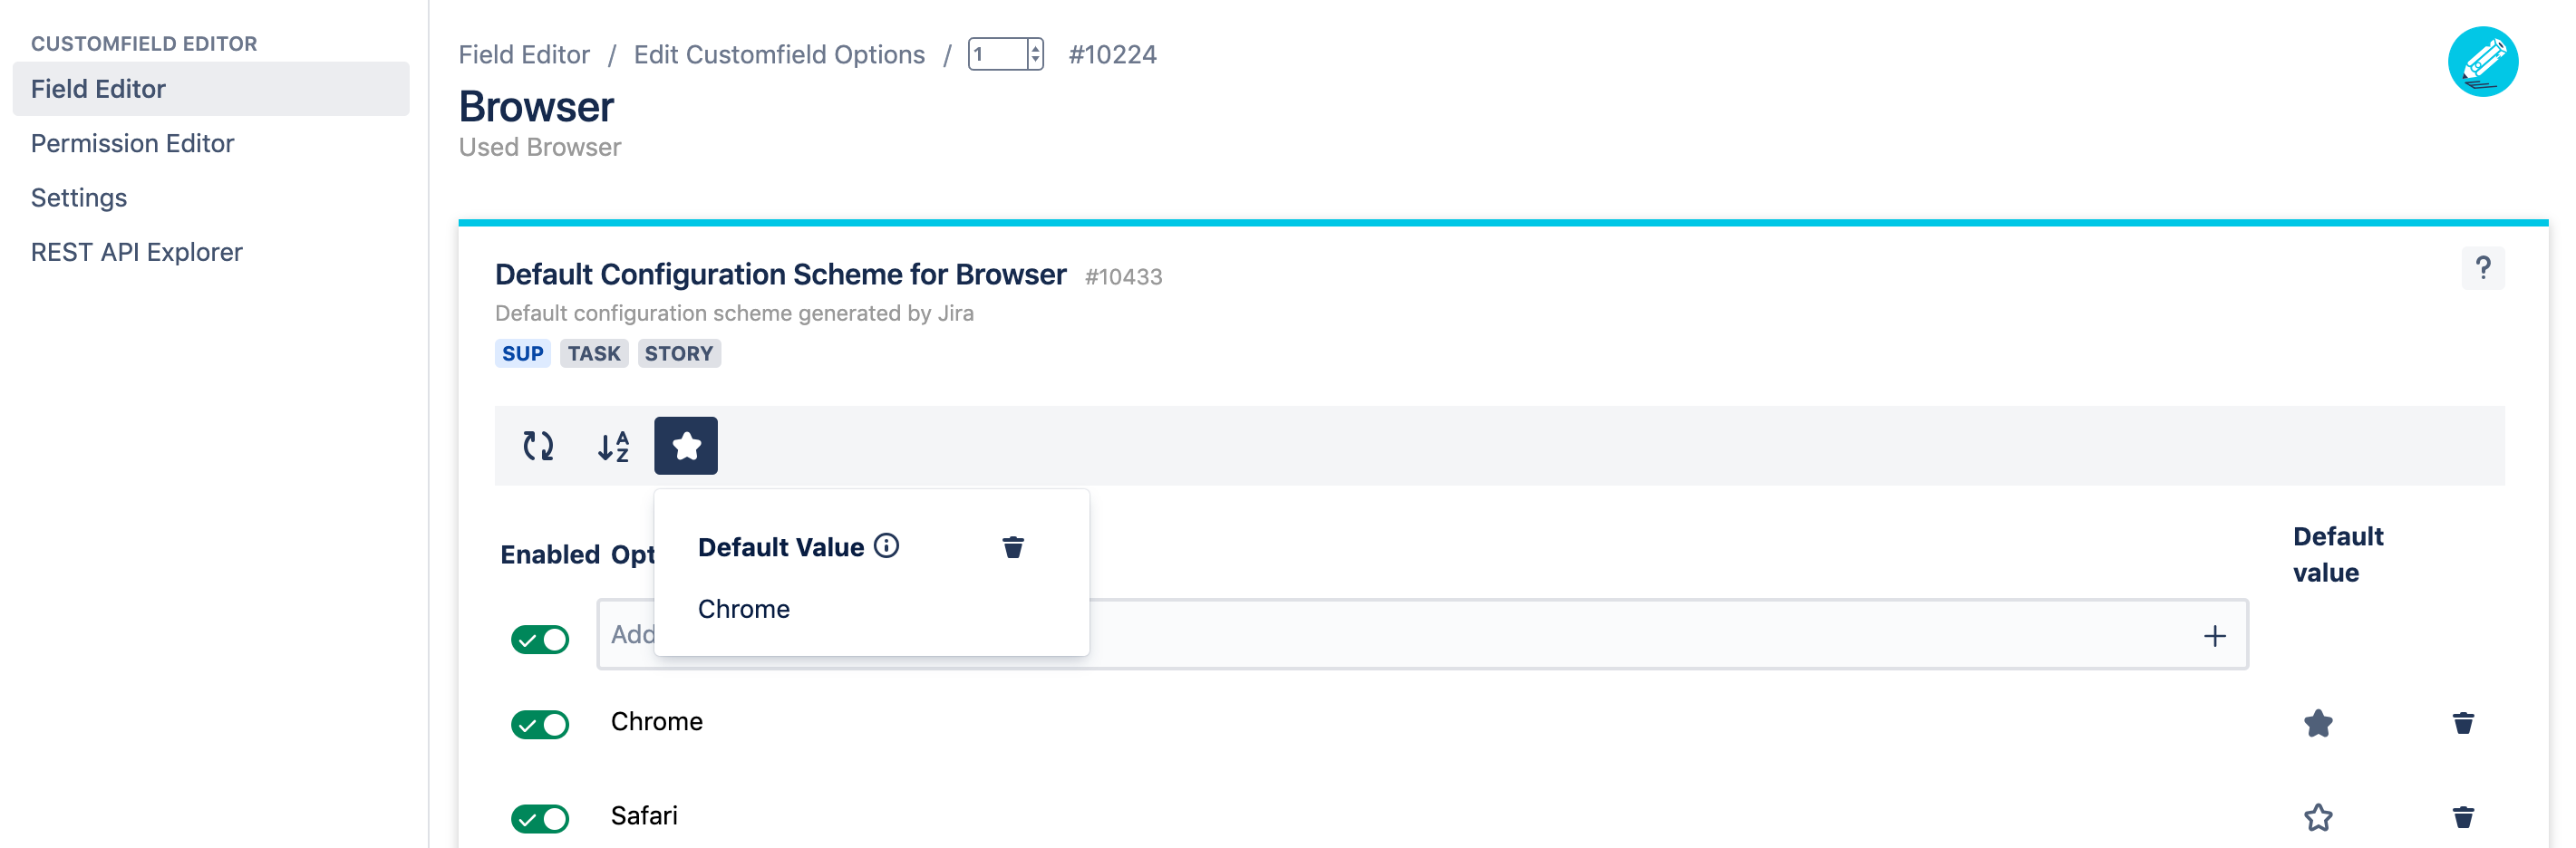
Setting default values
With a default value you can define which option value should be showed up in your customfield by default. Here the supported field types differ from each other. Some can have only one default value other field types can have more default values. Look in the table further down, to see which field type could have which default type(s). However the action by itself is equal for all supported field types:
To set a single or multiple default value(s) you just have to click the star icon beside the option value. The star of the default value is now filled. In the toolbar at the top of the table is also a star for a quick overview about the set default value(s) without long searching.
To delete a single or multiple default value(s) you just have to click on the star in the toolbar and delete the respective default value(s) by clicking on the trash icon. If you have selected multiple default values, all will be deleted. If you have selected multiple default values and just want to delete a single default value, you can do this by clicking on the filled star icon of the respective option value in the table.
Look in the table below, to see which field type could have which default type(s):
Select List (single choice) | |
Select List (cascading) | |
Select List (multiple choices) | |
Checkboxes | |
Radio Buttons |
Furthermore these field types provided by Atlassian Marketplace apps have these default type(s):
Multi-Level Cascading Select by Sourcesense |