Gain insights on Jira customfields with Microsoft Power BI
Fetch data via the Customfield Editor for Jira REST API directly from Power BI Desktop
This blogpost will show how to gather insights on your Jira Server or Data Center customfields. We will use the Customfield Editor REST API together with Microsoft Power BI to gain insights. Make sure you have the Customfield Editor for Jira App installed and added an evaluation license for the app.
- 1. Customfield, Permissions and API user
- 2. Power BI Desktop with Push dataset
- 3. Power BI Cloud with Streaming dataset
- 4. Usage of custom field value throughout project
1. Customfield, Permissions and API user
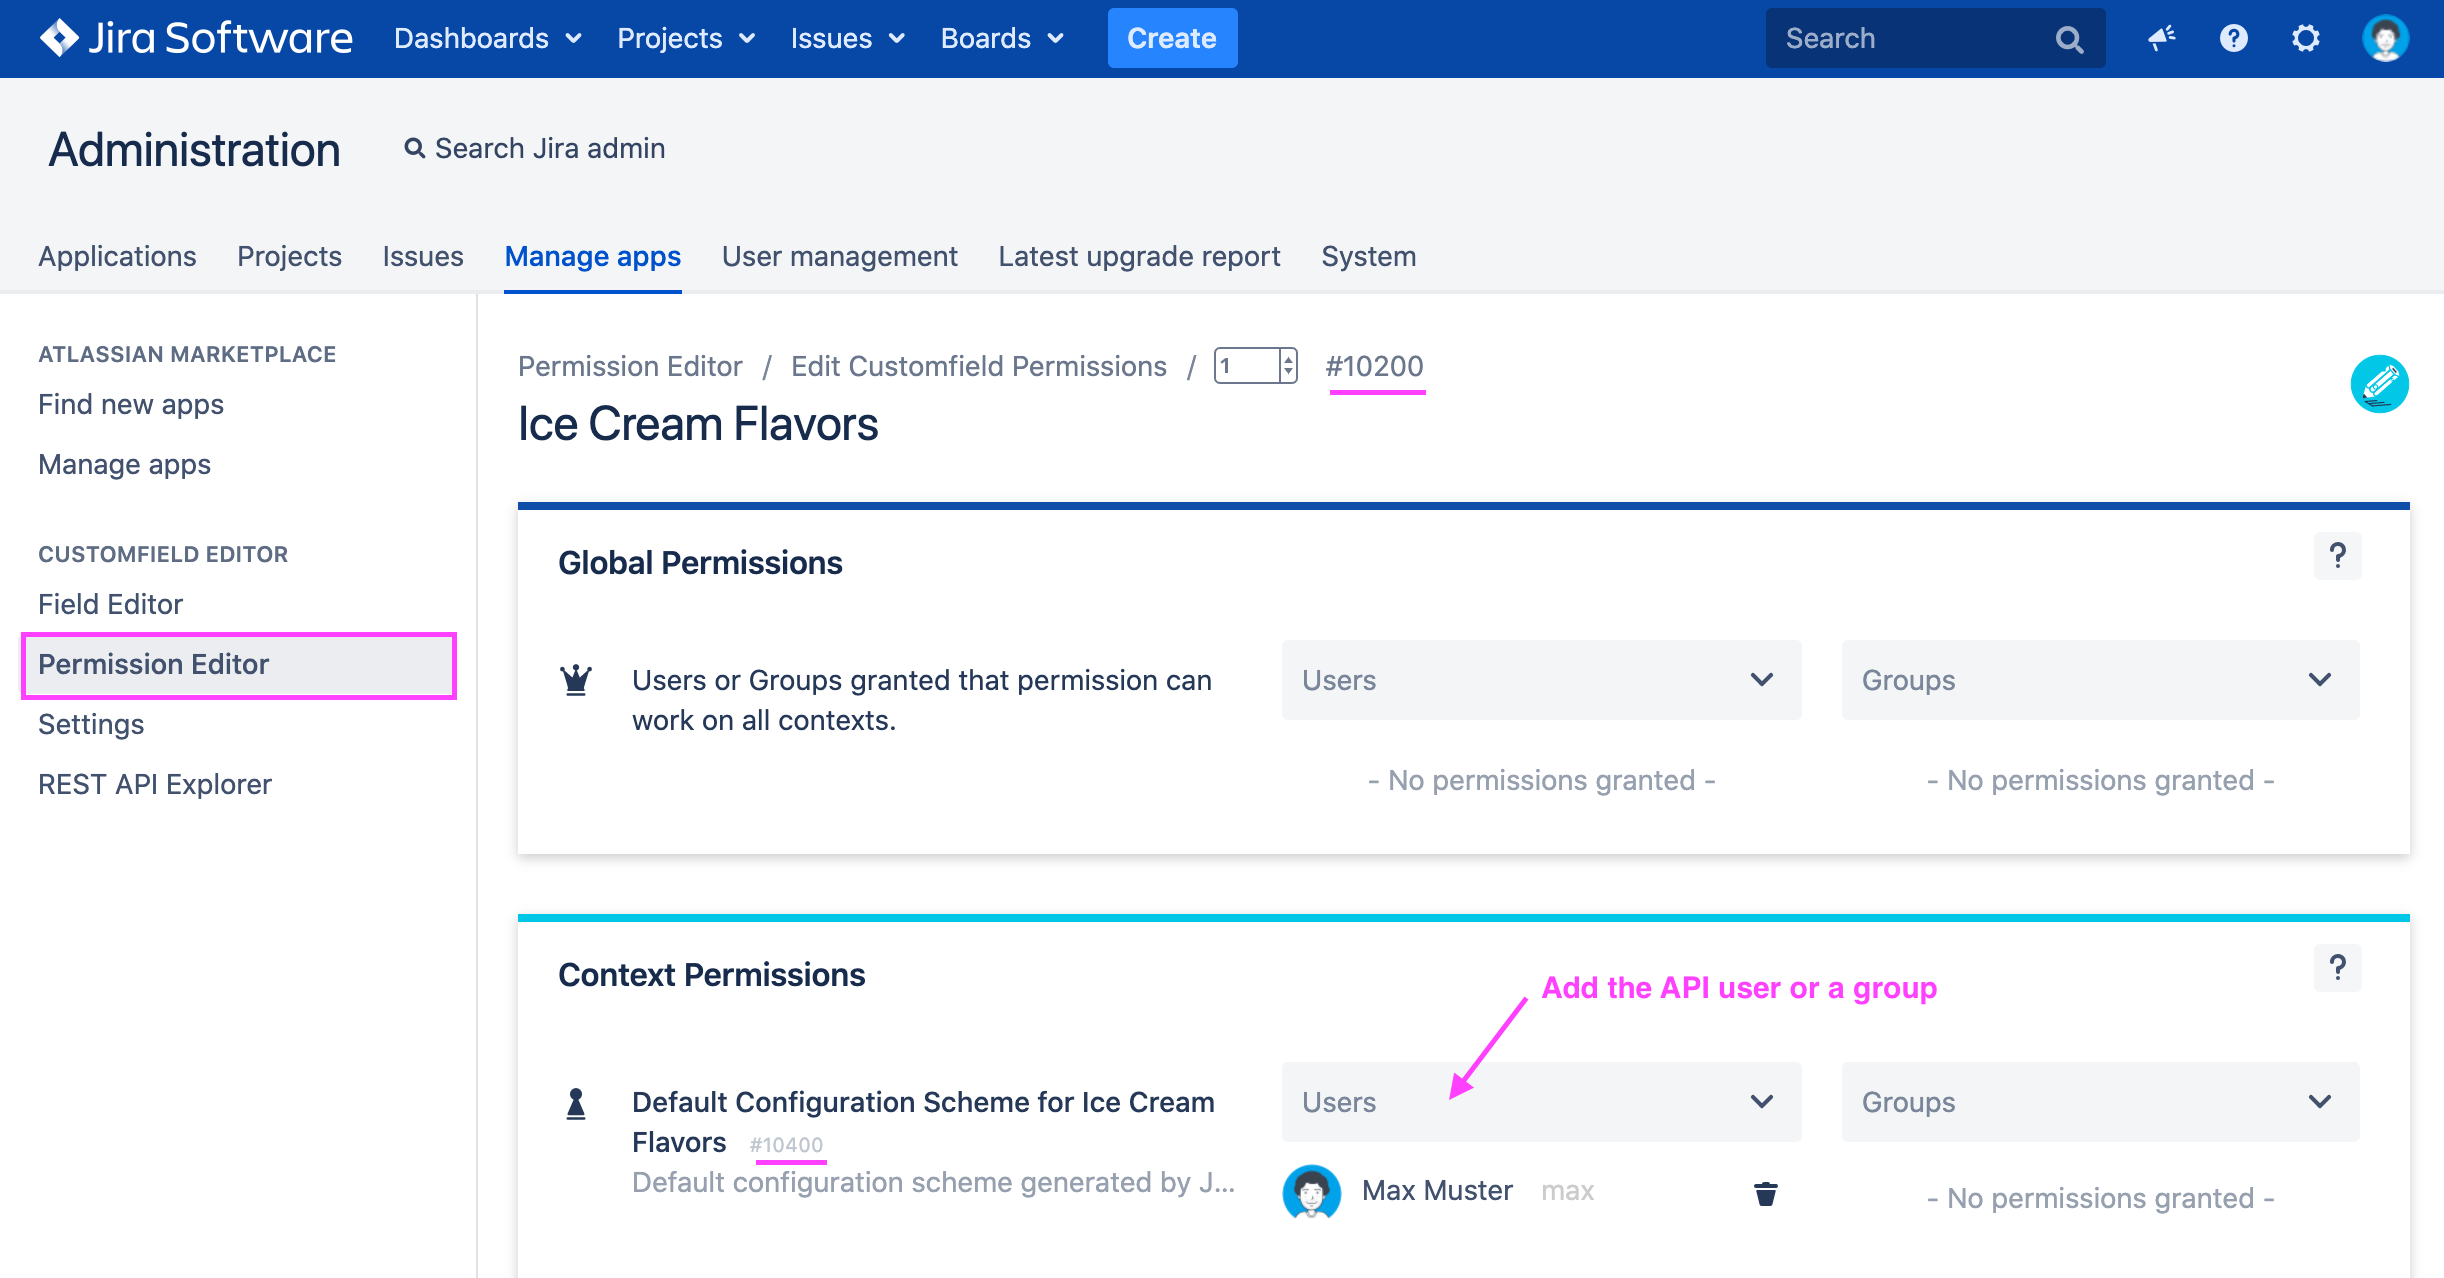
First we need to grant permissions to the user max which we will use to query to the REST API. Therefore we go to the edit permissions page in the Permission Editor and add max to the right customfield context. In our case we note down the customFieldId 10200 and contextId 10400 for later use.
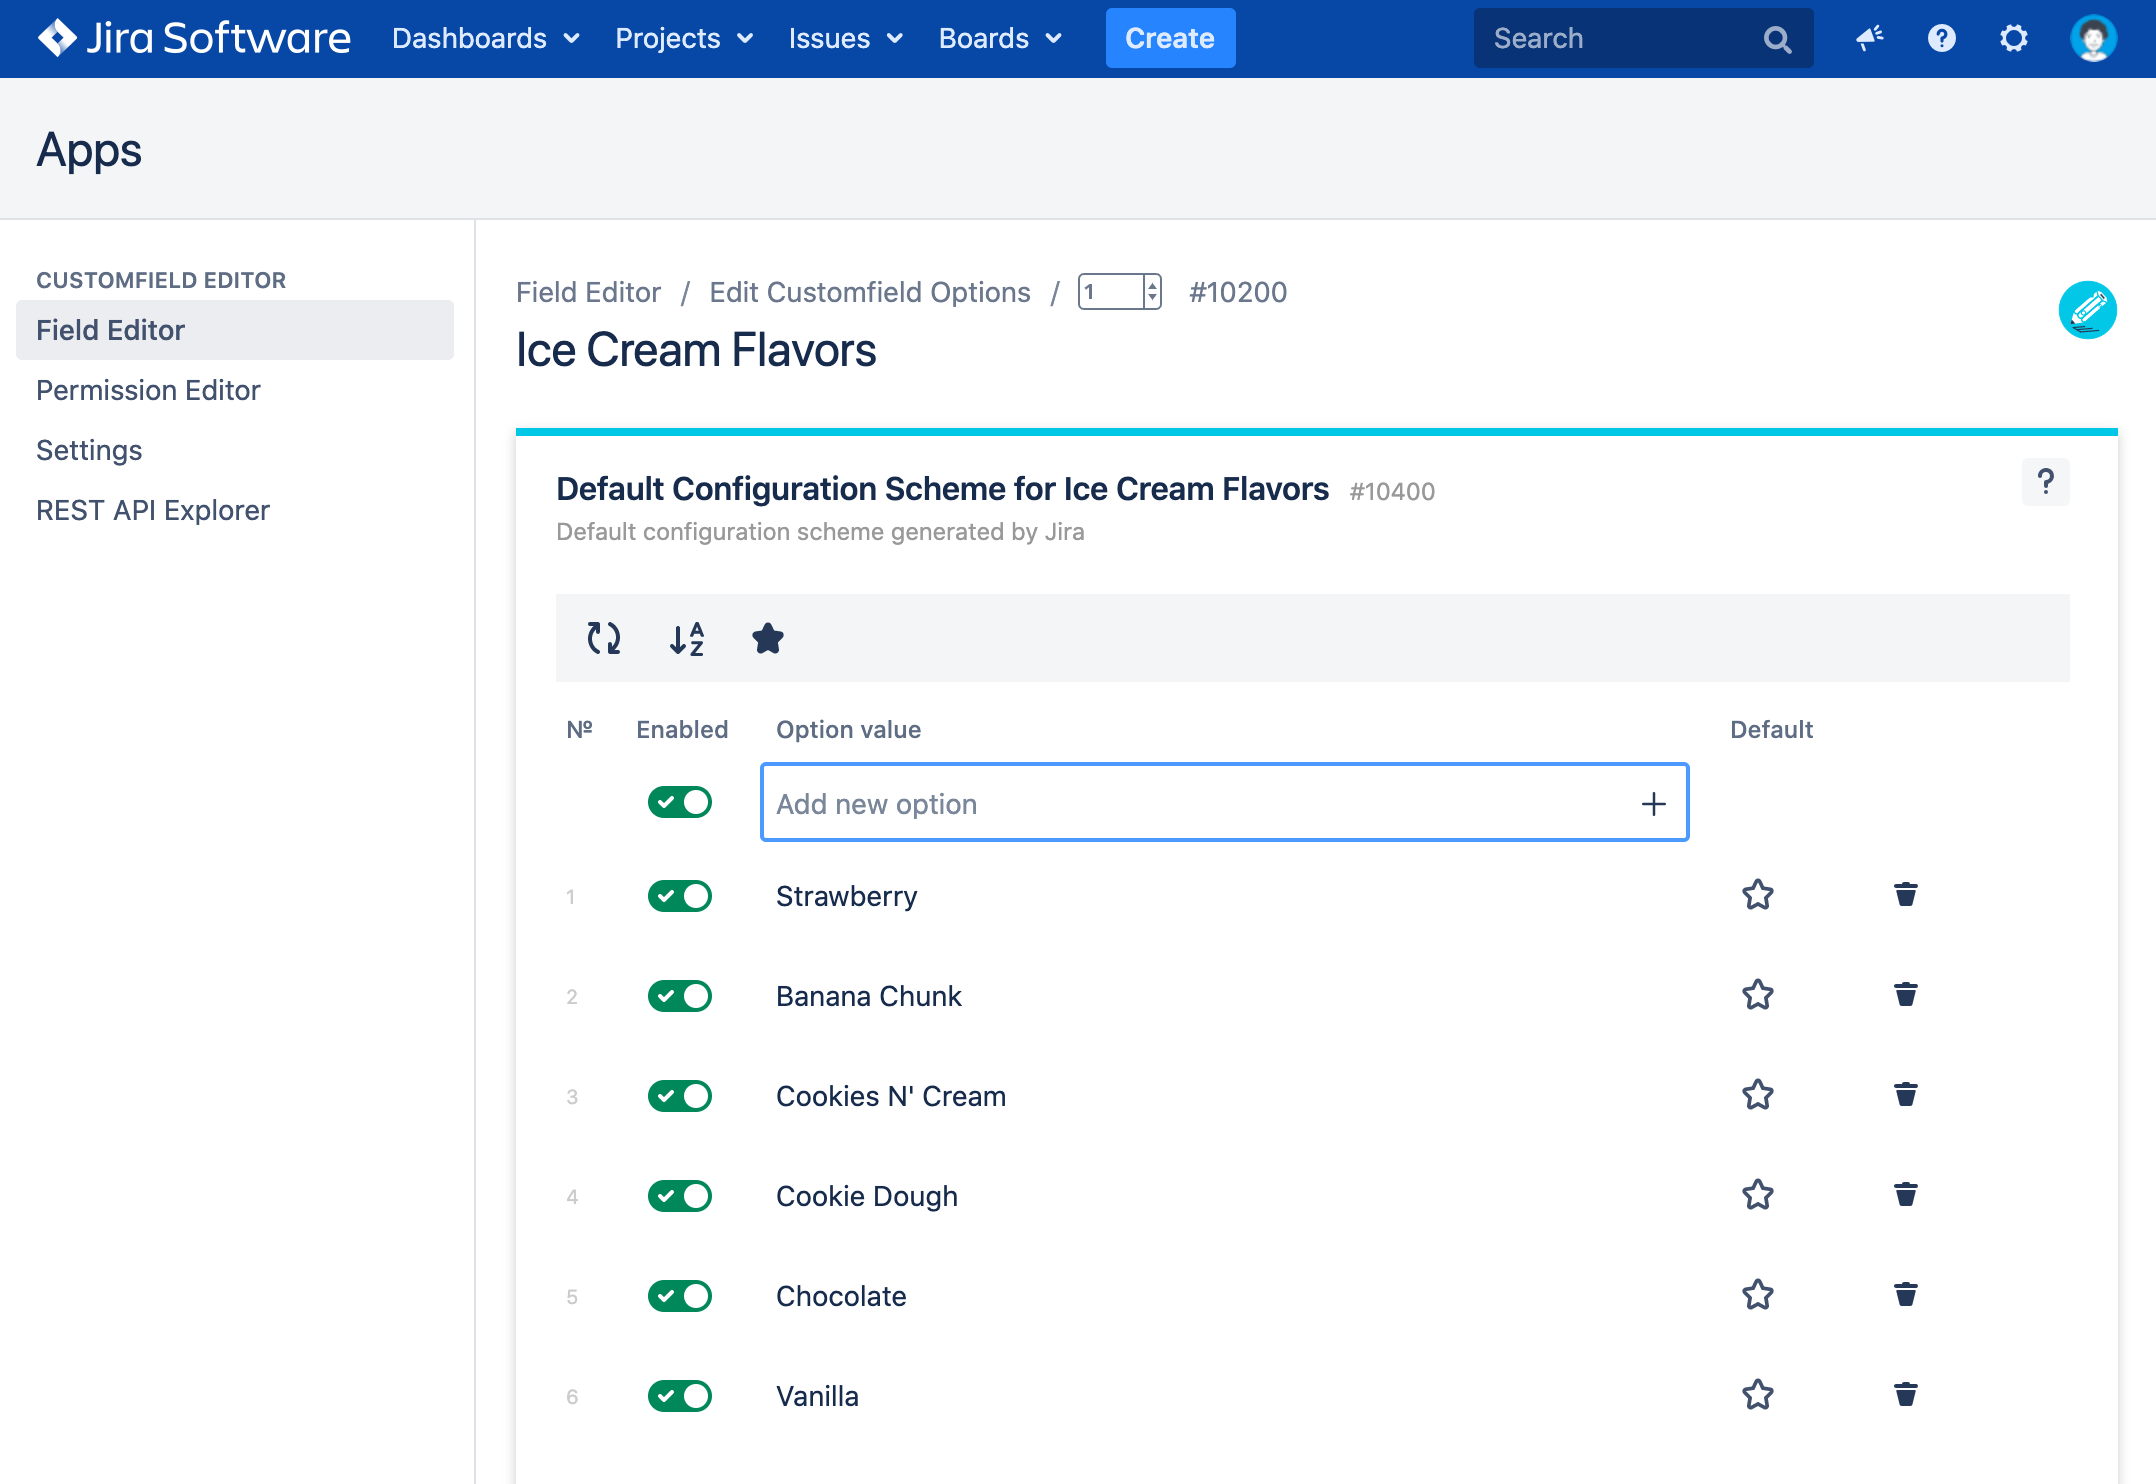
When we view the customfield options in the Field Editor we see that our customfield called Ice Cream Flavors contains some options already.
What we will do is basically use a REST API call to fetch all the options as we see in above picture. We will use the
GET /user/customfields/{customFieldId}/contexts/{contextId}/options
The API call looks like this in with the customFieldId 10200 and contextId 10400.
The response is in JSON format and looks like this:
[
  {
    "optionvalue": "Strawberry",
    "id": 33100,
    "sequence": 0,
    "disabled": false
  },
  {
    "optionvalue": "Banana Chunk",
    "id": 33101,
    "sequence": 1,
    "disabled": false
  },
  {
    "optionvalue": "Cookies N' Cream",
    "id": 33102,
    "sequence": 2,
    "disabled": false
  },
  {
    "optionvalue": "Cookie Dough",
    "id": 33103,
    "sequence": 3,
    "disabled": false
  },
  {
    "optionvalue": "Chocolate",
    "id": 33104,
    "sequence": 4,
    "disabled": false
  },
  {
    "optionvalue": "Vanilla",
    "id": 33105,
    "sequence": 5,
    "disabled": false
  }
]
2. Power BI Desktop with Push dataset
We will use the Power BI Desktop app to create a Push dataset which we will fill with data from the Customfield Editor REST API. We have seen the REST API call to fetch all options in the previous section and will now use it in Power BI directly.
2.1 Power BI Desktop - Get data from Web
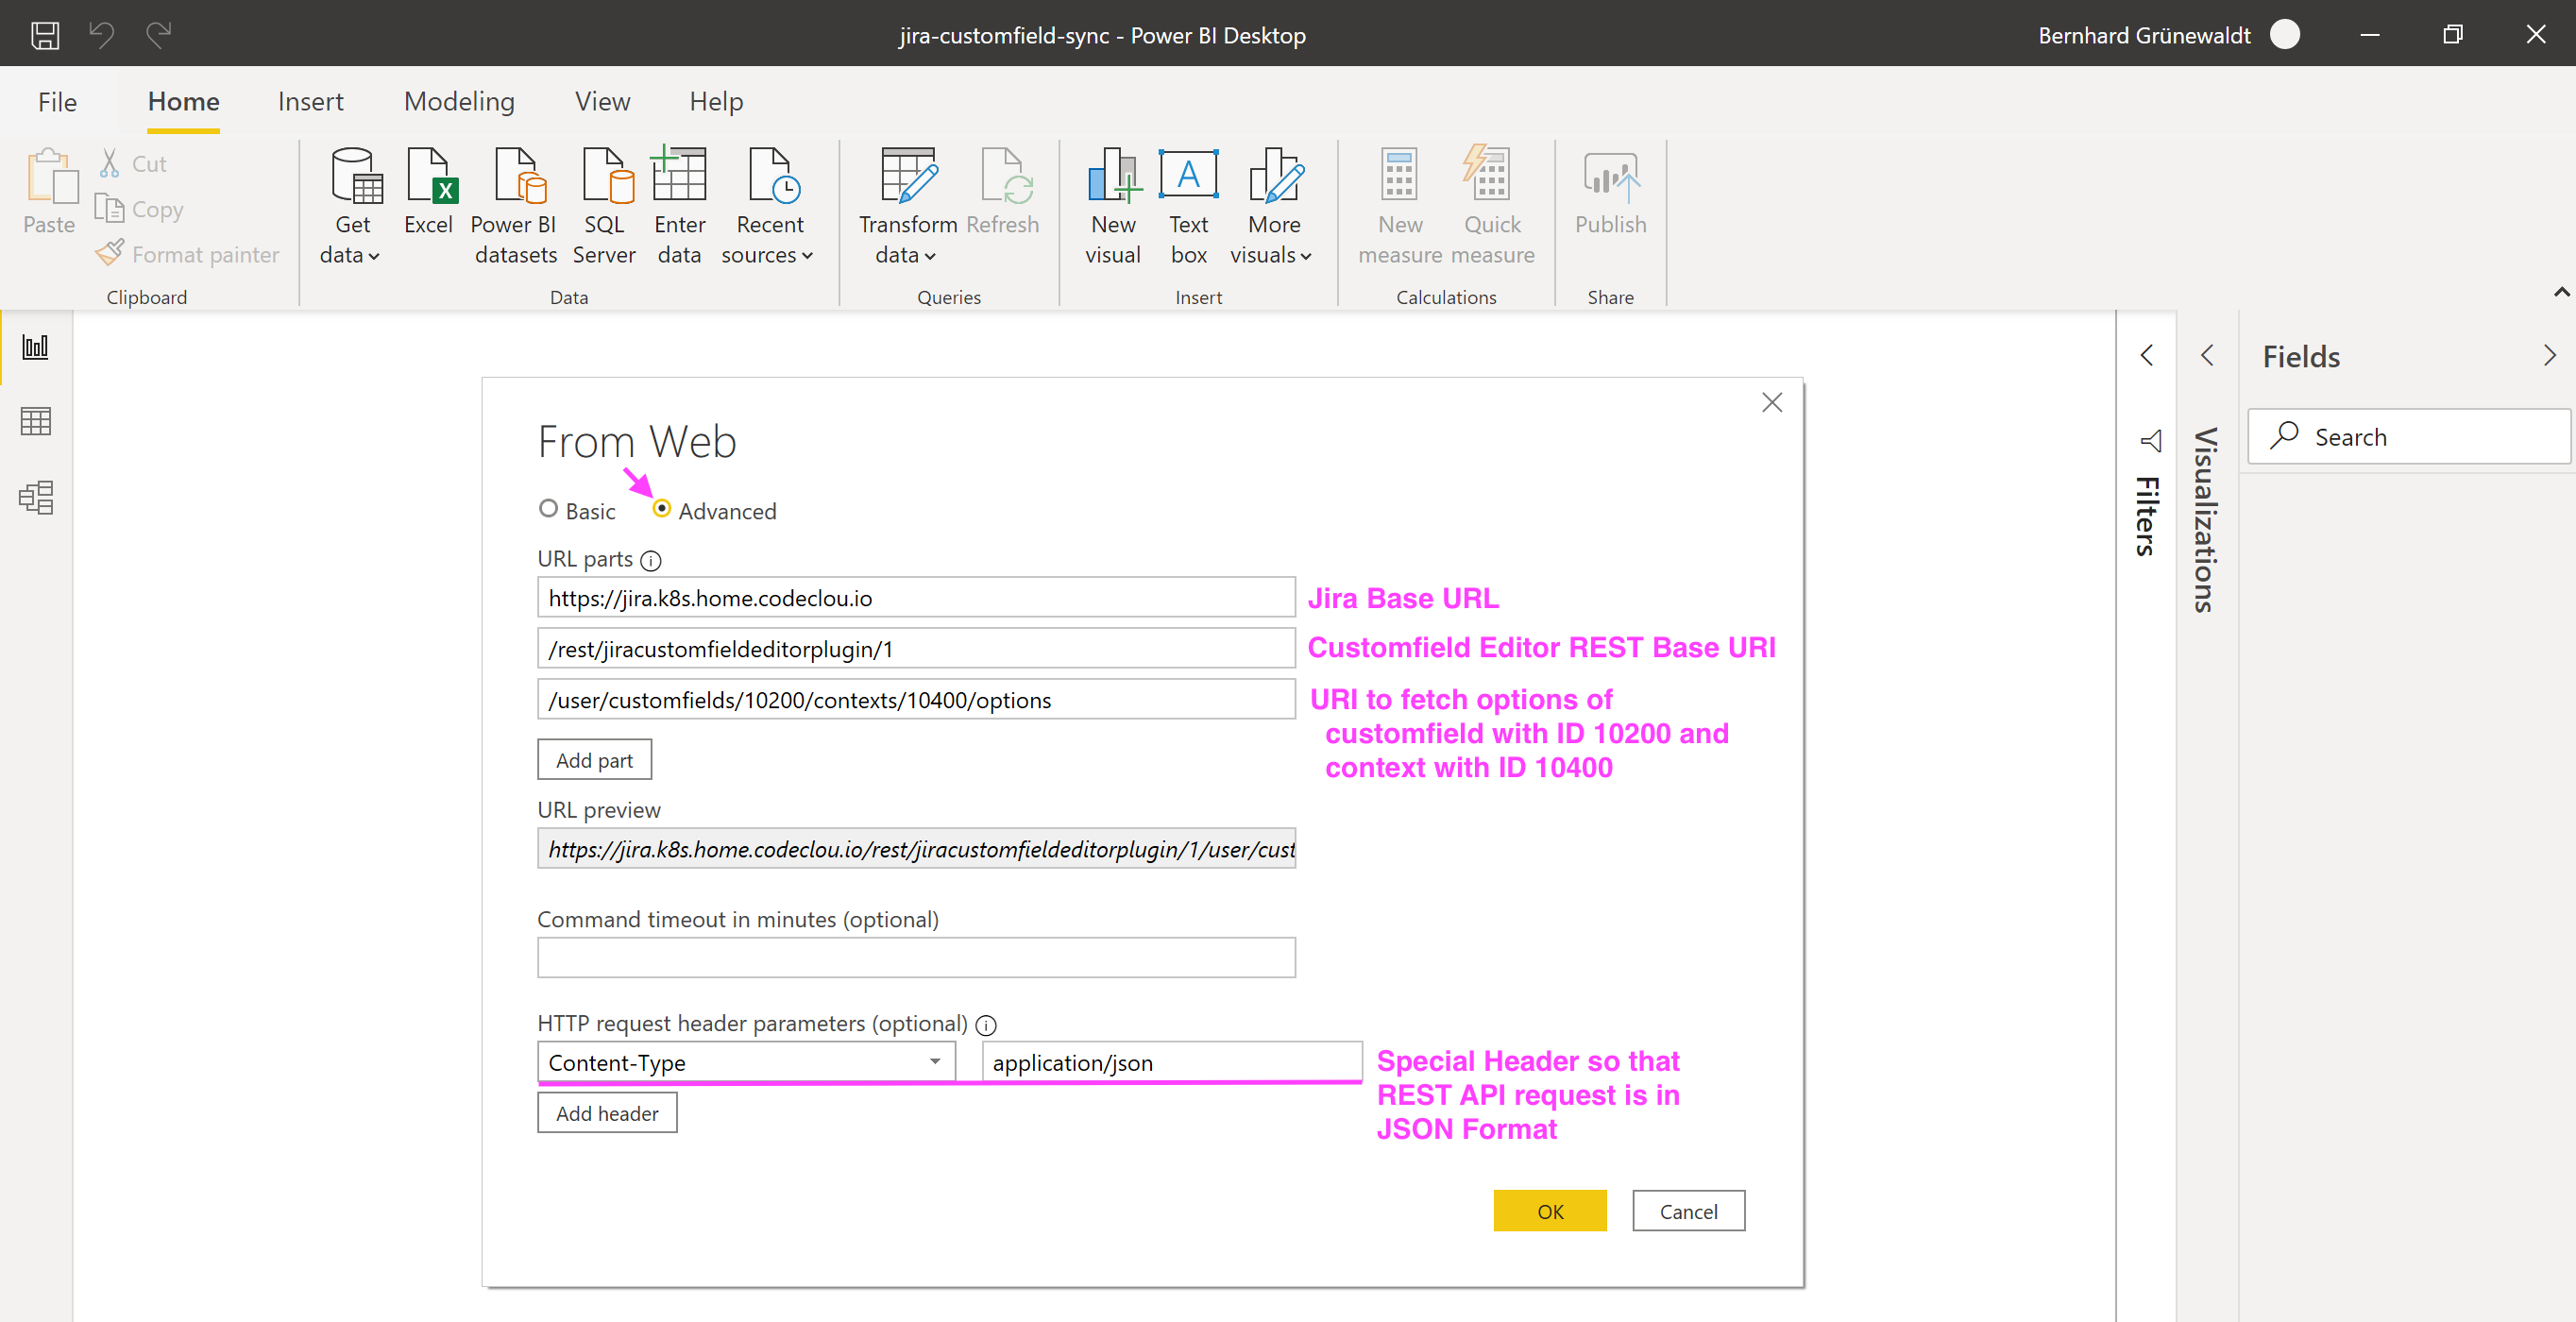
Open Power BI Desktop and click on Get Data from Web.

Next click on Advanced and enter the REST API Url in parts (of course replace it with your Jira instance hostname). Be sure to set the Content-Type header to application/json.
https://jira.k8s.home.codeclou.io
/rest/jiracustomfieldeditorplugin/1
/user/customfields/10200/contexts/10400/options
Now we have to define the credentials for accessing the REST API. Use basic and enter the Jira username and password of your REST API user.

We sucessfully fetched the data and only need to transform it into a table.
We do not need to select anything special in the first step.
Now it is important to click on the small expand button since our list of records needs to be flattened out.
Select all columns and uncheck the prefix option.
We are almost done. You can already see the final format of our data table . Simply click close & apply.
Our data table is now sucessfully created and we can see it in the data tab.
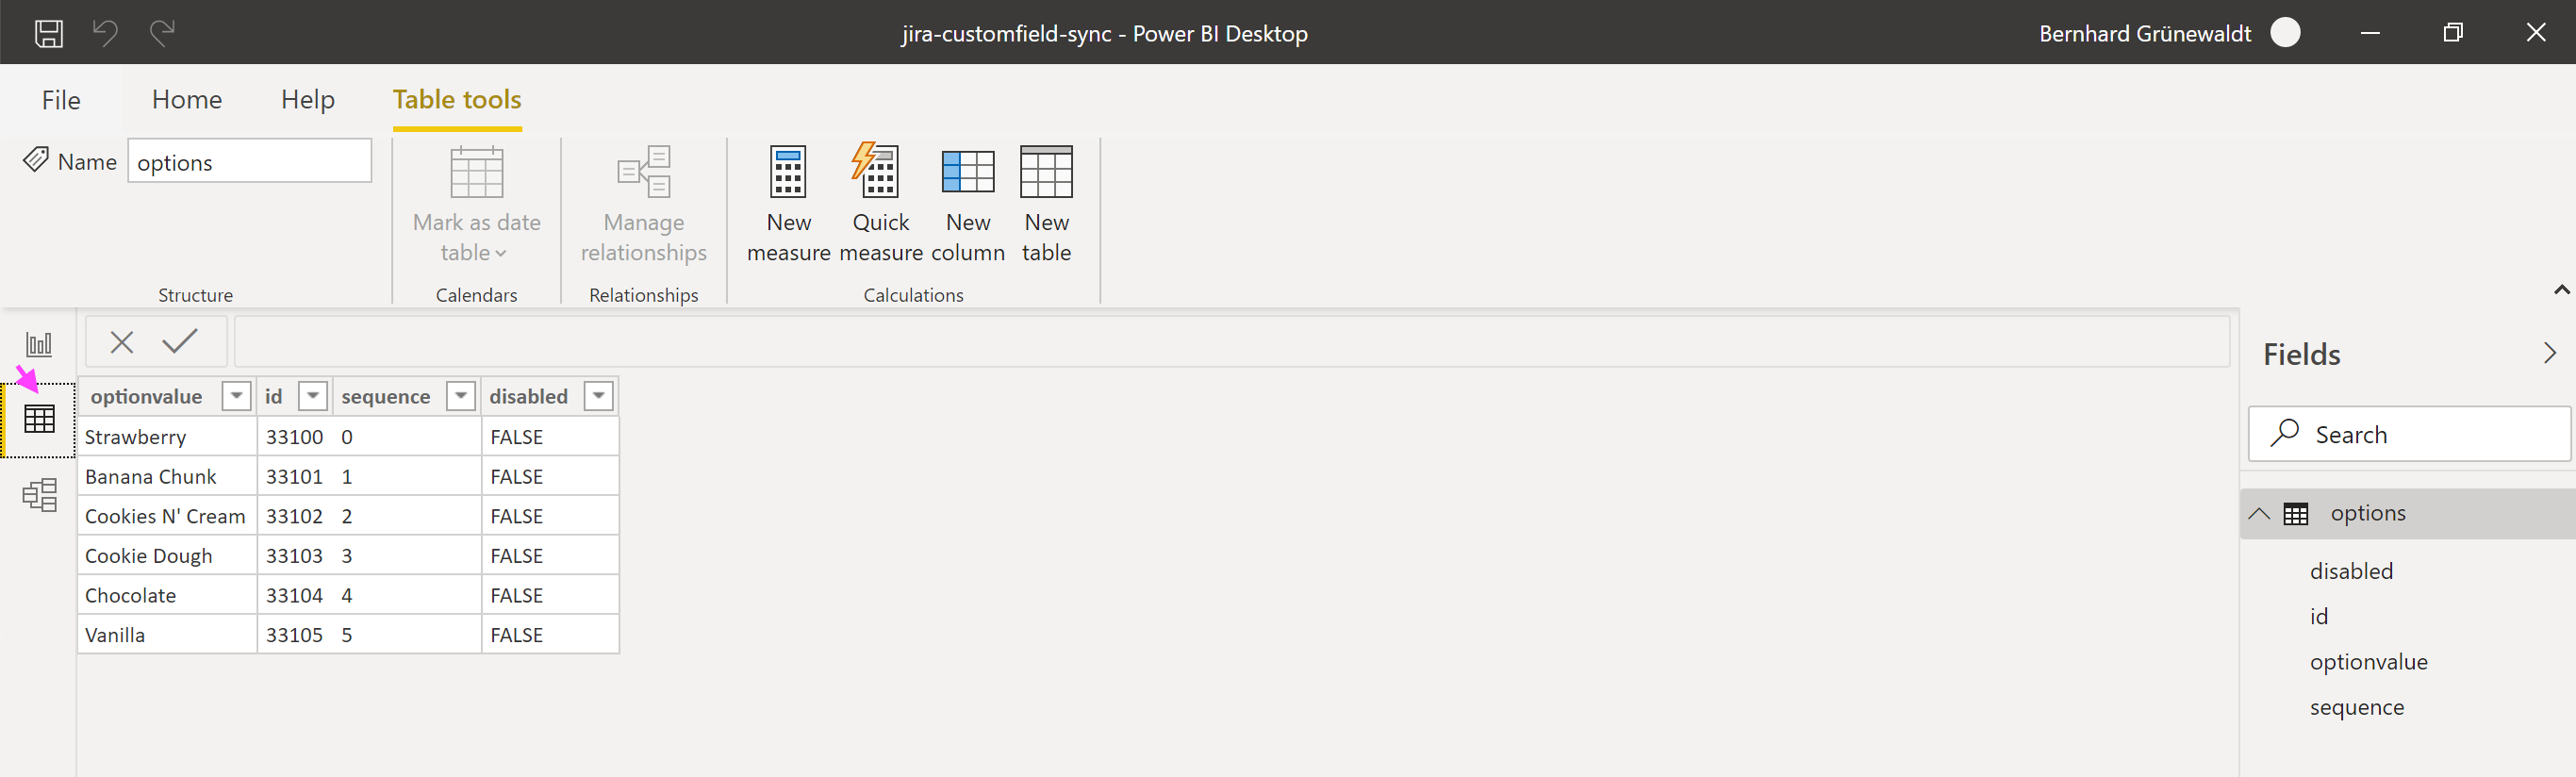
We can now click on the visualization tab and create a table visualization and select the optionvalue on the right under fields.
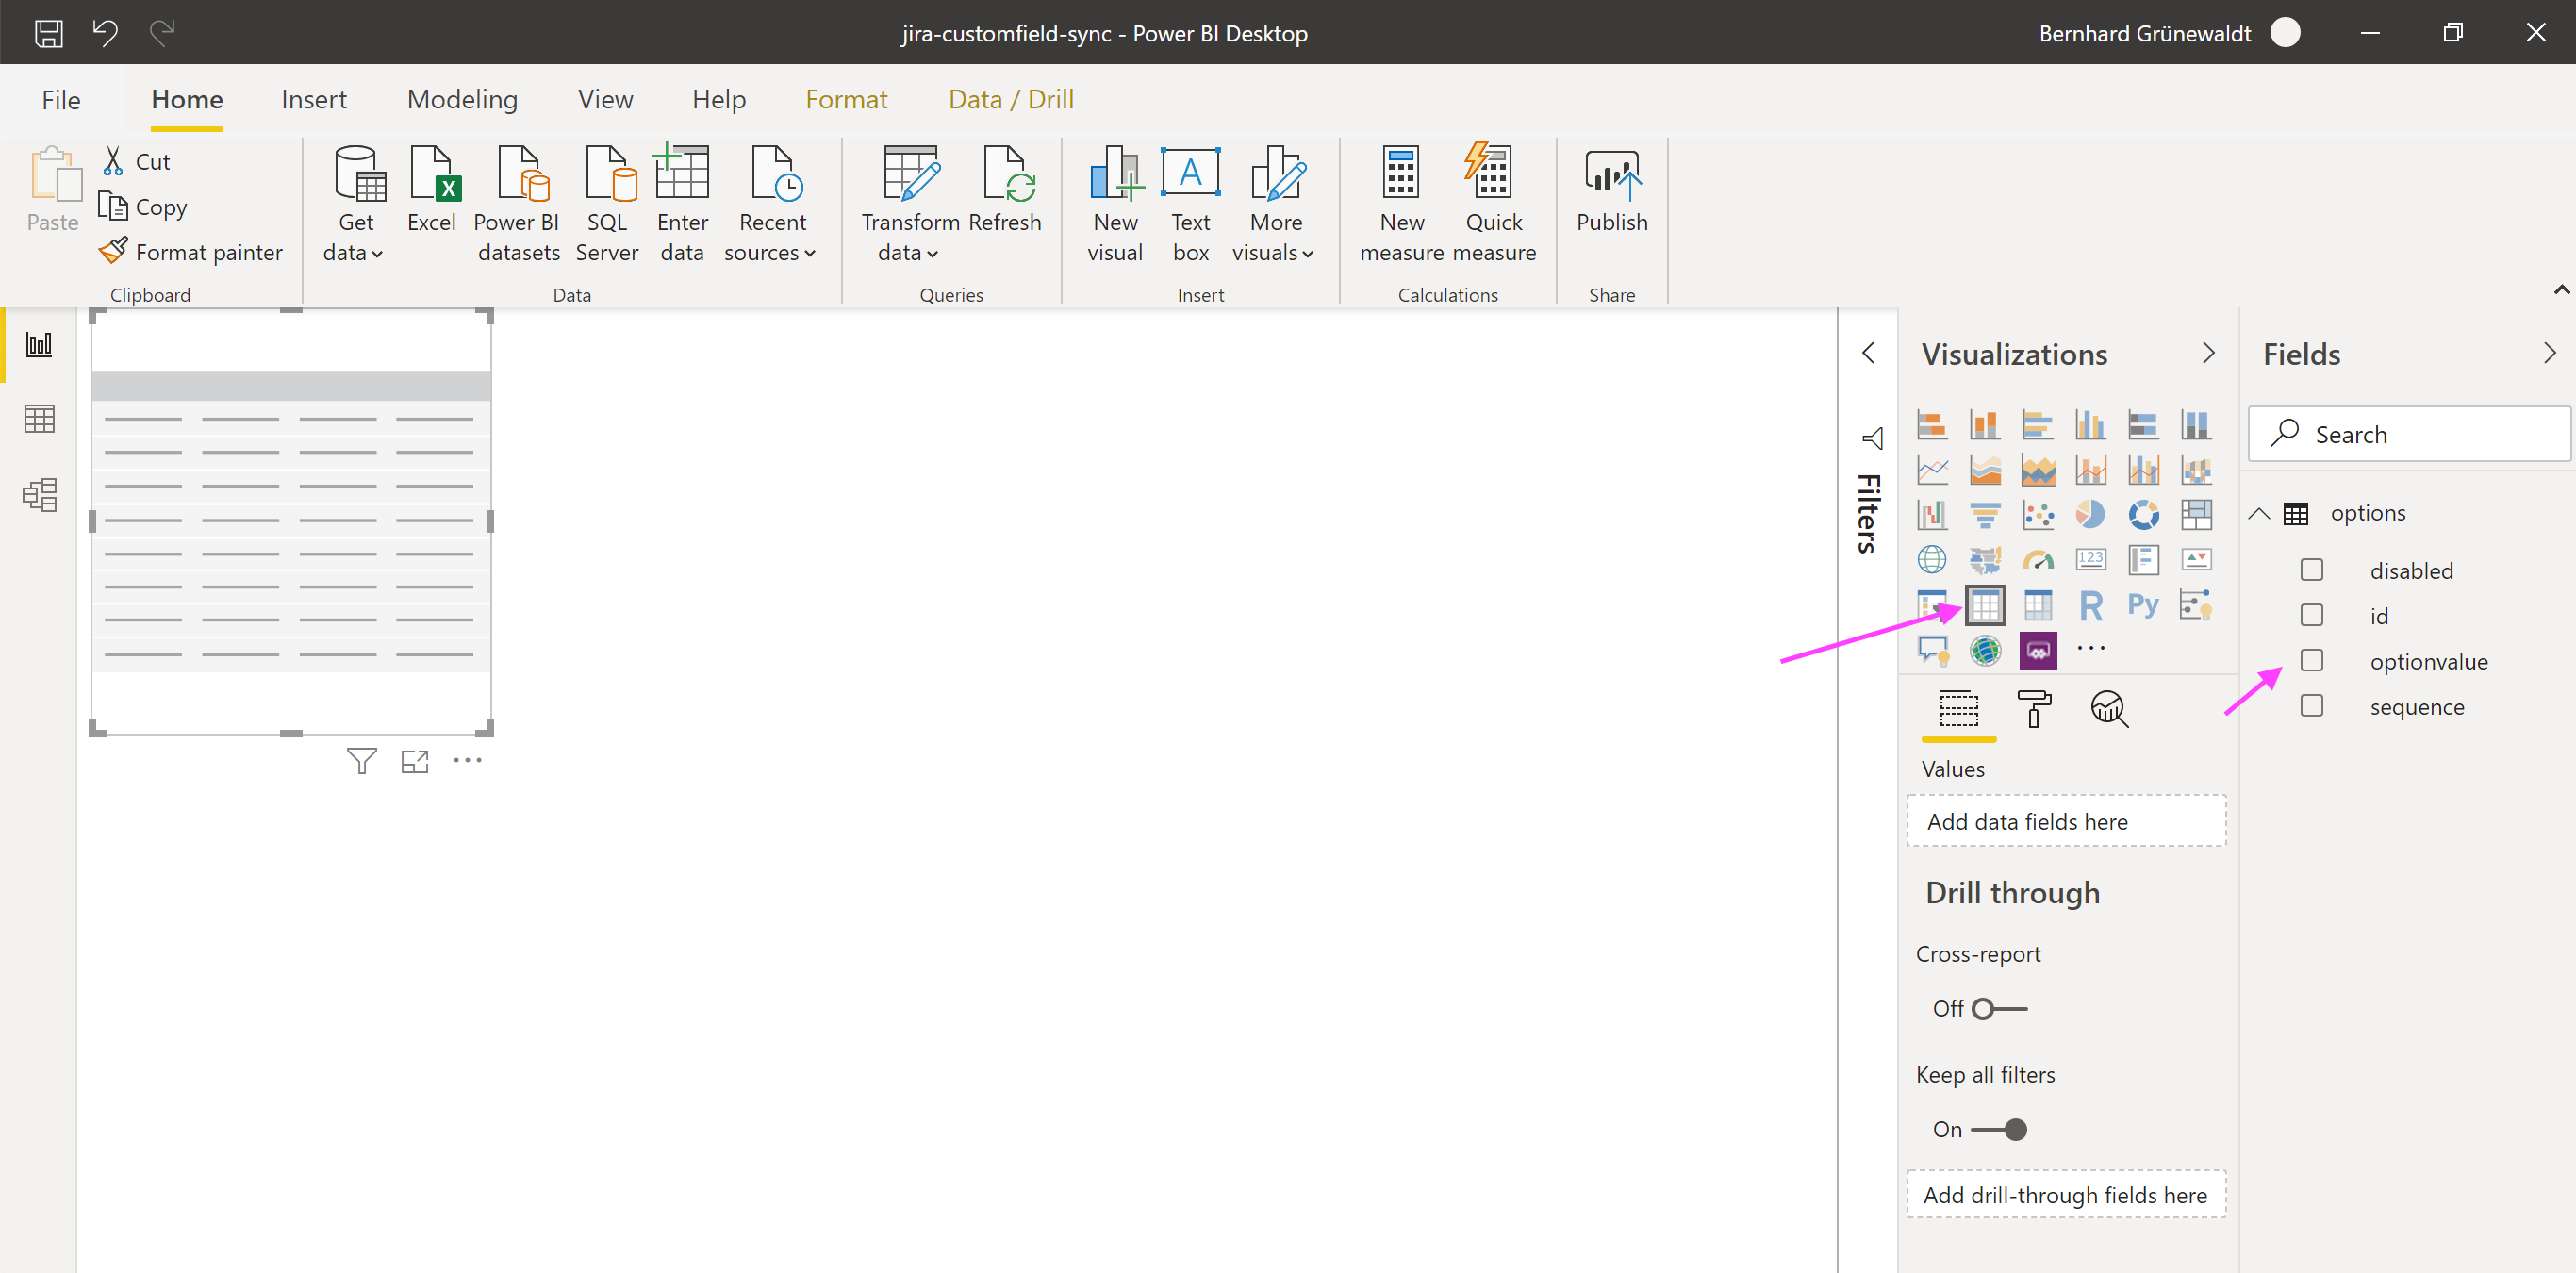
The result is immediately shown. Our report shows a small table visualization of all our customfield options.

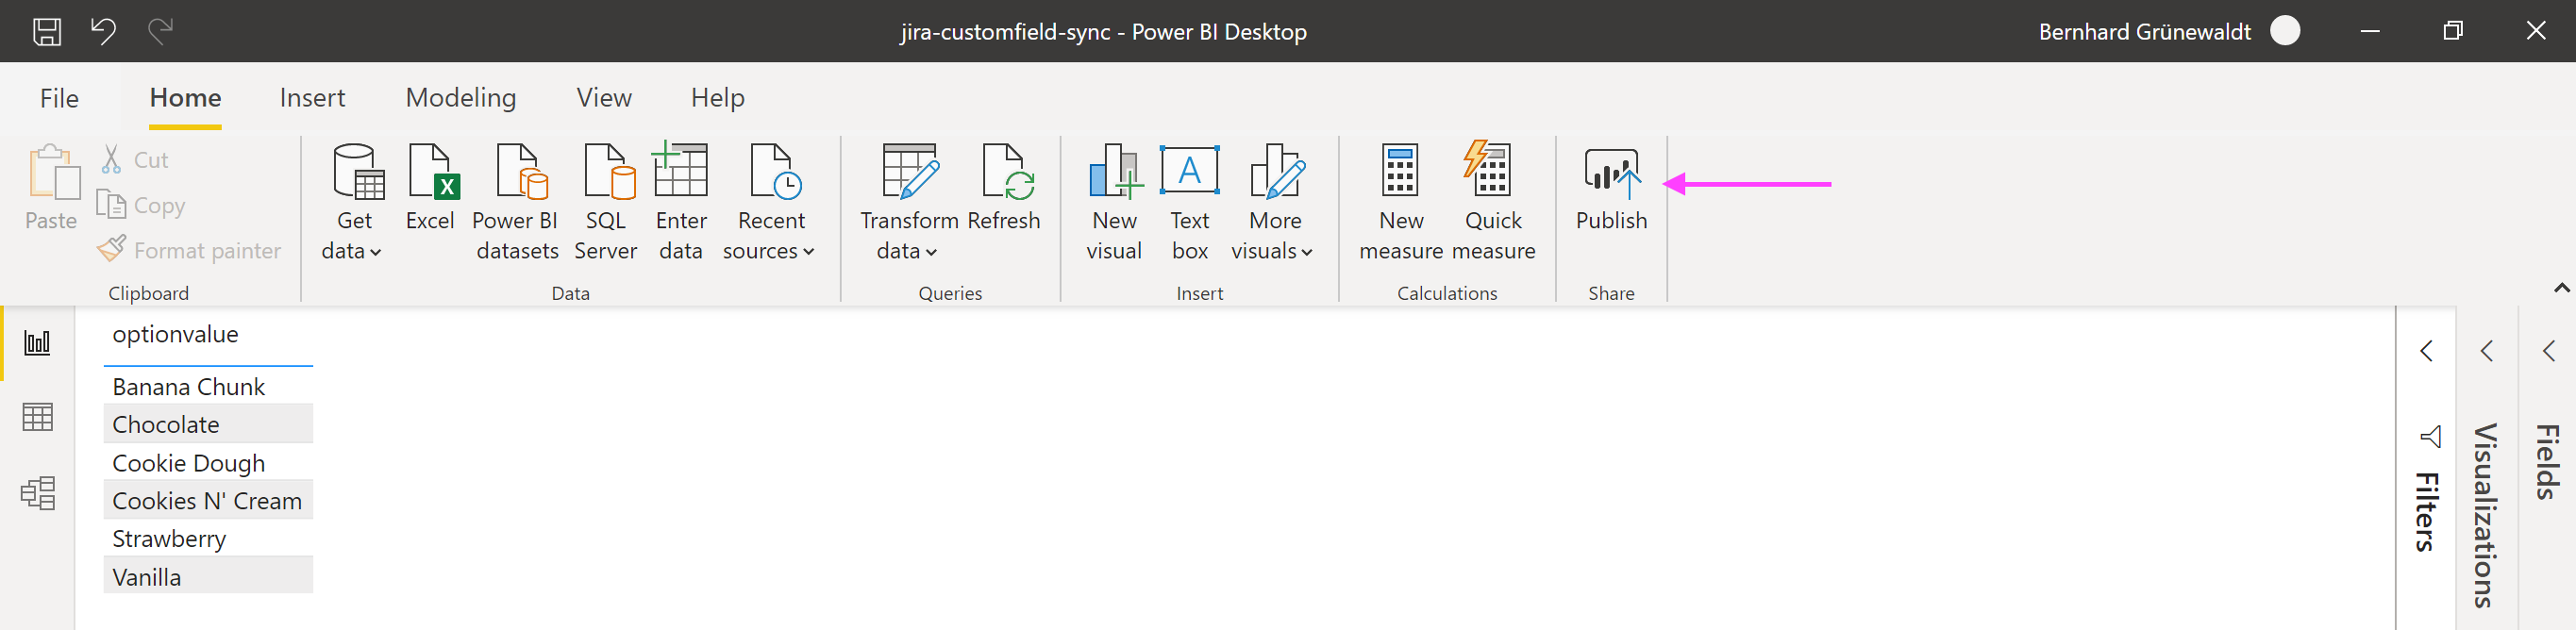
Lastly the only thing left is to publish everything to Power BI Cloud.
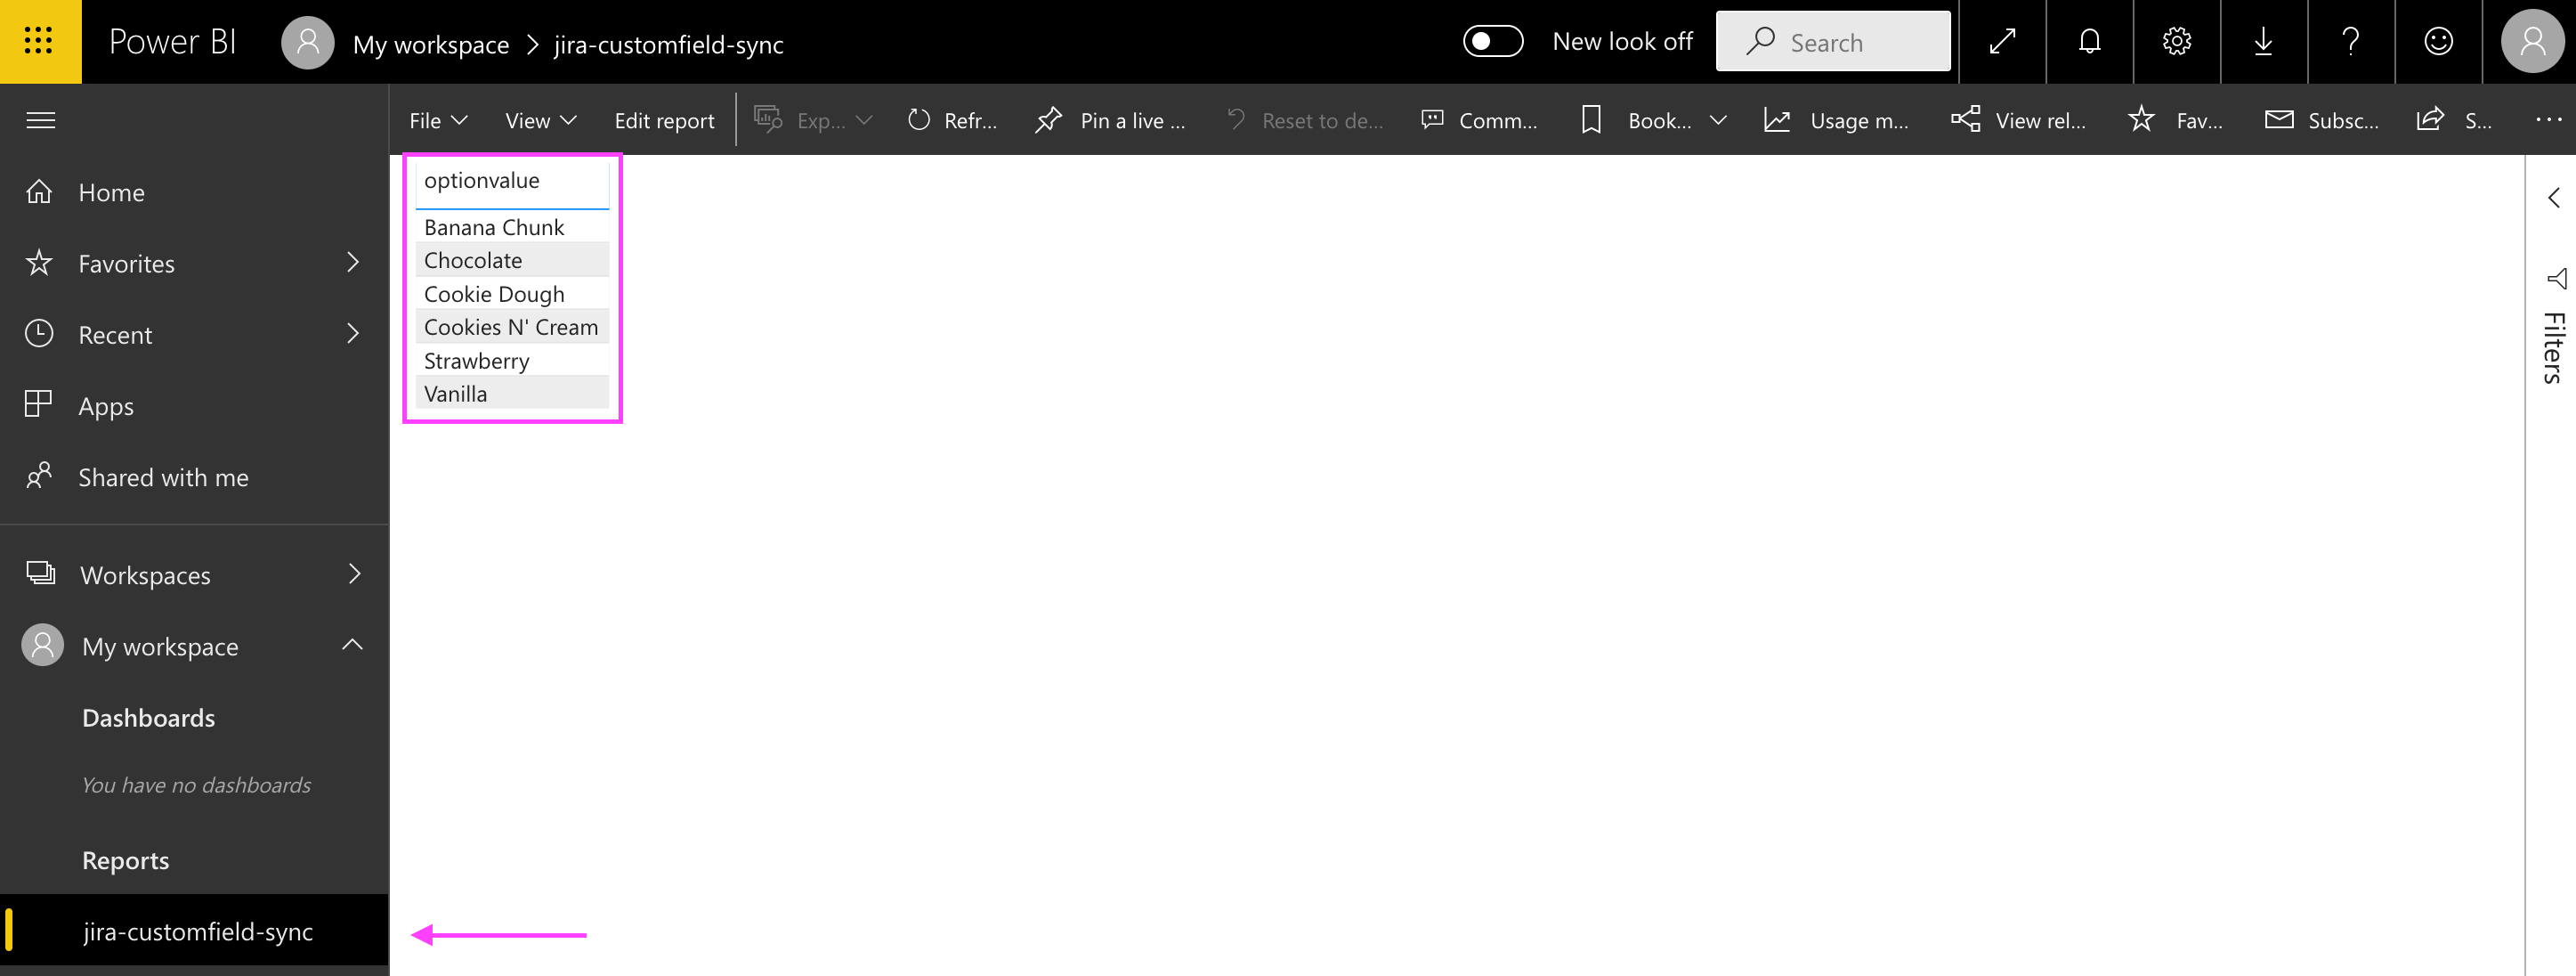
When logged in to Power BI Cloud we can see our report as well.
You could use the REST API to count options, select contexts, count overall customfields and more. The REST API Explorer can help you test your API requests directly in the browser.
2.2 Power BI Cloud - Push dataset refresh
By default the dataset is not updated automatically. But Power BI Cloud can be configured to periodically refresh the dataset directly from the REST API. This way you do not have to periodically need to publish data from Power BI Desktop.

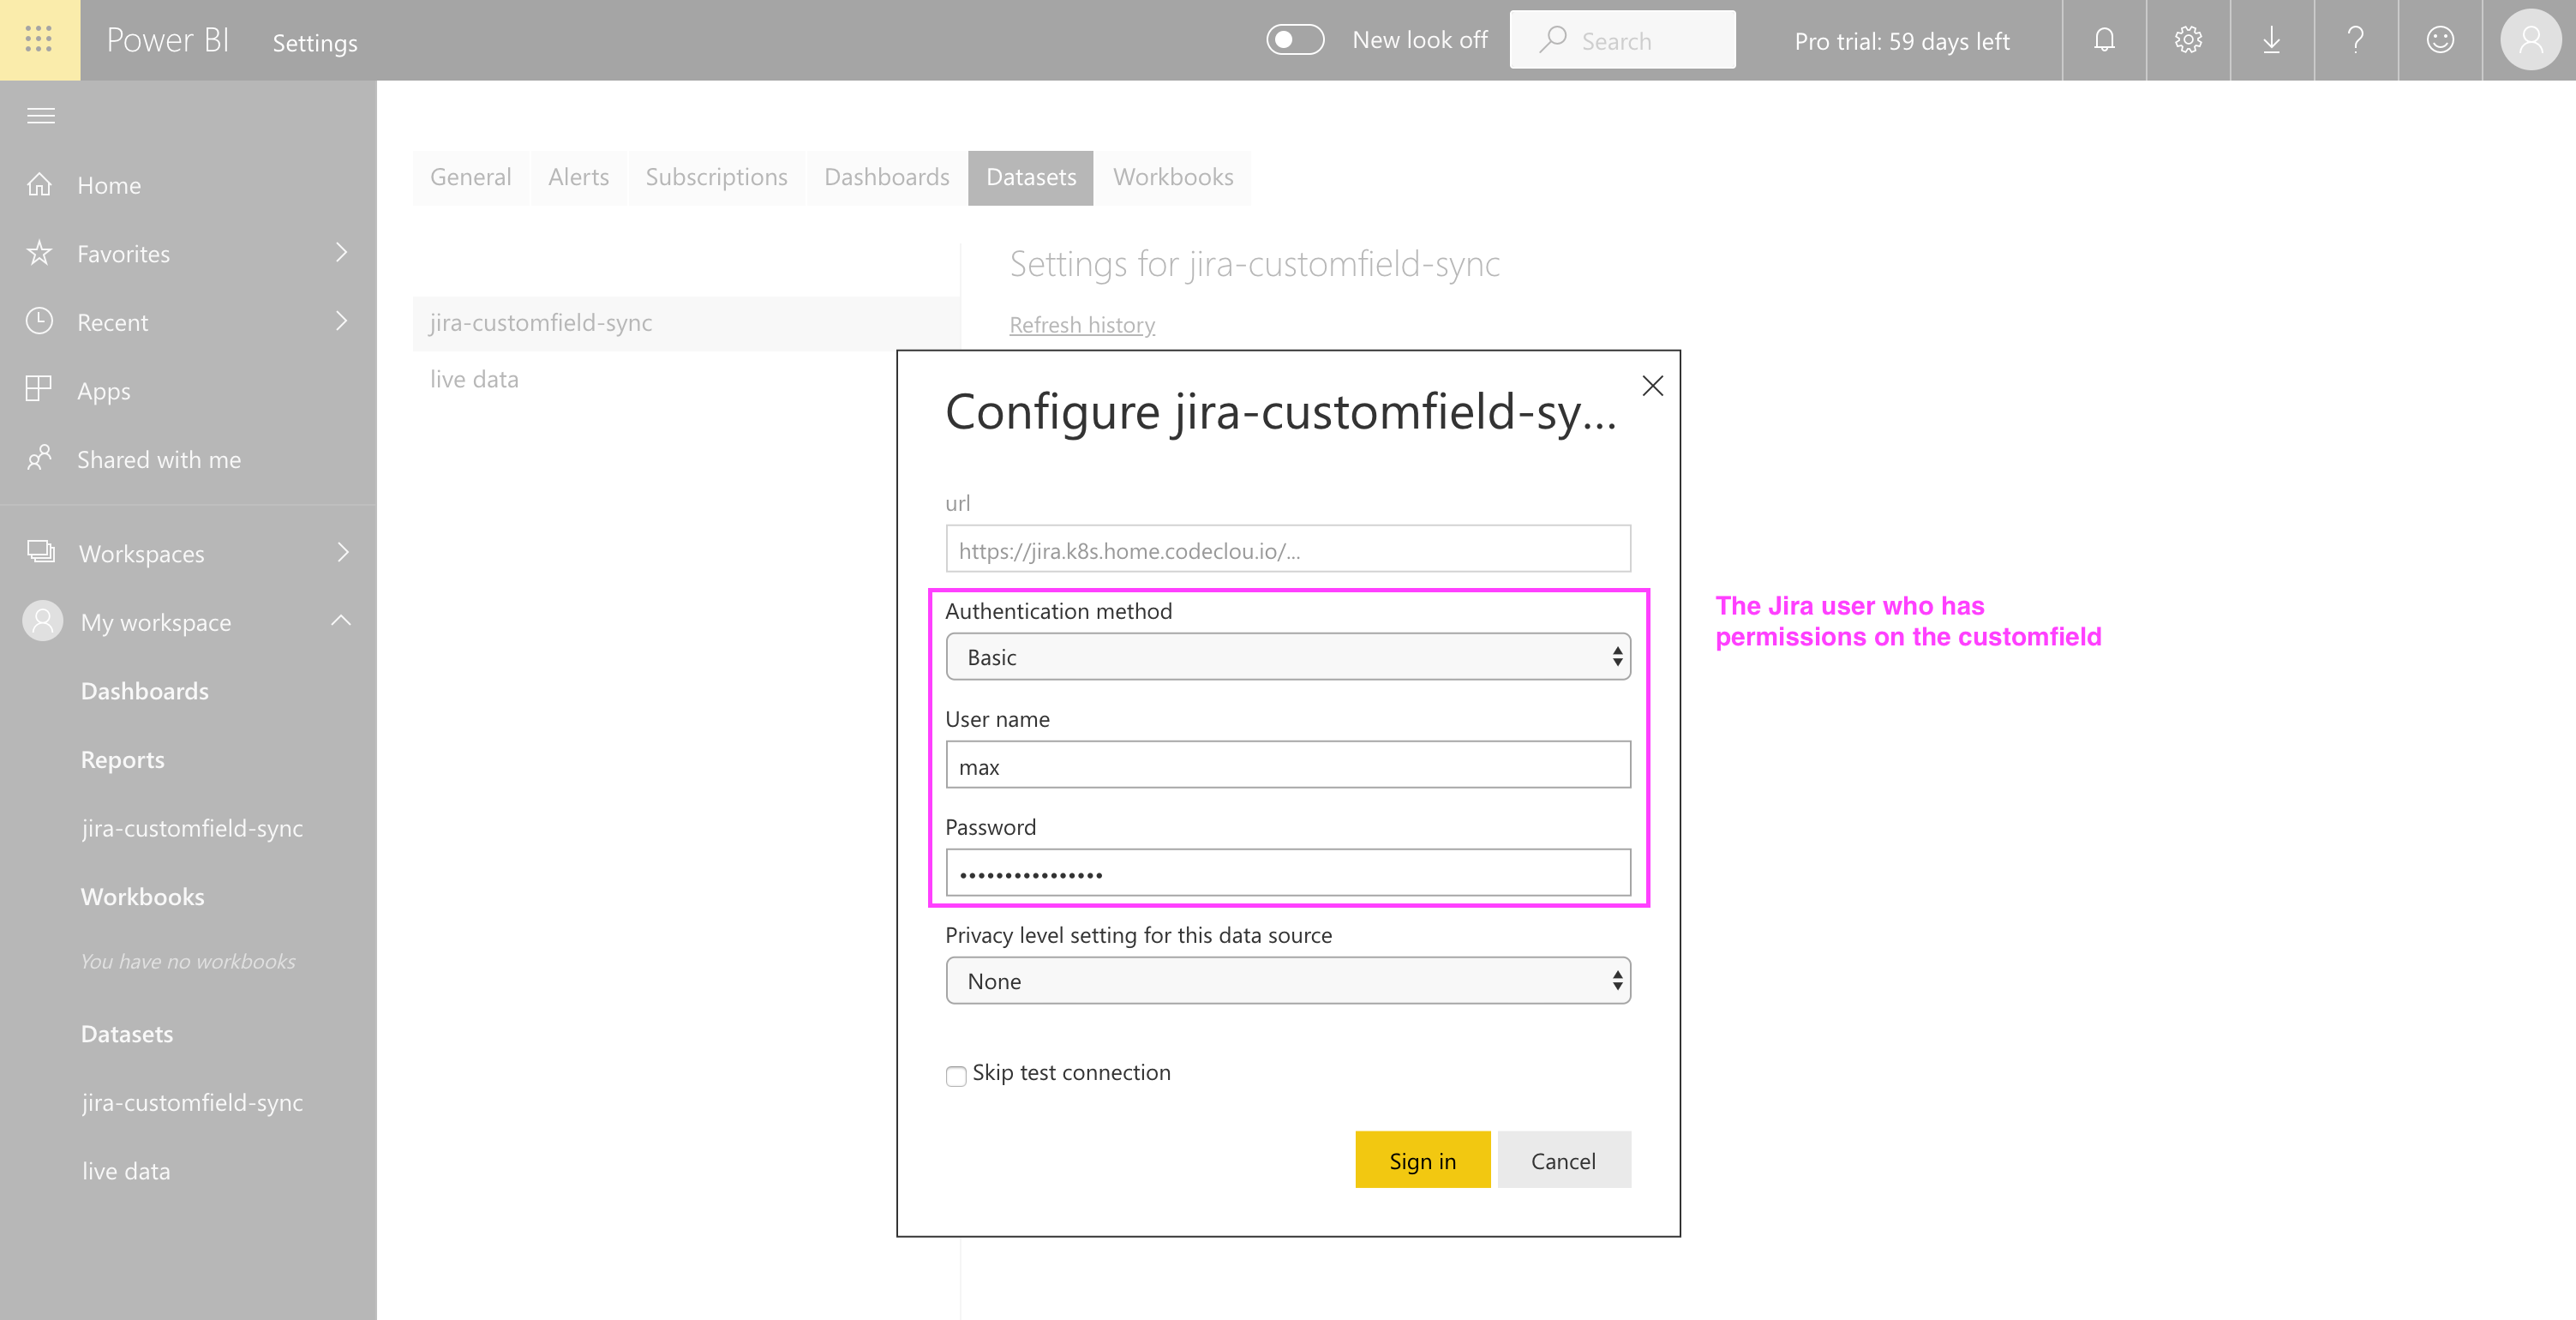
In the dataset settings you have to specify the credentials to Jira before you can refresh your dataset. Since the PBIX publishing did not send the credentials to cloud.
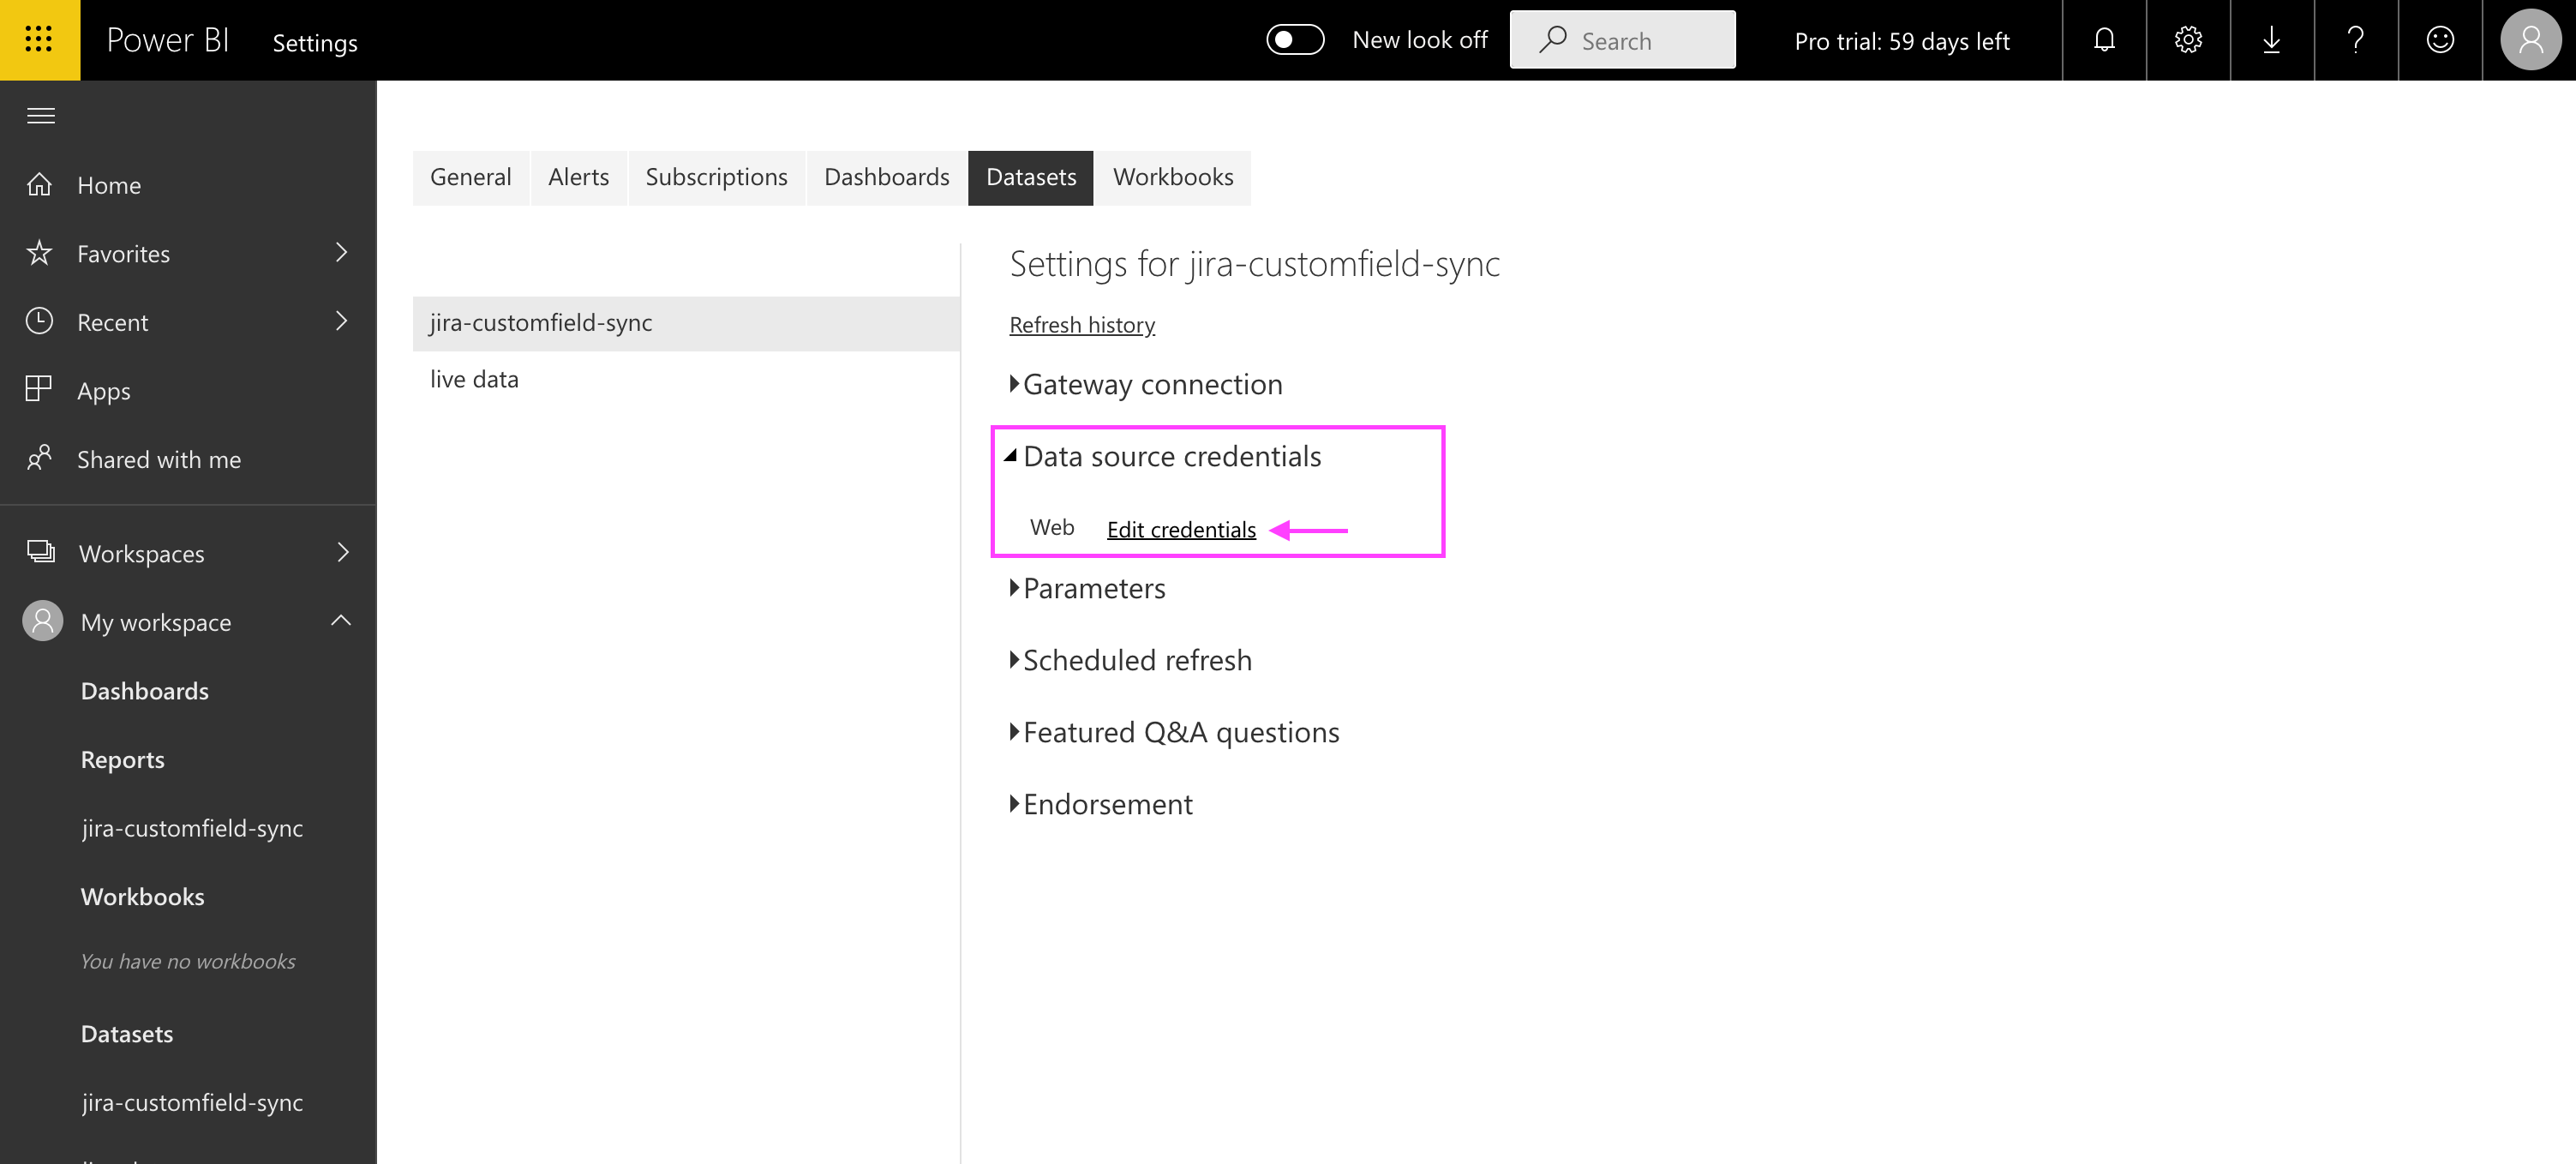
Specify the username and password of your Jira API user. In our case max as we used in the Power BI Desktop app.
Now you can click on refresh and the data should be refreshed within a minute. The REST API is queried in the background and the customfield options are updated in the dataset.
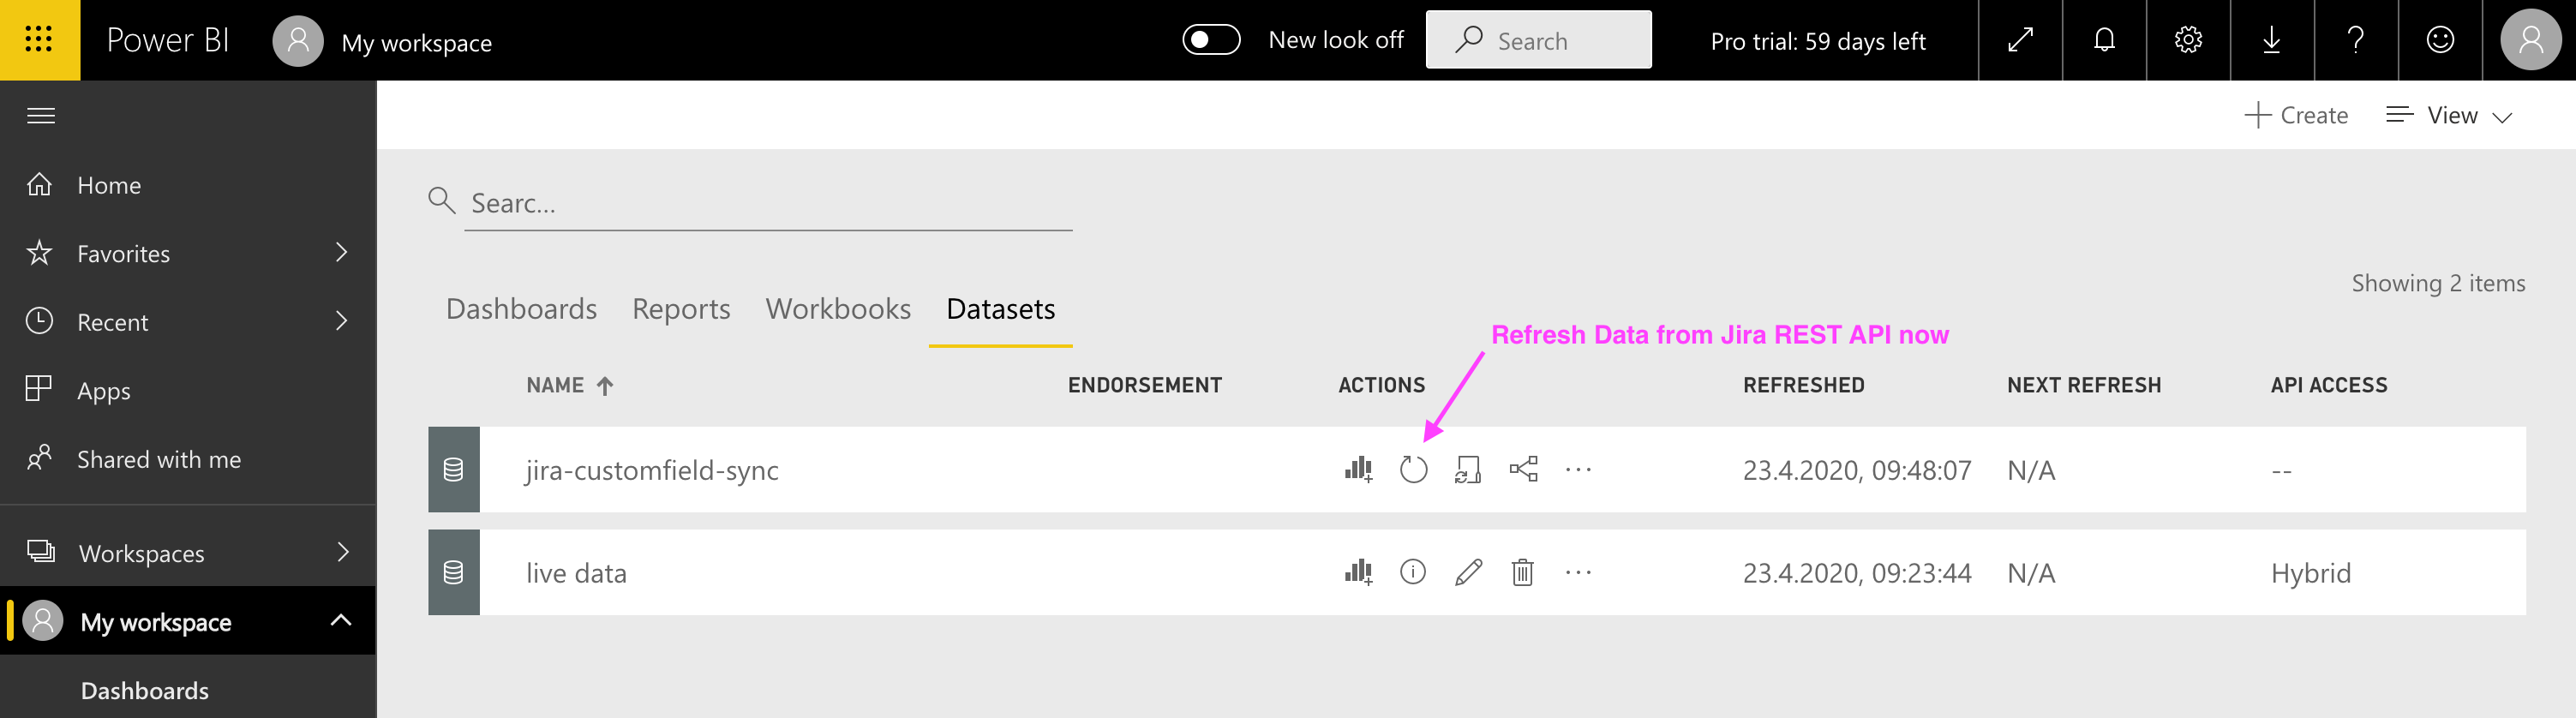
Power BI cloud can periodically refresh the data simply specify Scheduled refresh settings.

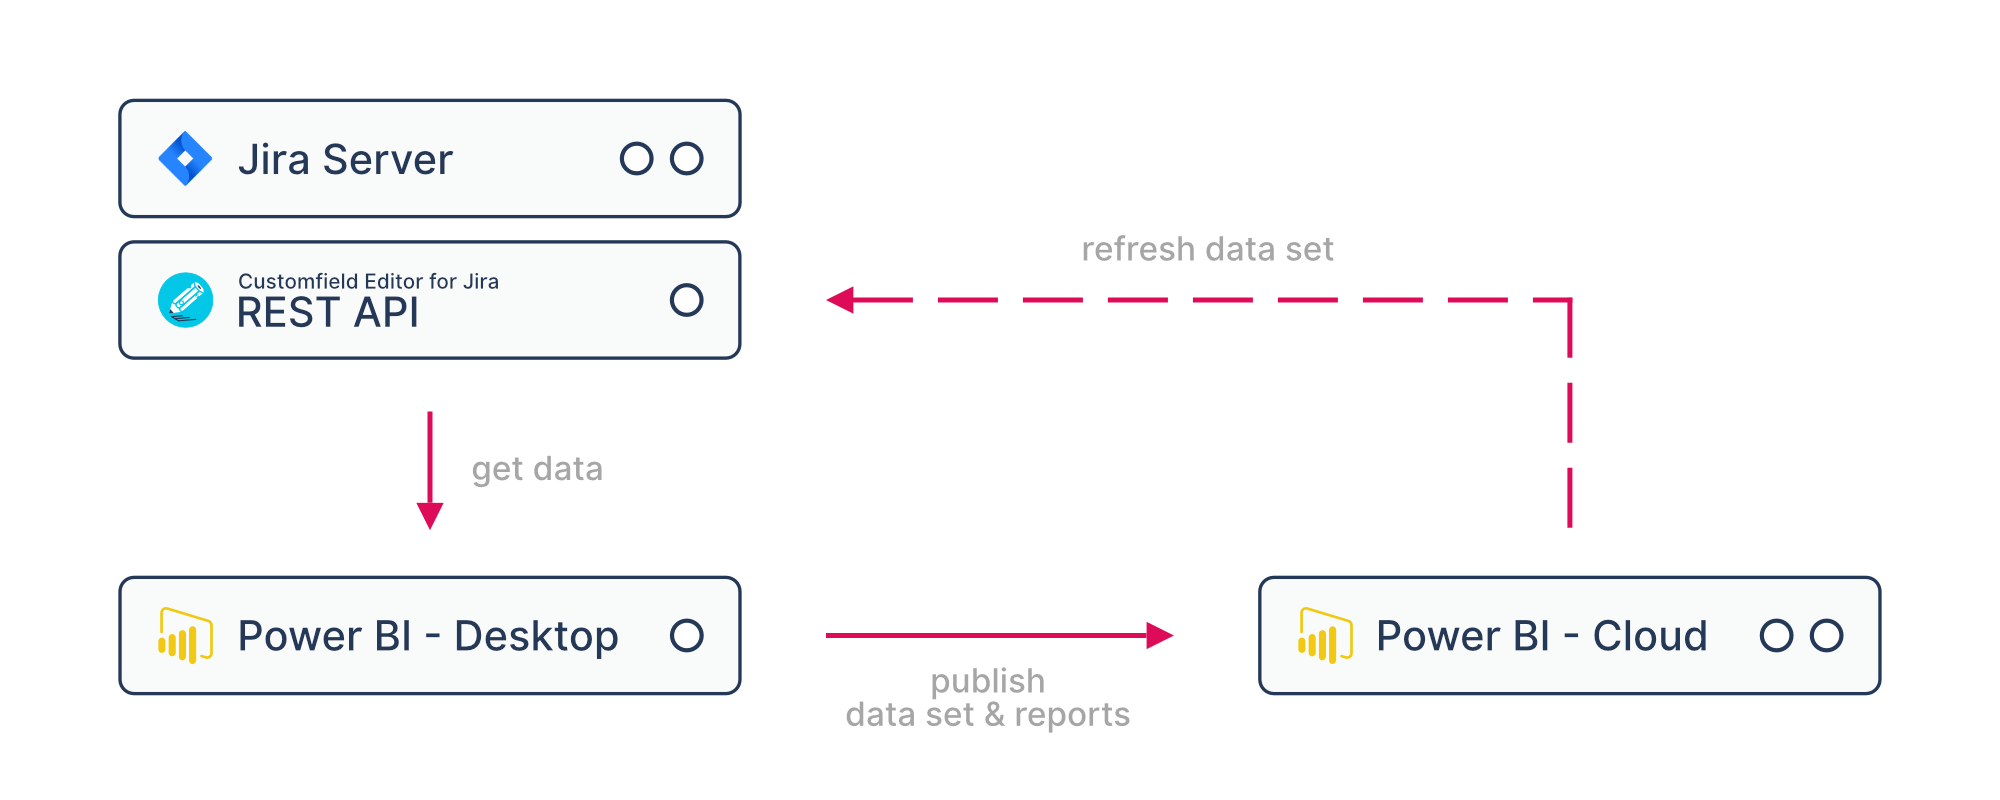
3. Power BI Cloud with Streaming dataset
You can alternatively use a Streaming dataset. Here you will need a sync server that fetches from the Jira REST API and push data via REST to the Power BI Cloud API. You can easily adjust the sync logic of the customer database sync blog post.
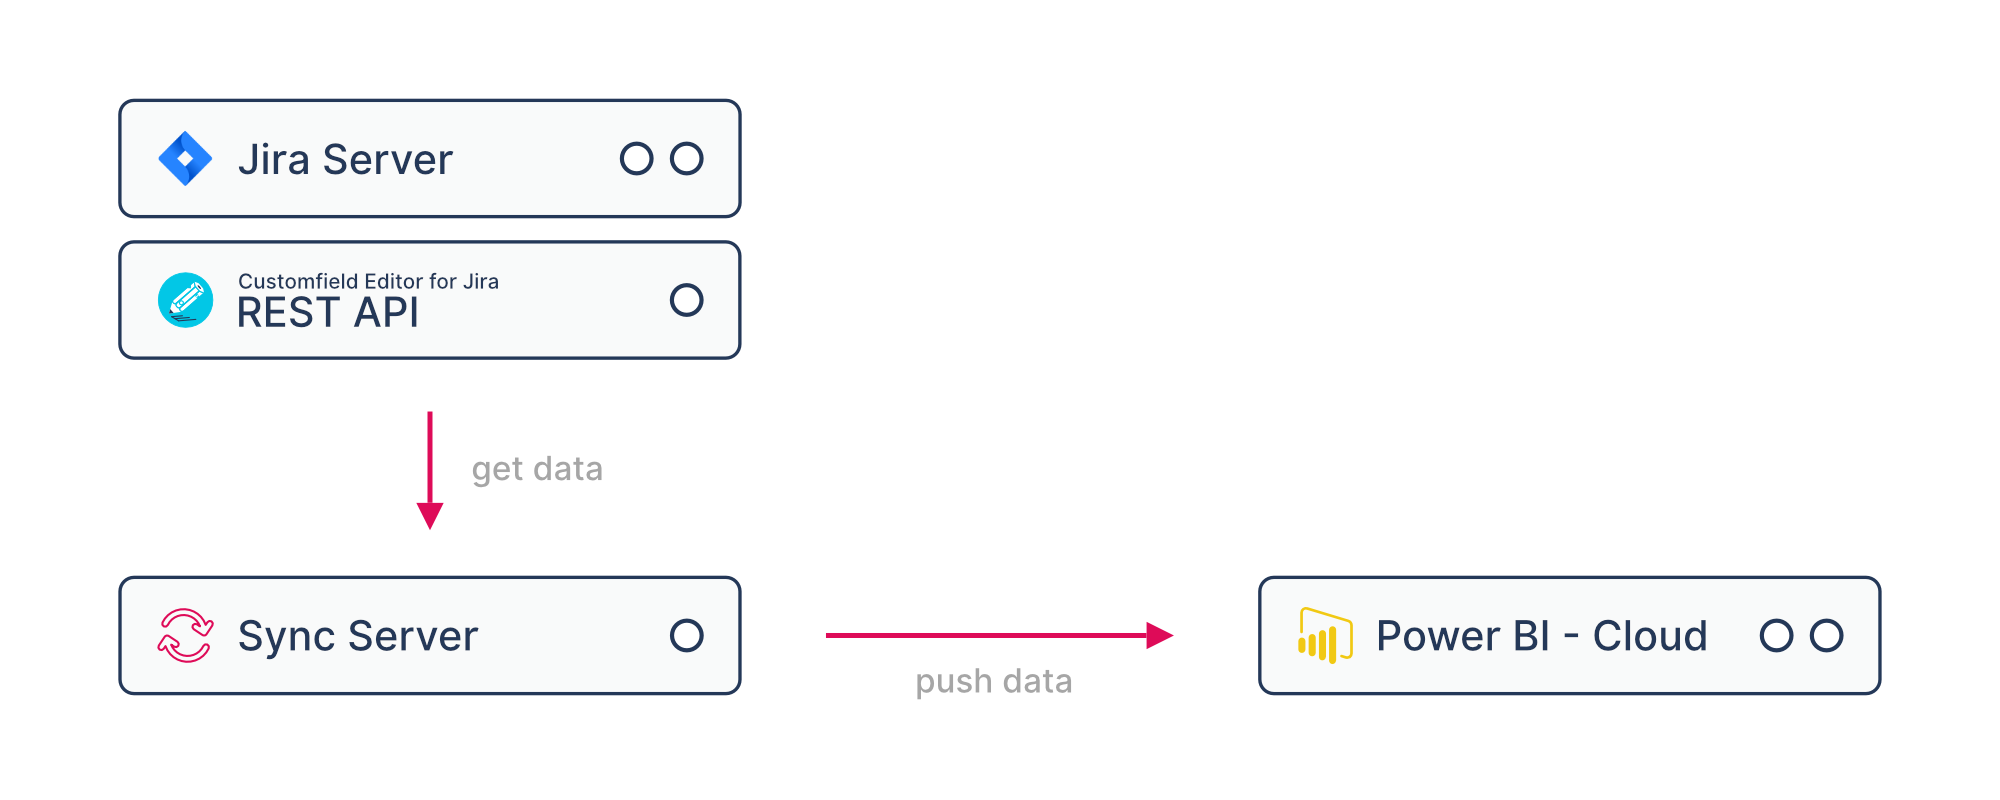
Power BI Cloud will not be able to refresh data directly from Jira! You will need to run your sync script on your sync server periodically to do so.
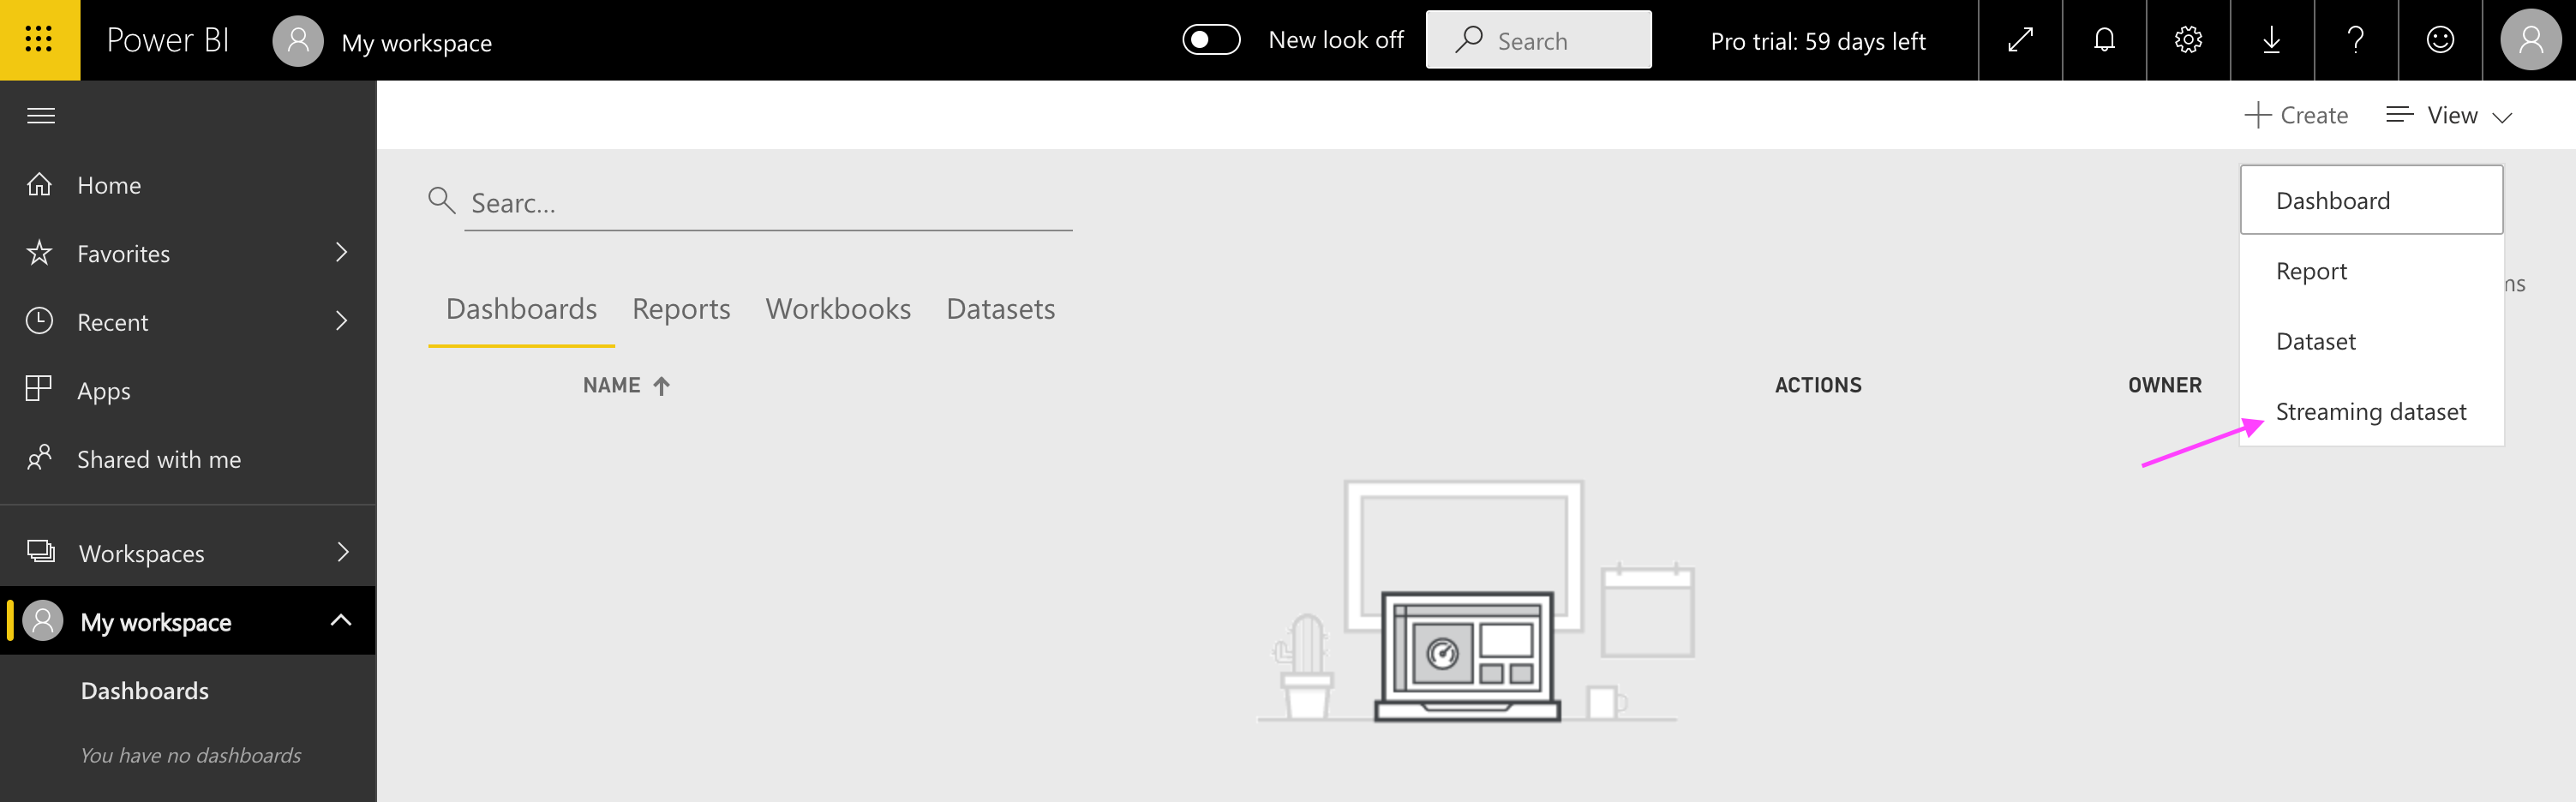
3.1 Creating a Streaming dataset
In Power BI Cloud browse to your workspace and click on Create and Streaming dataset.
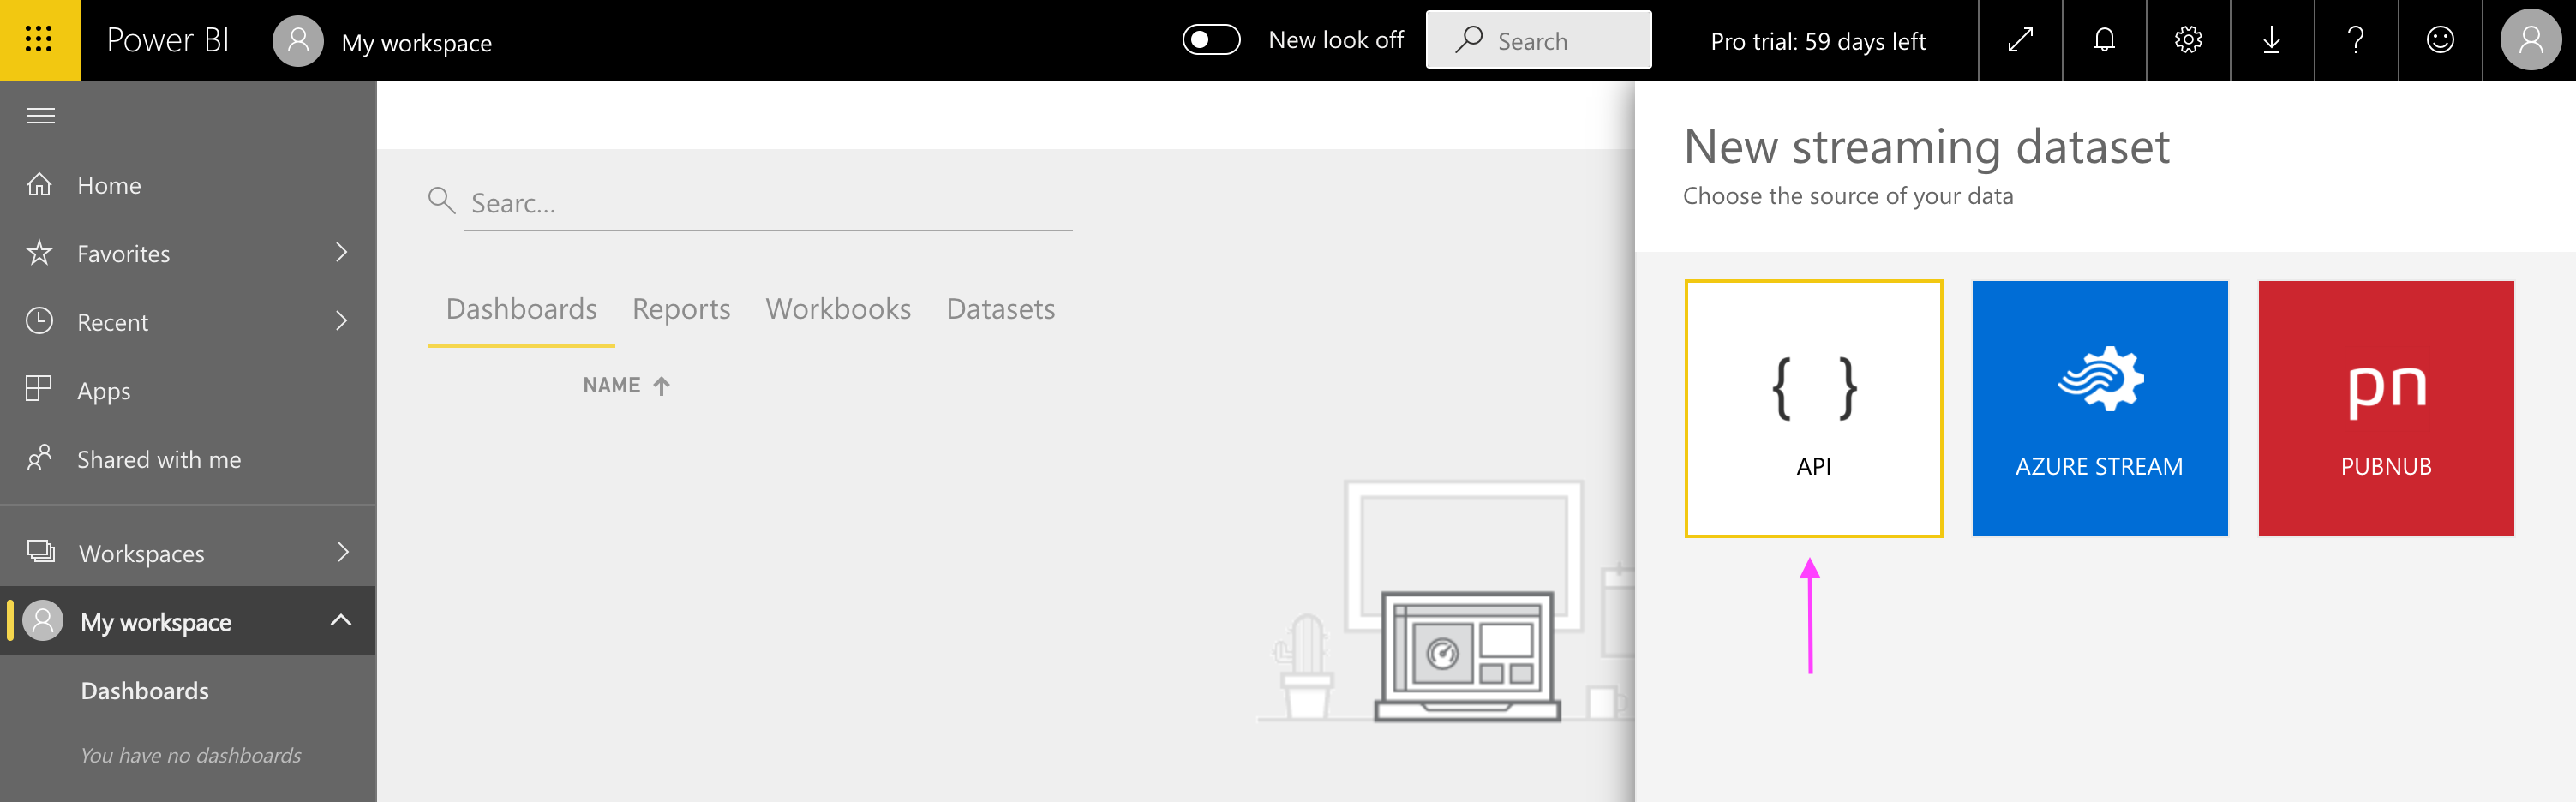
Select the API type.
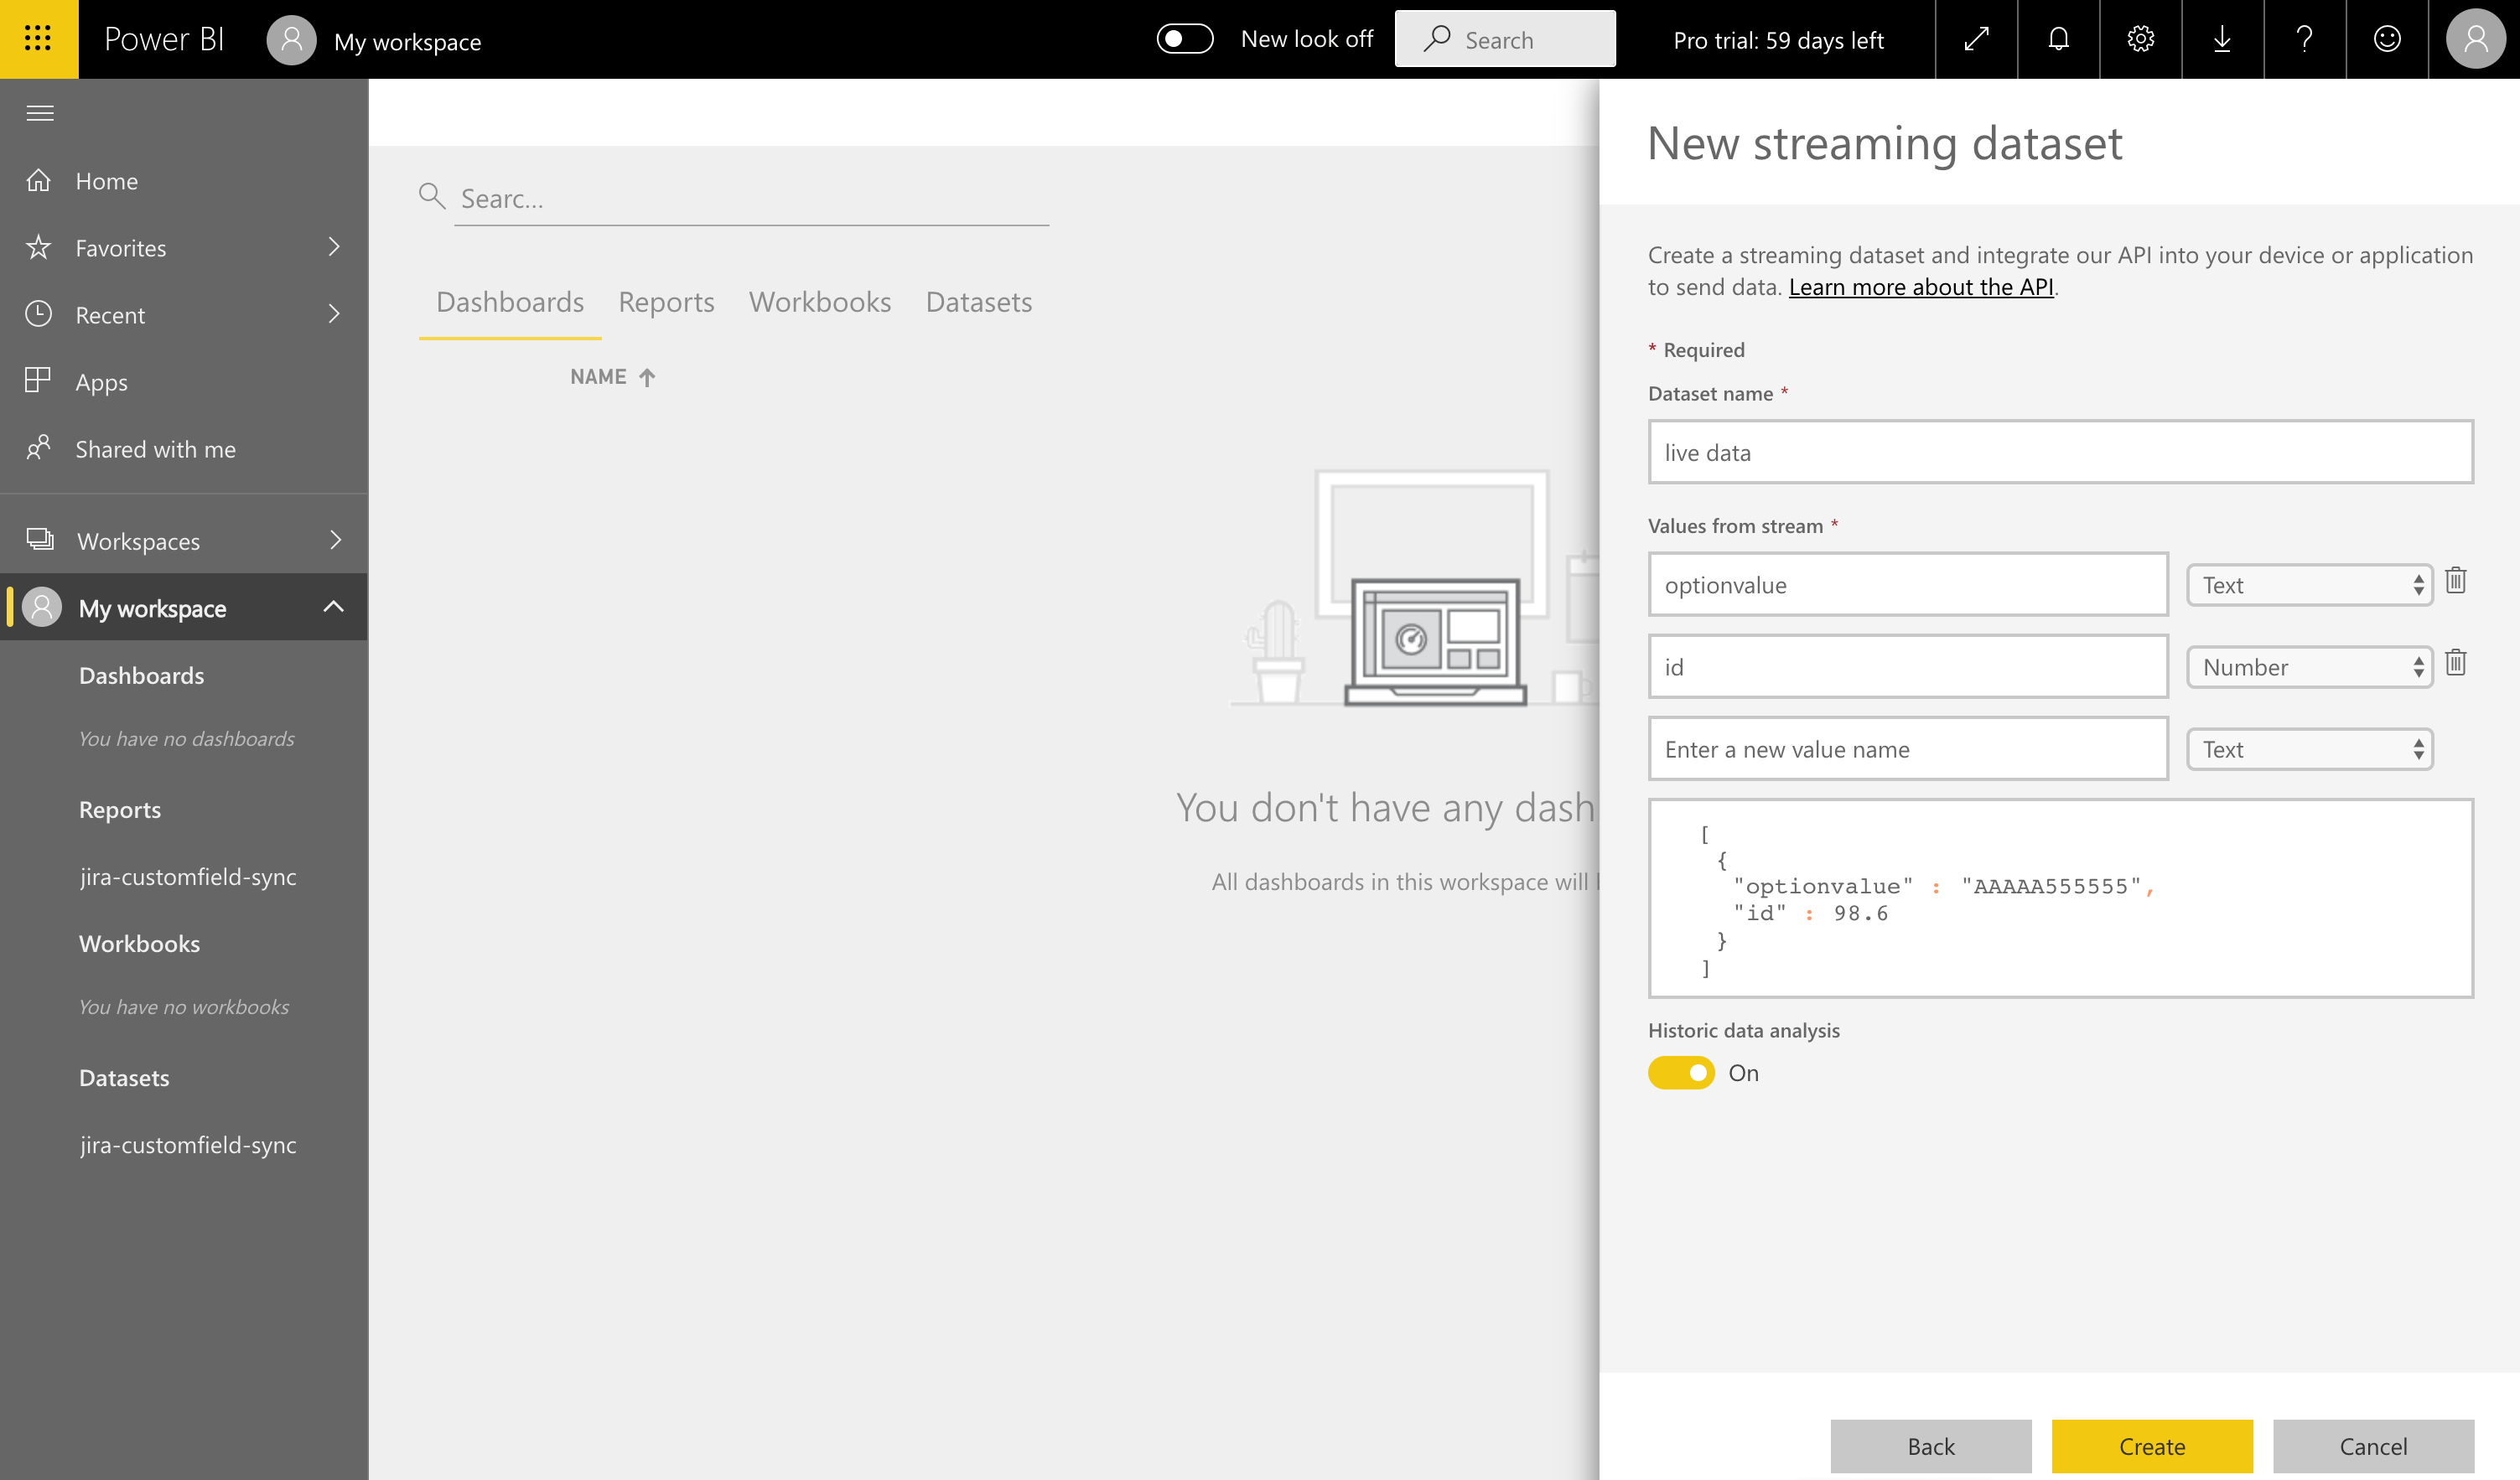
Now define the fields and name of the dataset. In our case we define optionvalue and id.
The Streaming dataset is created and we can use CURL or any other tool to push data now.

An example data push could look like so:
If you choose this approach you can easily adjust the sync logic of the customer database sync blog post.
4. Usage statistics of custom field values per project
We have shown you how you can import all the values of a custom field into Power BI. But you might also be interested in the usage statistics of your customfield values throughout your project.
Let's say we want to know how many Jira issues have selected Strawberry for the custom field Ice Cream Flavors.

First we need a JQL Query that we can use with the REST API to find all those issues.
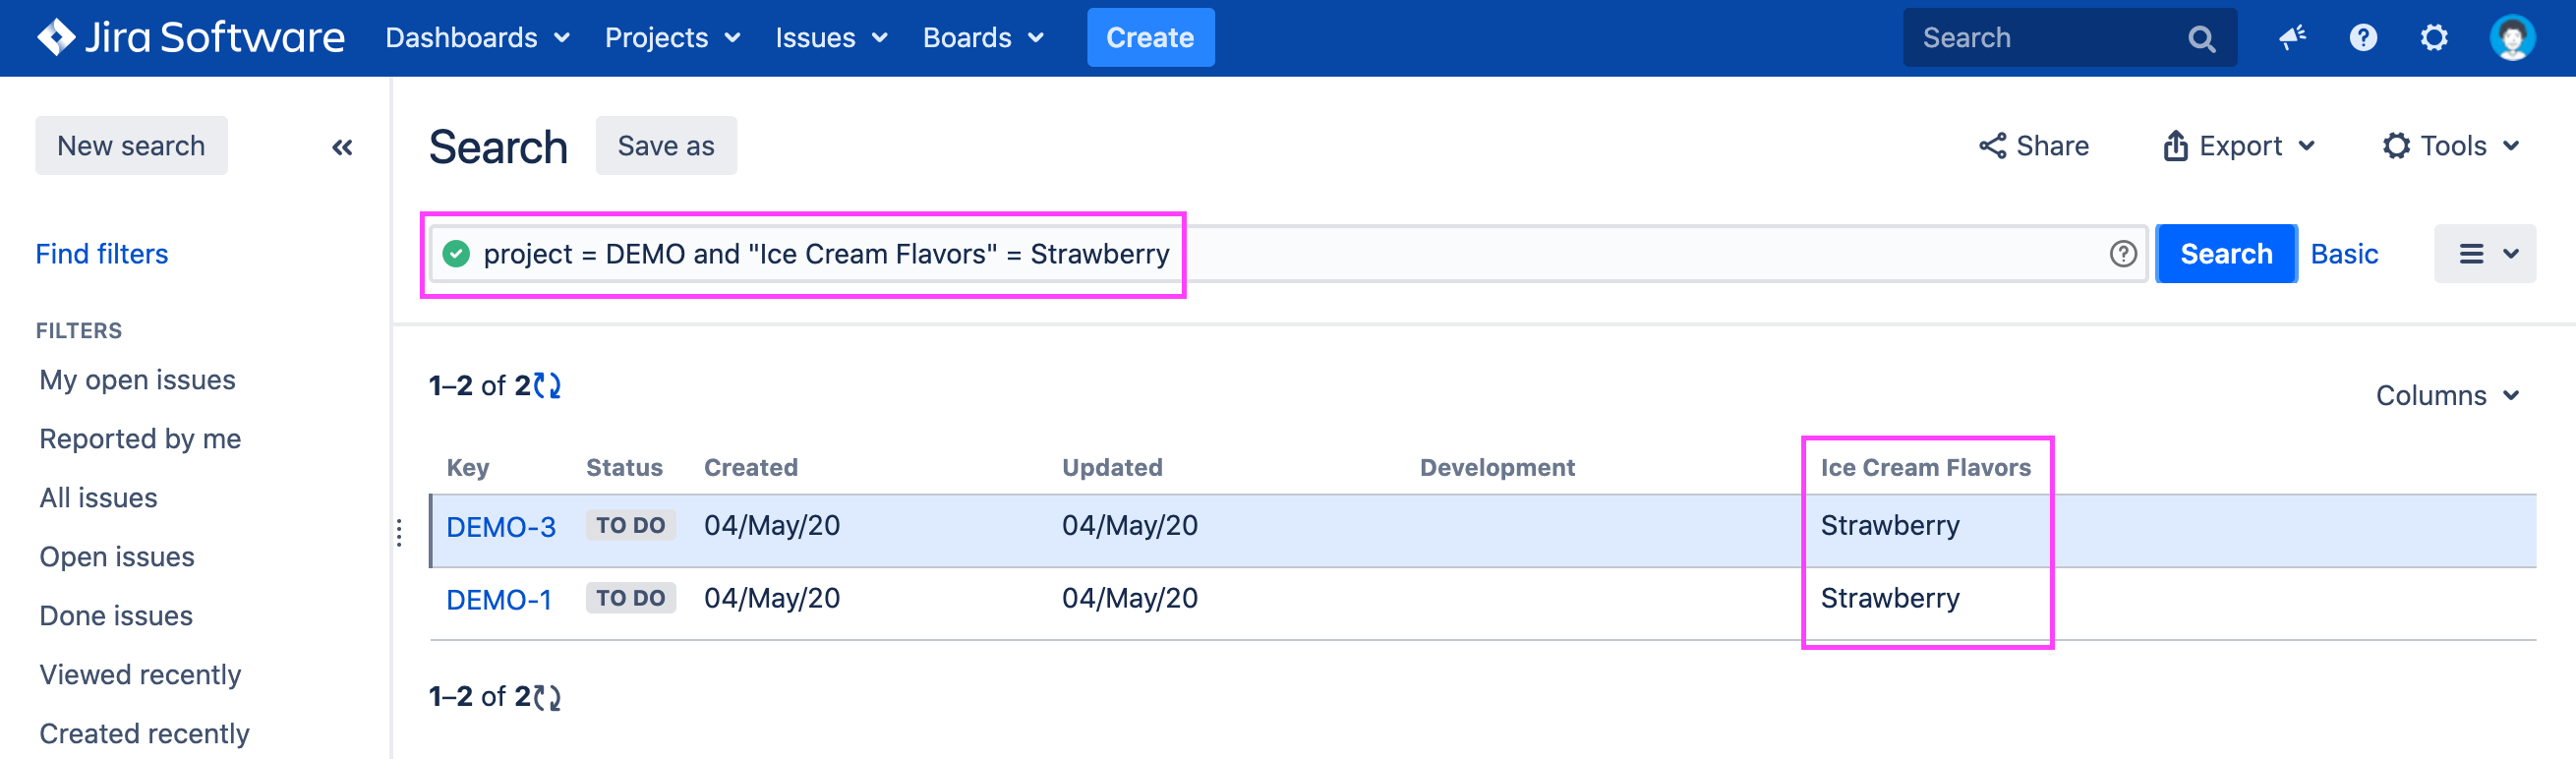
We can copy the JQL part from the URL or put it together manually additionally we add &maxResults=5000&fields=id to only get as less payload as possible because we are only interested in the total amount anyway.
The full JQL REST request looks like this.
{
  "expand": "schema,names",
  "startAt": 0,
  "maxResults": 1000,
  "total": 2,
  "issues": [
    {
      "expand": "operations,versionedRepresentations,editmeta,changelog,renderedFields",
      "id": "10702",
      "self": "https://jira.k8s.home.codeclou.io/rest/api/2/issue/10702",
      "key": "DEMO-3"
    },
    {
      "expand": "operations,versionedRepresentations,editmeta,changelog,renderedFields",
      "id": "10700",
      "self": "https://jira.k8s.home.codeclou.io/rest/api/2/issue/10700",
      "key": "DEMO-1"
    }
  ]
}
It gives us total: 2 which means that two issues with Ice Cream Flavor = Strawberry exist.
You could use the data set of all values to fetch the total amount of each customfield value in Power BI. It is only important that you properly URL Encode the optionvalue. If we tear the URL apart we have:
https://jira.k8s.home.codeclou.io/rest/api/2/search                               # base url
?jql=project%20%3D%20DEMO%20and%20%22Ice%20Cream%20Flavors%22%20%3D%20Strawberry  # jql part
&maxResults=5000&fields=id                                                        # additional params
Keep in mind to encode special chars like so:
whitespace as %20
equals = is %3D
double-quote " is %22
Conclusion
We have shown you how simple it can be to consume the Customfield Editor for Jira REST API directly from Power BI. You can easily gain insights an all your customfield related data. Amount of options of field, amount of contects per field, amount of customfields and much more. Simply explore the REST API to see what you can do. Have fun