Sync your external database values with Jira customfield options
using the Customfield Editor for Jira REST API and Node.js
This blogpost will show how to sync database values with Jira customfields via the Customfield Editor for Jira REST API. We will show example sync code in Node.js and use the axios library to send api calls to Jira. You can get the App in the Atlassian Marketplace.
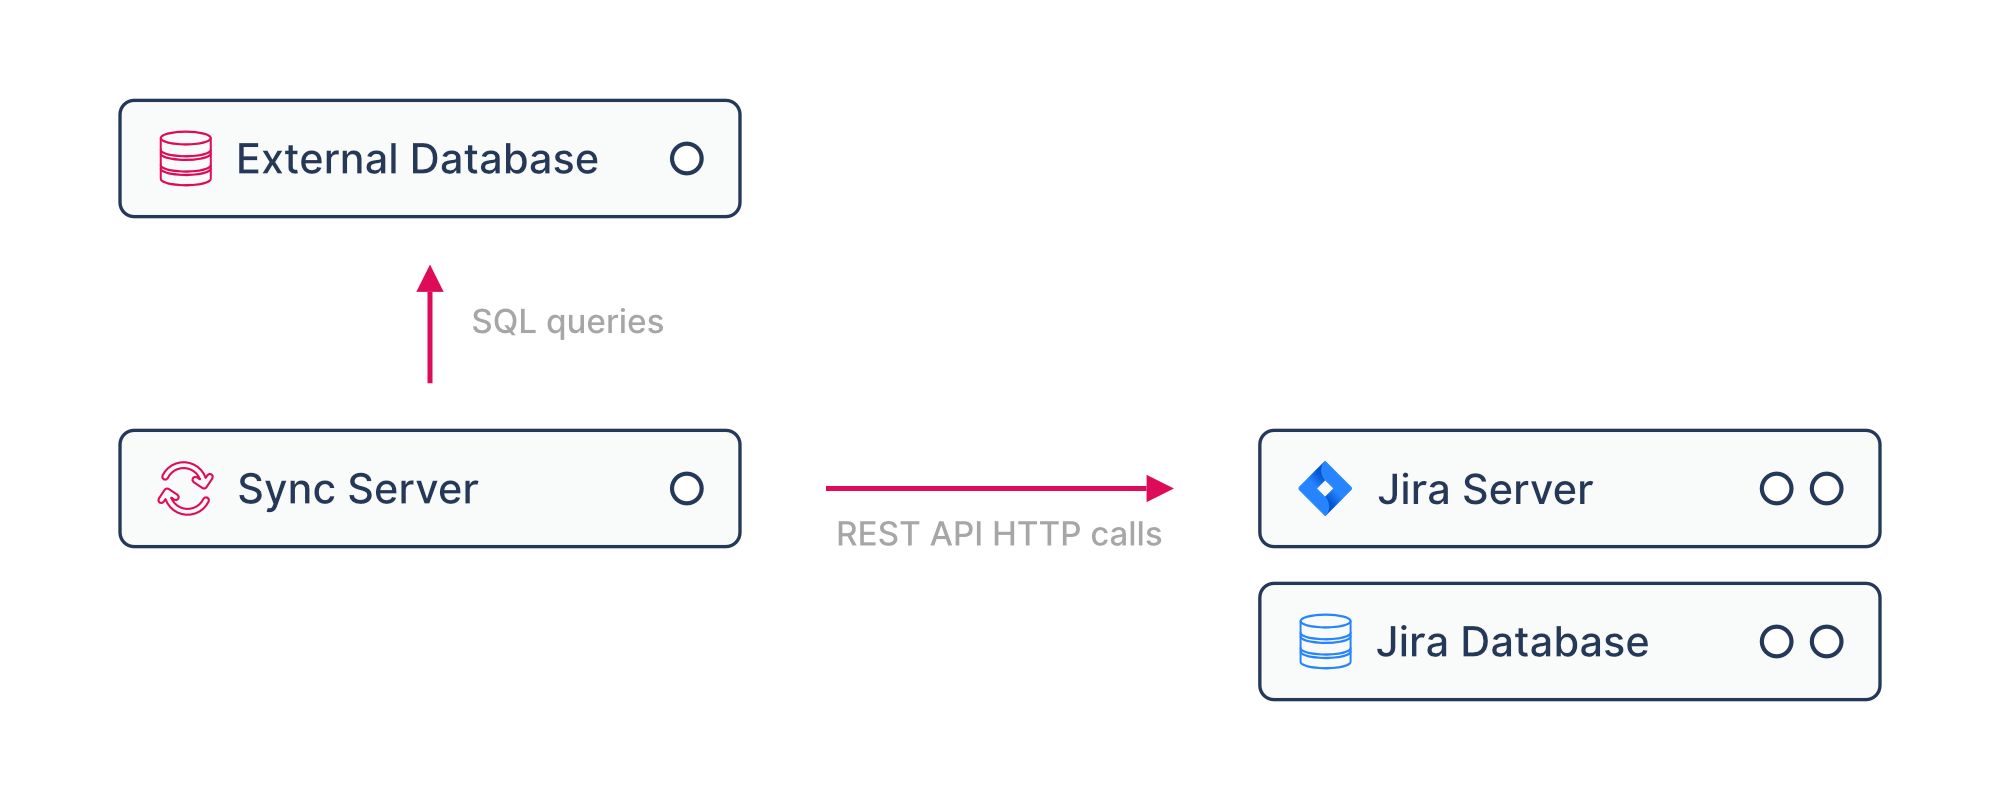
The big picture shows that we need an external sync server, which can be GitHub Actions, BitBucket Pipelines or any other CI System that can schedule jobs. Furthermore will the sync server connect to the external database, fetch data and send it to Jira via the Apps REST API.
The external Database
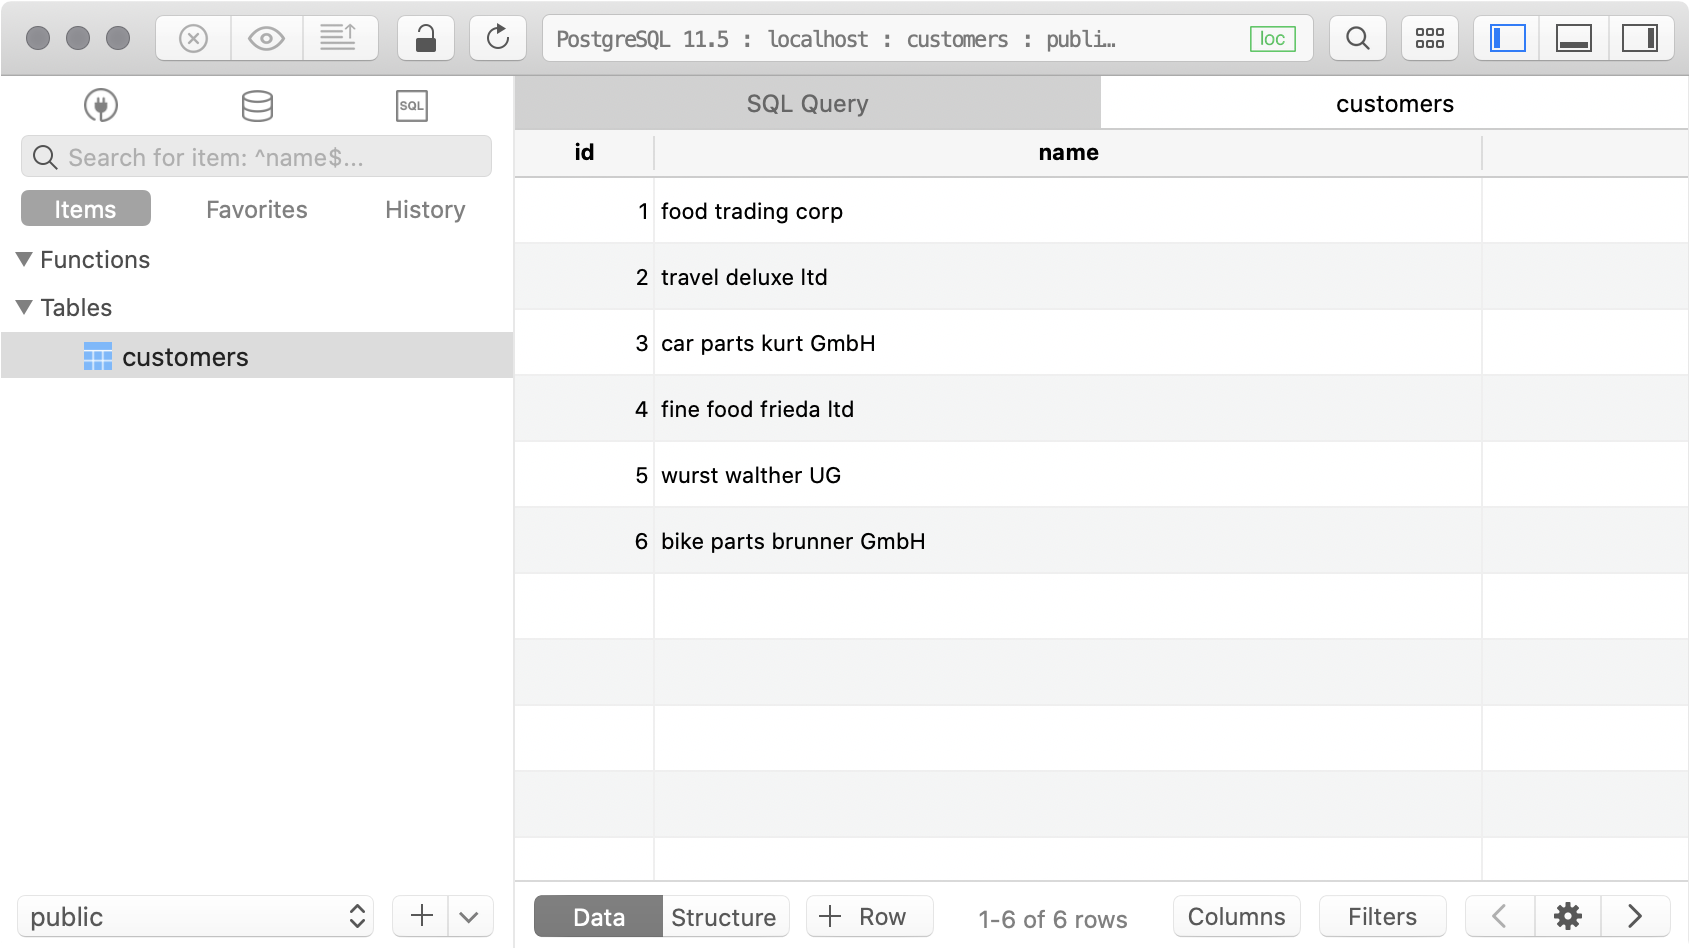
For our example the external Database is PostgreSQL and contains customer names we want to sync with a customer Jira customfield.
CREATE SEQUENCE IF NOT EXISTS customers_id_seq;
CREATE TABLE "public"."customers" (
    "id" int4 NOT NULL DEFAULT nextval('customers_id_seq'::regclass),
    "name" varchar,
    PRIMARY KEY ("id")
);
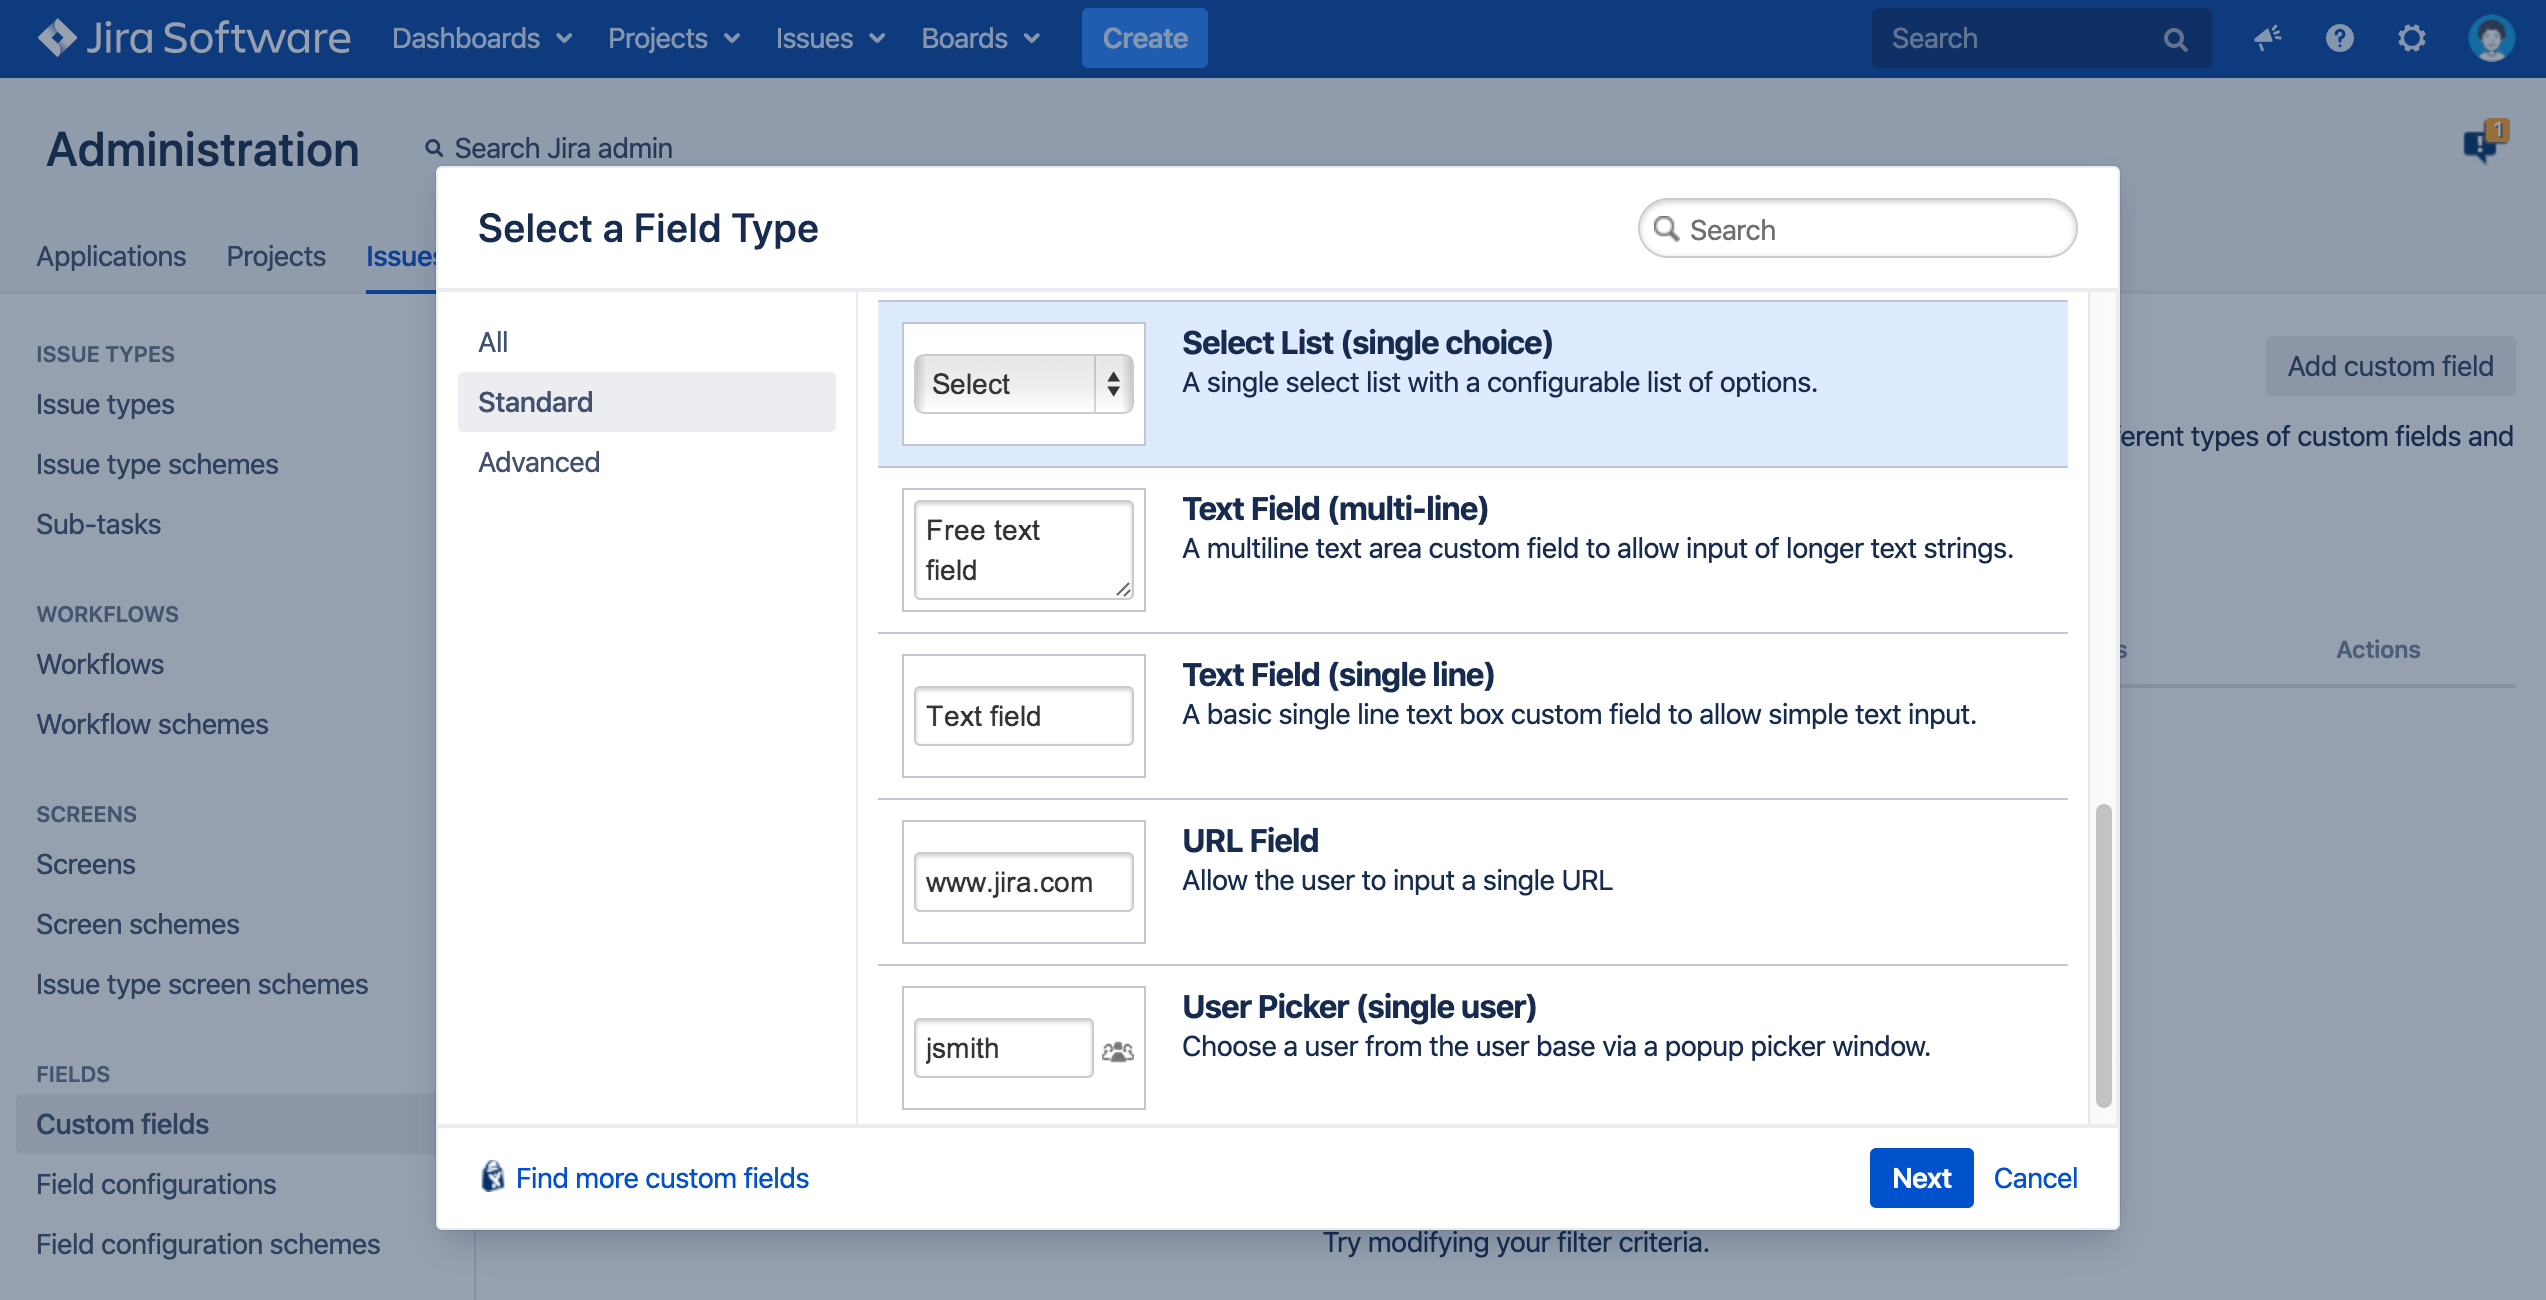
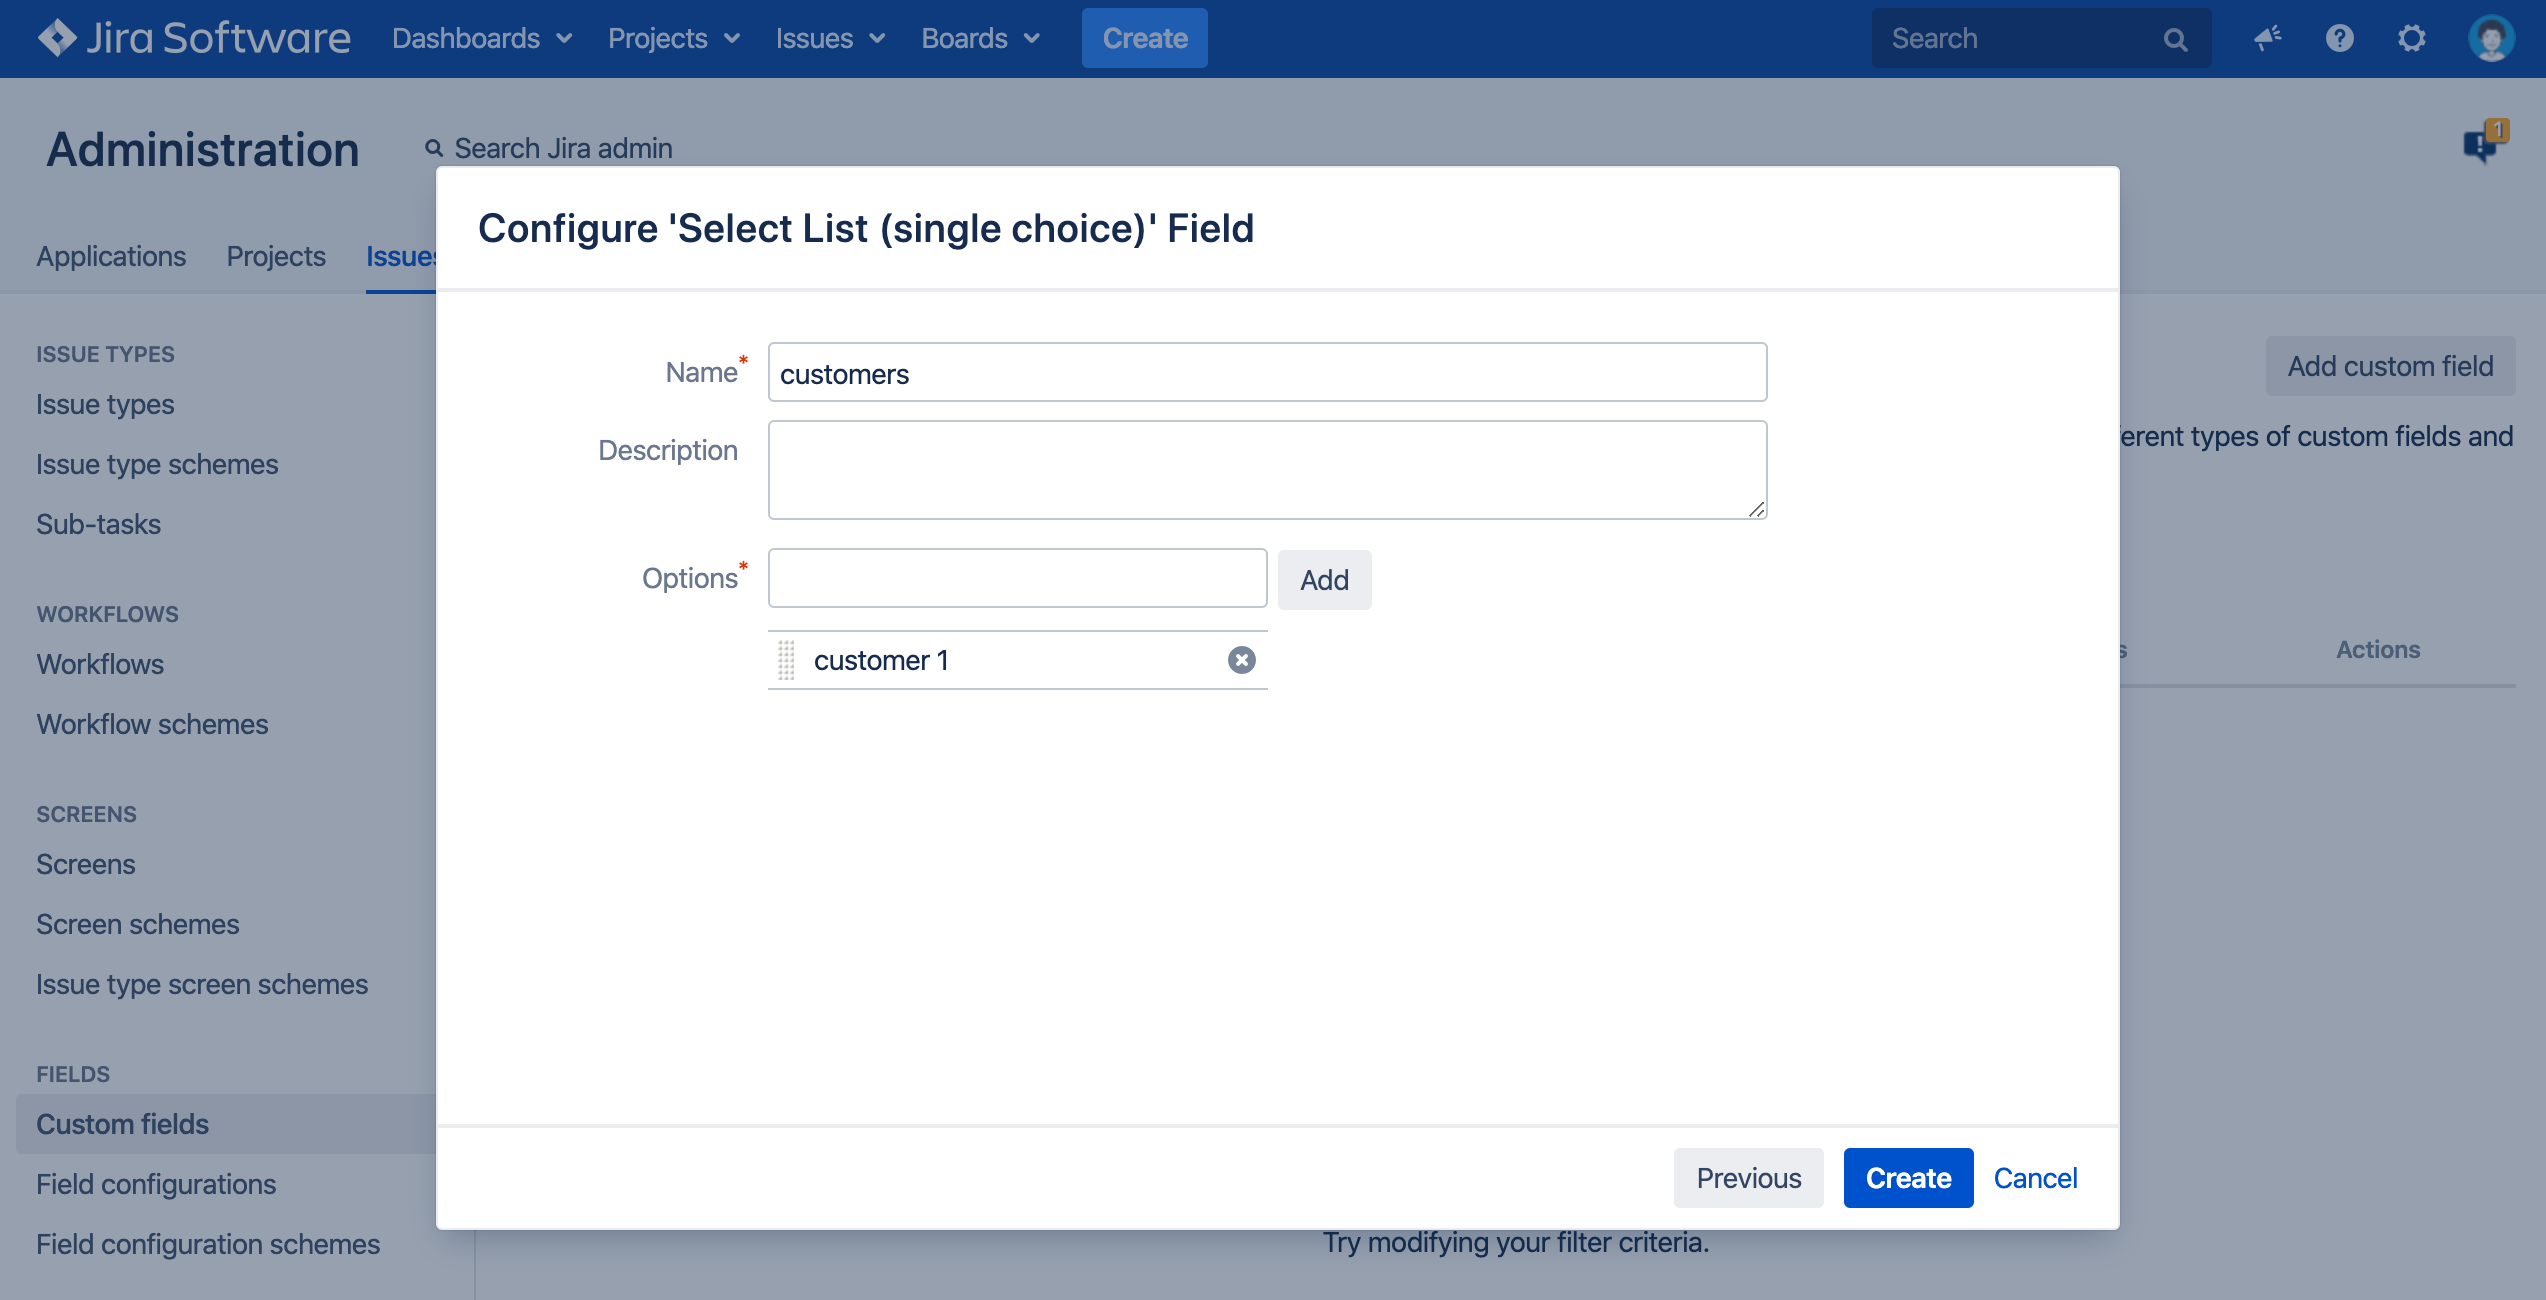
The Jira customers custom field
We create a single select custom field named 'customers' in Jira.
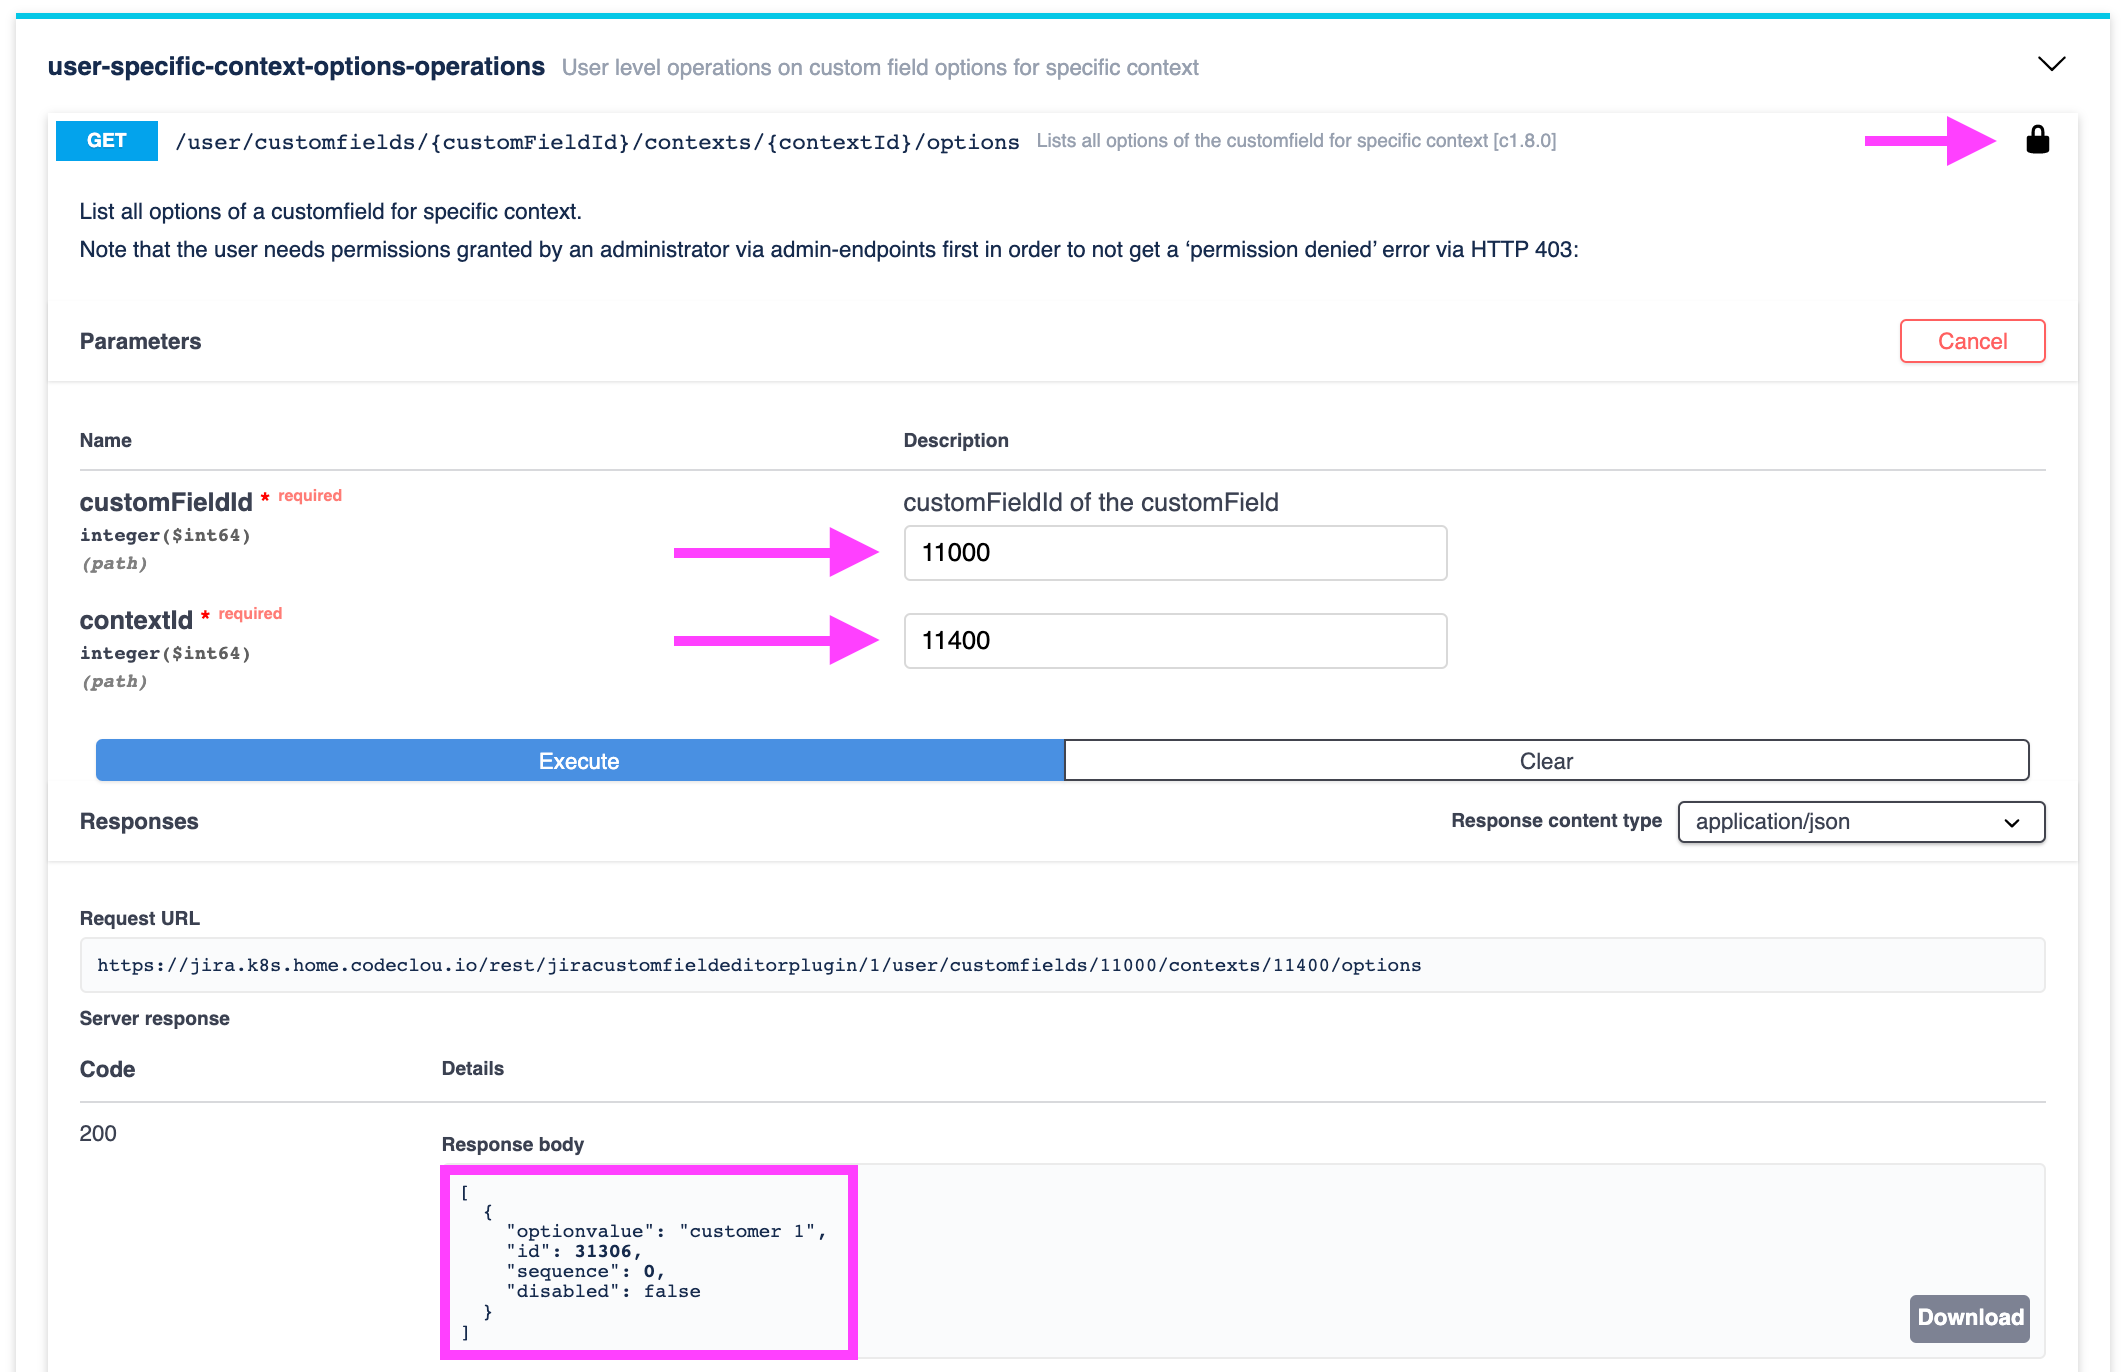
Once you have given your user permissions on the field in the Permission Editor you can search for it in the Field Editor. And we see that our customFieldId is 11000 and the contextId is 11400.

We can use the REST API Explorer to make our first REST API call and list the options in the field.
The sync direction
Now that we have a customfield ready to use we need to think of the sync direction meaning, in which ways do we want the data to be synced. Possible directions are:

- unidirectional Jira to external:
This means the data in the Jira customfield is the master. Editing of customfield options happens inside Jira. Data in external database will be overwritten.
- unidirectional external to Jira:
This means the data in the external databaseis the master. Editing of customfield options happens outside of Jira. Data in the Jira customfield will be overwritten.
- bidirectional both ways:
This is the most complex scenario in where you can edit the customfield options in Jira and inside the external database. You will need to think of a complex way to sync values in both directions.
Note: You cannot store your external database id inside a Jira customfield option. You will need to store the customfield option id inside your external database.
The mapping tables
Since we need to store the Jira customfield option id in our database we need the following additional tables:
- Table
customers_sync_mapping:
will be used to map customers to customfield options. We need this since we also need to react to deletions of customers as well as updated values. Therefore we map the optionid to the customerid.CREATE SEQUENCE IF NOT EXISTS customers_sync_mapping_id_seq; CREATE TABLE "public"."customers_sync_mapping" ( "id" int4 NOT NULL DEFAULT nextval('customers_sync_mapping_id_seq'::regclass), "optionvalue" varchar, "optionid" integer, "customerid" integer, "lastaction" varchar, PRIMARY KEY ("id") ); - Table
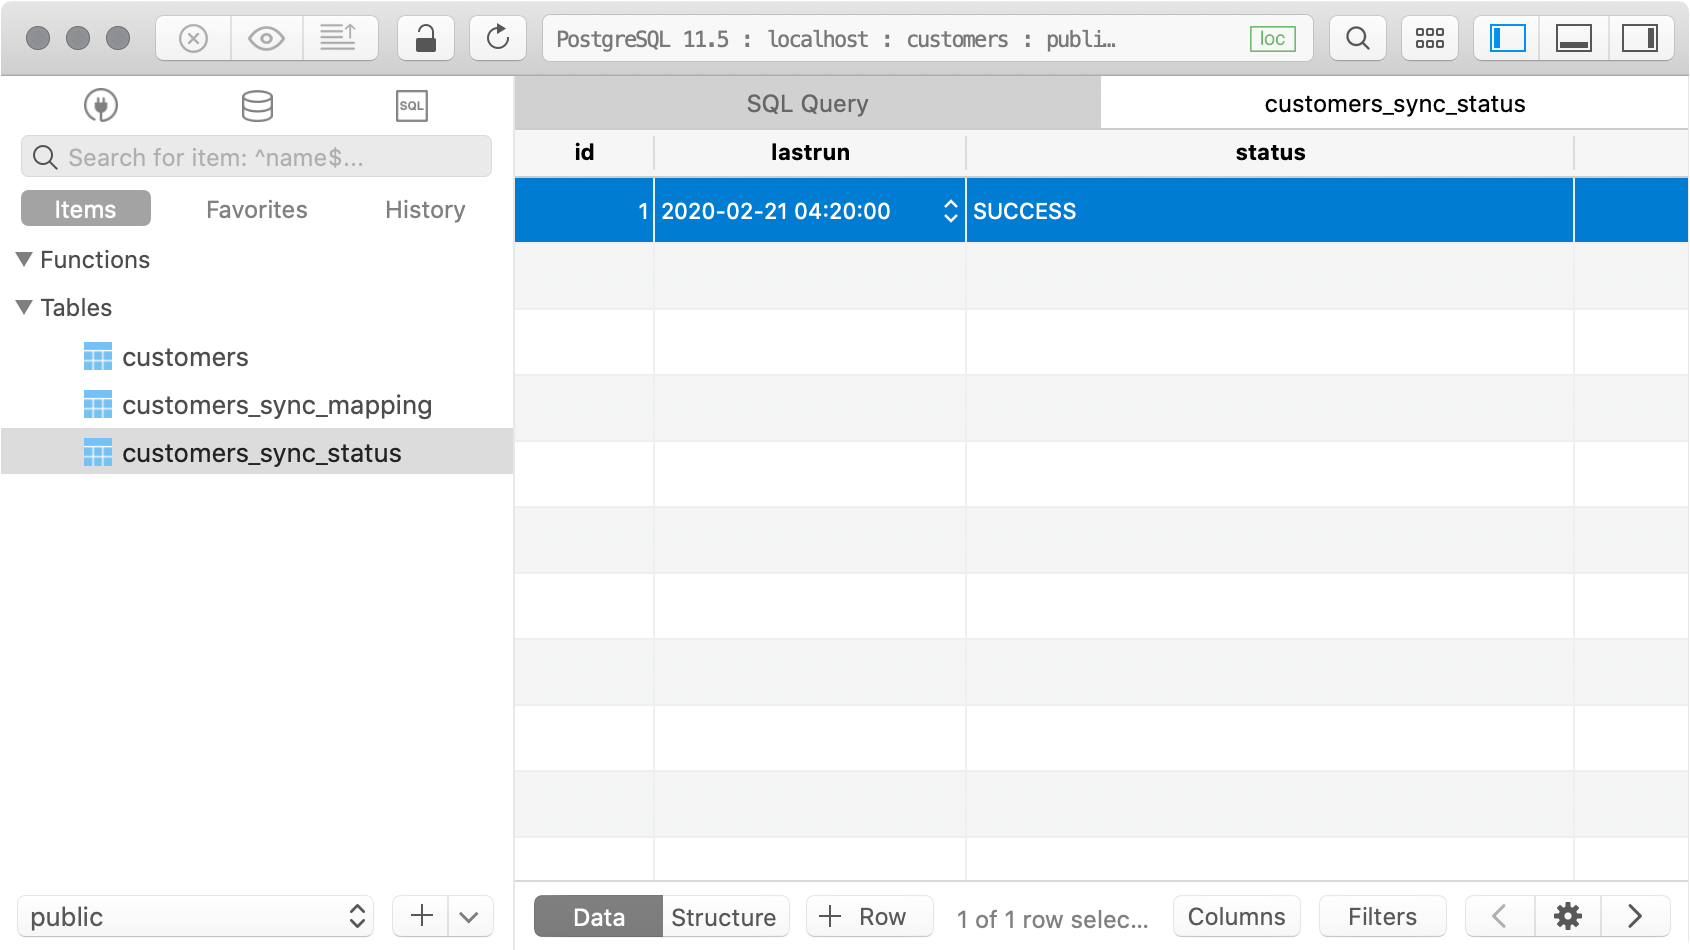
customers_sync_status:
will be used to store the job run status and date of last sync run.CREATE SEQUENCE IF NOT EXISTS customers_sync_status_id_seq; CREATE TABLE "public"."customers_sync_status" ( "id" int4 NOT NULL DEFAULT nextval('customers_sync_status_id_seq'::regclass), "lastrun" timestamp without time zone, "status" varchar, PRIMARY KEY ("id") );
The sync code
We need to write the sync code ourselves since this code will implement custom business logic that differs from use case to use case. In our case we will provide an example sync code for the unidirectional external to Jira sync logic with Node.js.
We setup a simple Node.js project with the axios library and the node-postgres library.
This will create a package.json and install axios and node-postgres inside node_modules. We can create the sync.js now and write our sync logic.
const { Client } = require("pg");

const client = new Client({
  user: "postgres",
  host: "localhost",
  database: "customers",
  password: "postgres",
  port: 5432
});

const insertSyncStatus =
  "INSERT INTO customers_sync_status(status, lastrun) VALUES ($1, $2)";
const updateSyncStatus =
  "UPDATE customers_sync_status SET status = $1 WHERE lastrun = $2";
const fetchLastSyncStatus =
  "SELECT status FROM customers_sync_status ORDER BY lastrun DESC LIMIT 1";
const jobRunDate = new Date();

const main = async () => {
  try {
    await client.connect();
    const lastSyncStatus = await client.query(fetchLastSyncStatus);
    if (
      lastSyncStatus.rows[0] === undefined ||
      lastSyncStatus.rows[0].status !== "RUNNING"
    ) {
      console.log("starting sync");
      await client.query(insertSyncStatus, ["RUNNING", jobRunDate]);

      // sync logic here

      await client.query(updateSyncStatus, ["SUCCESS", jobRunDate]);
    } else {
      console.log("skiping sync - another sync process is still running.");
    }
  } catch (err) {
    console.log("unexpected error", err);
    await client.query(updateSyncStatus, ["ERROR", jobRunDate]);
  }
};
main().then(() => client.end());
The above code is just the outer shell of our sync logic. It does the following things:
- Once the script starts the database table
customers_sync_statusis checked if currently another process already runs the sync script. - On start of sync write entry to
customers_sync_statustable with current date and status RUNNING. - On successful end of script update
customers_sync_statustable with status SUCCESS. - On error inside script update
customers_sync_statustable with status ERROR.
This will help us debug our job runs and avoid parallel executions.
We can execute the script like so - and it should write data to the customers_sync_status table.
Now we need to write the actual mapping and sync logic which we are doing in the sync_mapping.js file.
const axios = require("axios");
const fetchCustomers = "SELECT id, name FROM customers";
const fetchCustomersSyncMapping =
"SELECT id, optionvalue, optionid, customerid, lastaction " +
"FROM customers_sync_mapping WHERE customerid = $1";
const updateCustomersSyncMapping =
"UPDATE customers_sync_mapping SET optionvalue = $1, optionid = $2, lastaction = $4 WHERE customerid = $3";
const updateCustomersSyncMappingForDelete =
"UPDATE customers_sync_mapping SET optionvalue = $1, optionid = $2, customerid = $3, lastaction = $4 WHERE id = $5";
const createCustomersSyncMapping =
"INSERT INTO customers_sync_mapping(optionvalue, optionid, customerid, lastaction) VALUES ($1, $2, $3, $4)";
const fetchDesignatedDeletions =
"SELECT * FROM customers_sync_mapping WHERE customerid NOT IN (SELECT id FROM customers) AND customerid != -1";
const getBaseUrlAndAuthForAxios = jiraContext => {
return {
restBaseUrl: `${jiraContext.jiraBaseUrl}/rest/jiracustomfieldeditorplugin/1`,
axiosOptions: {
auth: {
username: jiraContext.username,
password: jiraContext.password
}
}
};
};
const updateCustomfieldOption = async (jiraContext, optionId, optionValue) => {
const { restBaseUrl, axiosOptions } = getBaseUrlAndAuthForAxios(jiraContext);
try {
await axios.put(
`${restBaseUrl}/user/customfields/${jiraContext.customFieldId}/contexts/${jiraContext.contextId}/options/${optionId}`,
{ optionvalue: optionValue },
axiosOptions
);
// Wait one second after a REST API Call to give Jira time to internally process data
await new Promise(resolve => setTimeout(resolve, 1000));
} catch (err) {
console.log(
"unexpected error during updateCustomfieldOption",
err && err.response.data ? err.response.data : err
);
}
};
const createCustomfieldOption = async (jiraContext, optionValue) => {
const { restBaseUrl, axiosOptions } = getBaseUrlAndAuthForAxios(jiraContext);
try {
const res = await axios.post(
`${restBaseUrl}/user/customfields/${jiraContext.customFieldId}/contexts/${jiraContext.contextId}/options`,
{ optionvalue: optionValue },
axiosOptions
);
// Wait one second after a REST API Call to give Jira time to internally process data
await new Promise(resolve => setTimeout(resolve, 1000));
return res
} catch (err) {
console.log(
"unexpected error during createCustomfieldOption",
err && err.response.data ? err.response.data : err
);
}
};
const deleteCustomfieldOption = async (jiraContext, optionId) => {
const { restBaseUrl, axiosOptions } = getBaseUrlAndAuthForAxios(jiraContext);
// Note: You should disable options instead of deleting them
// this way you avoid Jira issues losing a selected value
try {
await axios.delete(
`${restBaseUrl}/user/customfields/${jiraContext.customFieldId}/contexts/${jiraContext.contextId}/options/${optionId}`,
axiosOptions
);
// Wait one second after a REST API Call to give Jira time to internally process data
await new Promise(resolve => setTimeout(resolve, 1000));
} catch (err) {
console.log(
"unexpected error during deleteCustomfieldOption",
err && err.response.data ? err.response.data : err
);
}
};
const syncAndMap = async (client, jiraContext) => {
process.env["NODE_TLS_REJECT_UNAUTHORIZED"] = 0; // avoid self signed SSL errors
//
// Step 1: Handle Updates and Creations
//
const customers = await client.query(fetchCustomers);
if (customers.rows) {
for (let customer of customers.rows) {
const mapping = await client.query(fetchCustomersSyncMapping, [
customer["id"]
]);
const optionvalue = customer["name"];
const customerid = customer["id"];
let optionid =
mapping.rows && mapping.rows[0]["optionid"]
? mapping.rows[0]["optionid"]
: null;
if (optionid) {
// Update option in Jira
await updateCustomfieldOption(jiraContext, optionid, optionvalue);
await client.query(updateCustomersSyncMapping, [
optionvalue,
optionid,
customerid,
"UPDATE"
]);
} else {
// Create option in Jira
let res = await createCustomfieldOption(jiraContext, optionvalue);
optionid = res && res.data ? res.data.id : null;
if (optionid) {
await client.query(createCustomersSyncMapping, [
optionvalue,
optionid,
customerid,
"CREATE"
]);
}
}
}
}
//
// Step 2: Handle Deletions
//
const customerMappings = await client.query(fetchDesignatedDeletions);
if (customerMappings.rows) {
for (let customerMapping of customerMappings.rows) {
const optionvalue = customerMapping["optionvalue"];
const optionid = customerMapping["optionid"];
const mappingid = customerMapping["id"];
// Delete option in Jira
await deleteCustomfieldOption(jiraContext, optionid);
await client.query(updateCustomersSyncMappingForDelete, [
optionvalue,
optionid,
-1, // set to -1 since customer was already deleted from customers table
"DELETE",
mappingid
]);
}
}
};
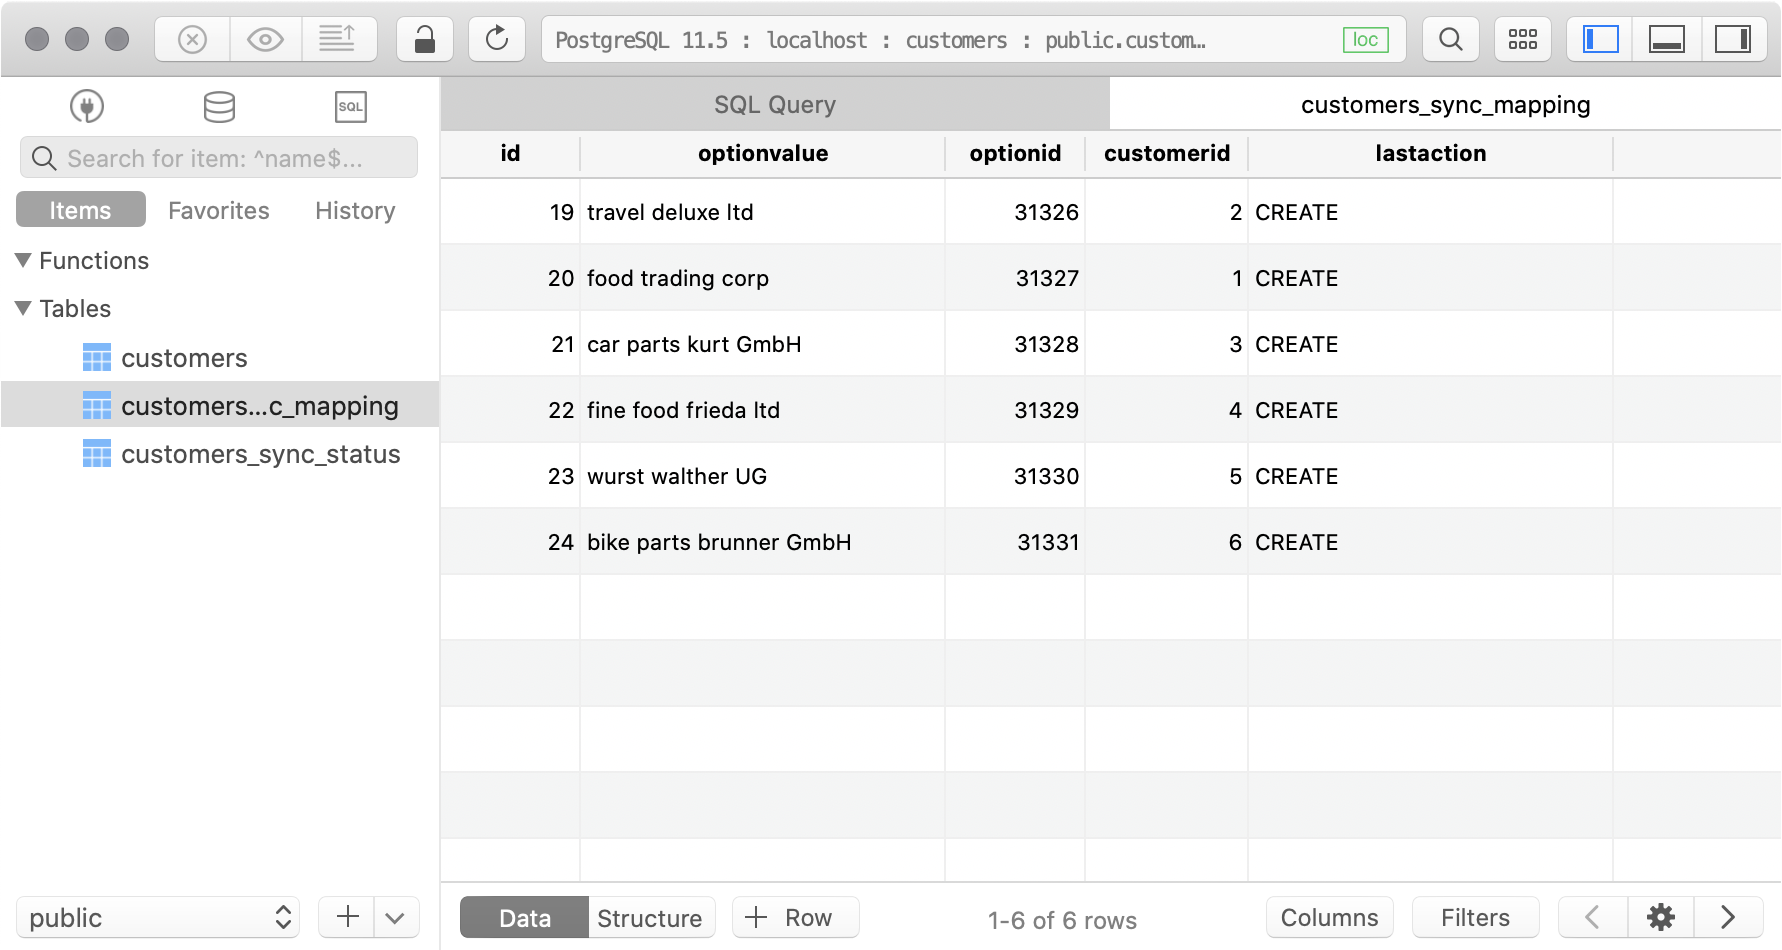
exports.syncAndMap = syncAndMap;In Step 1 we handle creations and updates. This is quite simple and after a sucessful snyc run, the customers_sync_mapping table should look like this. It holds references to the customer and the Jira customfield option. Furthermore does an entry show what the last action was, that the sync script did execute.
But before we can run the sync script, we need to adapt the sync.js file like so:
// ...
const { syncAndMap } = require("./sync_mapping");

const jiraContext = {
  jiraBaseUrl: "https://jira.k8s.home.codeclou.io", // without trailing slash
  customFieldId: 11000,
  contextId: 11400,
  username: "admin",
  password: "admin"
};
const client = // ...

// ...

const main = async () => {
    // ...
      await client.query(insertSyncStatus, ["RUNNING", jobRunDate]);

      await syncAndMap(client, jiraContext);

      await client.query(updateSyncStatus, ["SUCCESS", jobRunDate]);
    // ...
};
main().then(() => client.end());
Now you can initially run it, if you have entered your Jira URL, credentials, custom field ID and context ID.
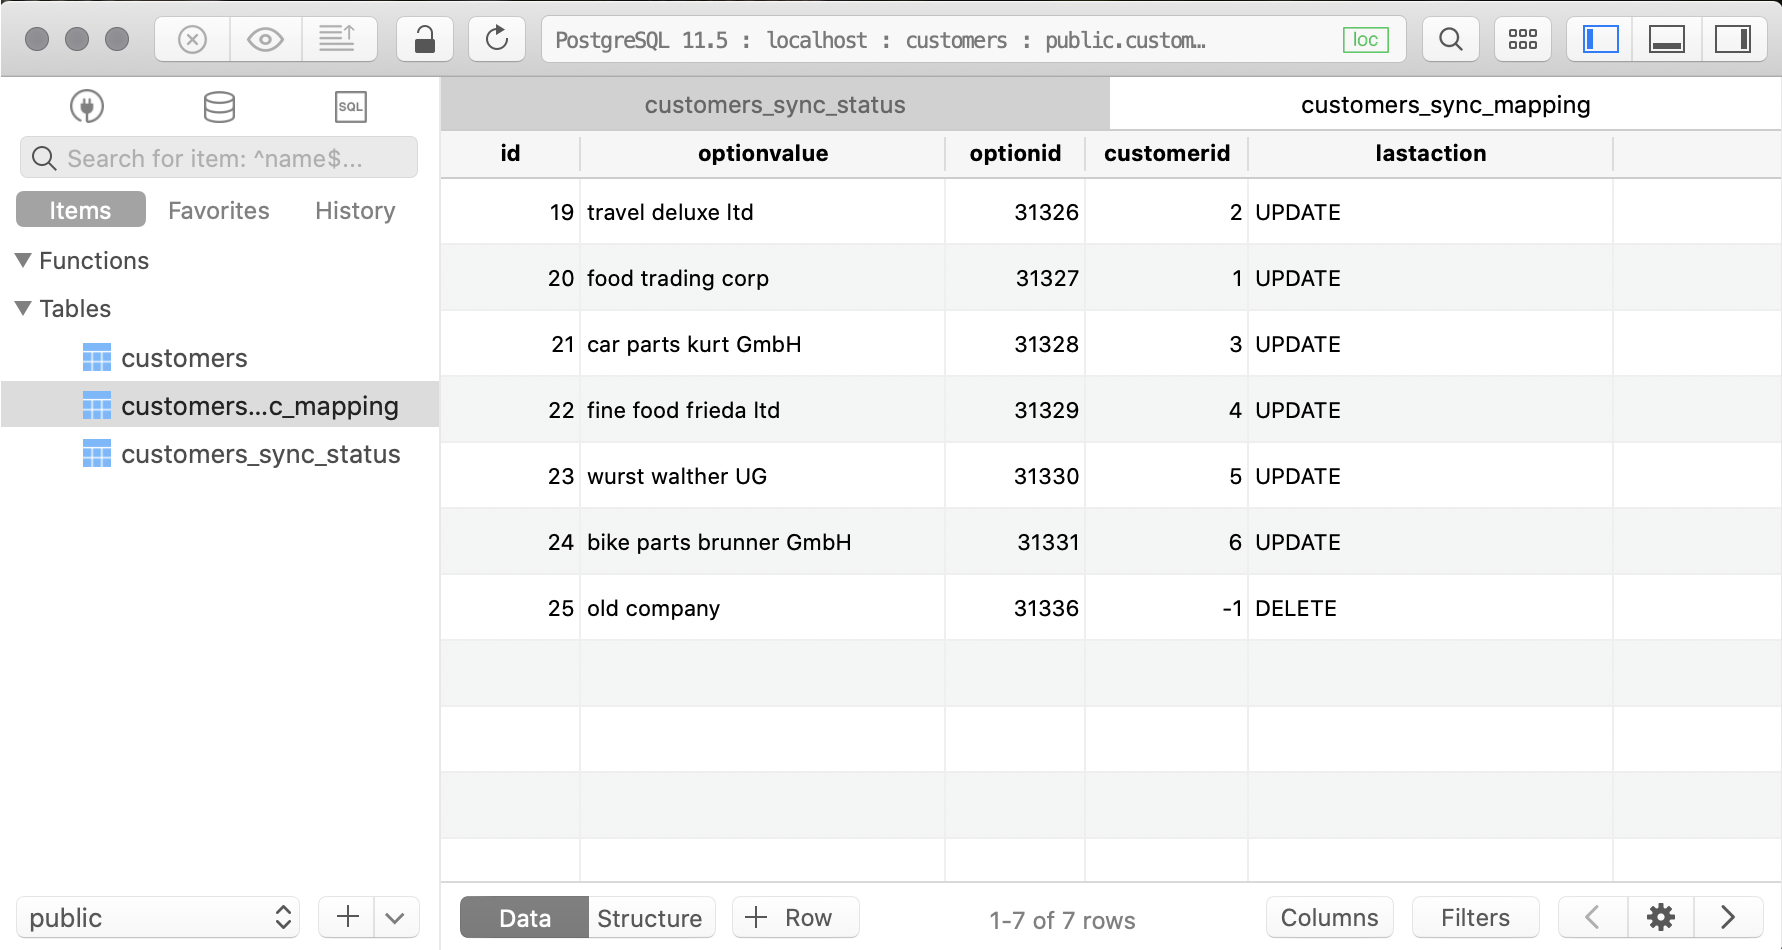
In Step 2 we handle deletions. But how do we handle deletions? Our approach is, that a sync happens frequently, maybe once a night or more often depending on your needs. During a sync the mapping table is filled and holds a reference to the customer (customerid) and a reference to the option (optionid). Should someone delete a customer from your customers table, then during the next sync run, the script will look for all mapping entries, that do NOT have a customer anymore. Since these entries from the mapping tables still hold references to the Jira option (optionid) we simply then delete them from Jira. A sync run with deletions will look like so (last line):
Of course you can write a more sophisticated sync logic that fits your needs, but this example logic can handle creations, updates and deletions. You can easily replace delete option logic with simply disabling an option instead and further other improvements like better error handling.
You can download the full code here.
The sync server
You can put the files in a folder on your linux server and create a cronjob to execute it. This is quite simple, just put sync.js, sync_mapping.js and package.json in the same folder and execute npm install. Then you can create a cronjob like so:
Or you can put your files in a GIT repository and run the sync on a modern buildsystem environment that can run scheduled jobs. You can choose between GitHub Actions, BitBucket Pipelines, CircleCI and many more.
This is an example running the sync from GitHub Actions also scheduling it like a cronjob.
name: sync customers with jira

on:
  schedule:
    - cron:  '* */6 * * *'

jobs:
  build:
    runs-on: ubuntu-latest
    steps:
      - uses: actions/checkout@v1
      - name: Use Node.js 10
        uses: actions/setup-node@v1
        with:
          version: 10
      - name: install app dependencies
        run: npm install
      - name: run sync
        run: node sync.js
Now it's your turn! Enjoy syncing your external data into Jira custom fields with the REST API of the Customfield Editor for Jira.