Get Started
Accessing Advanced Codeblocks
To get started - add the Advanced Codeblocks to your Confluence Page:
Go to your Confluence Page and click edit.
Select in the toolbar
 Insert more content > Other macros
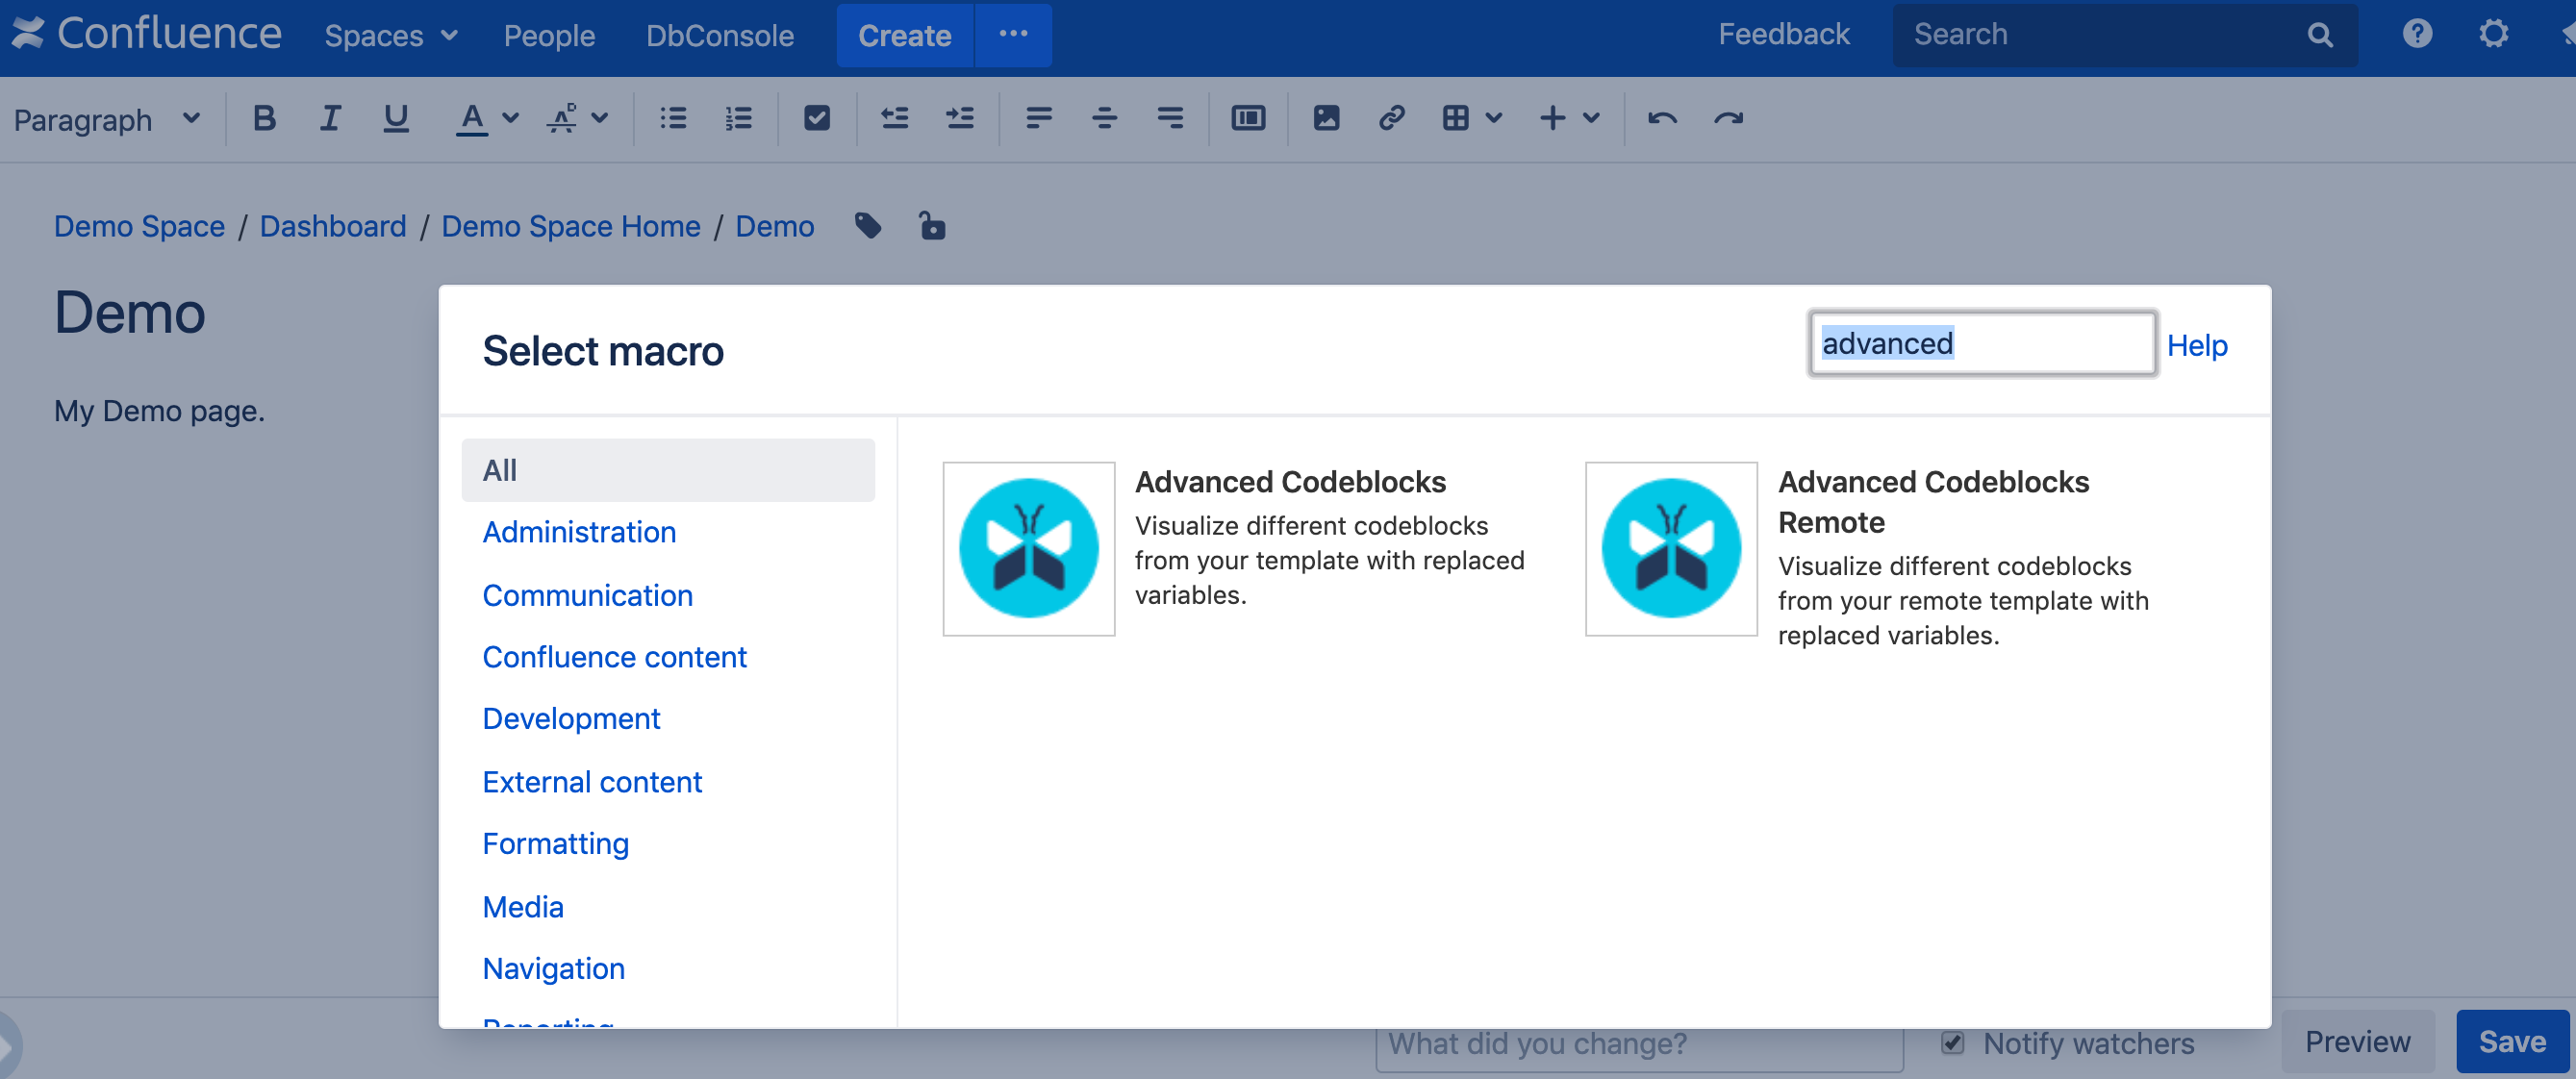
Now you can search for Advanced Codeblocks and should see both macros.
Choose now between Advanced Codeblocks or Advanced Codeblocks Remote and select it by clicking.
Create your first codeblocks
To create your first codeblocks, follow the steps above and:
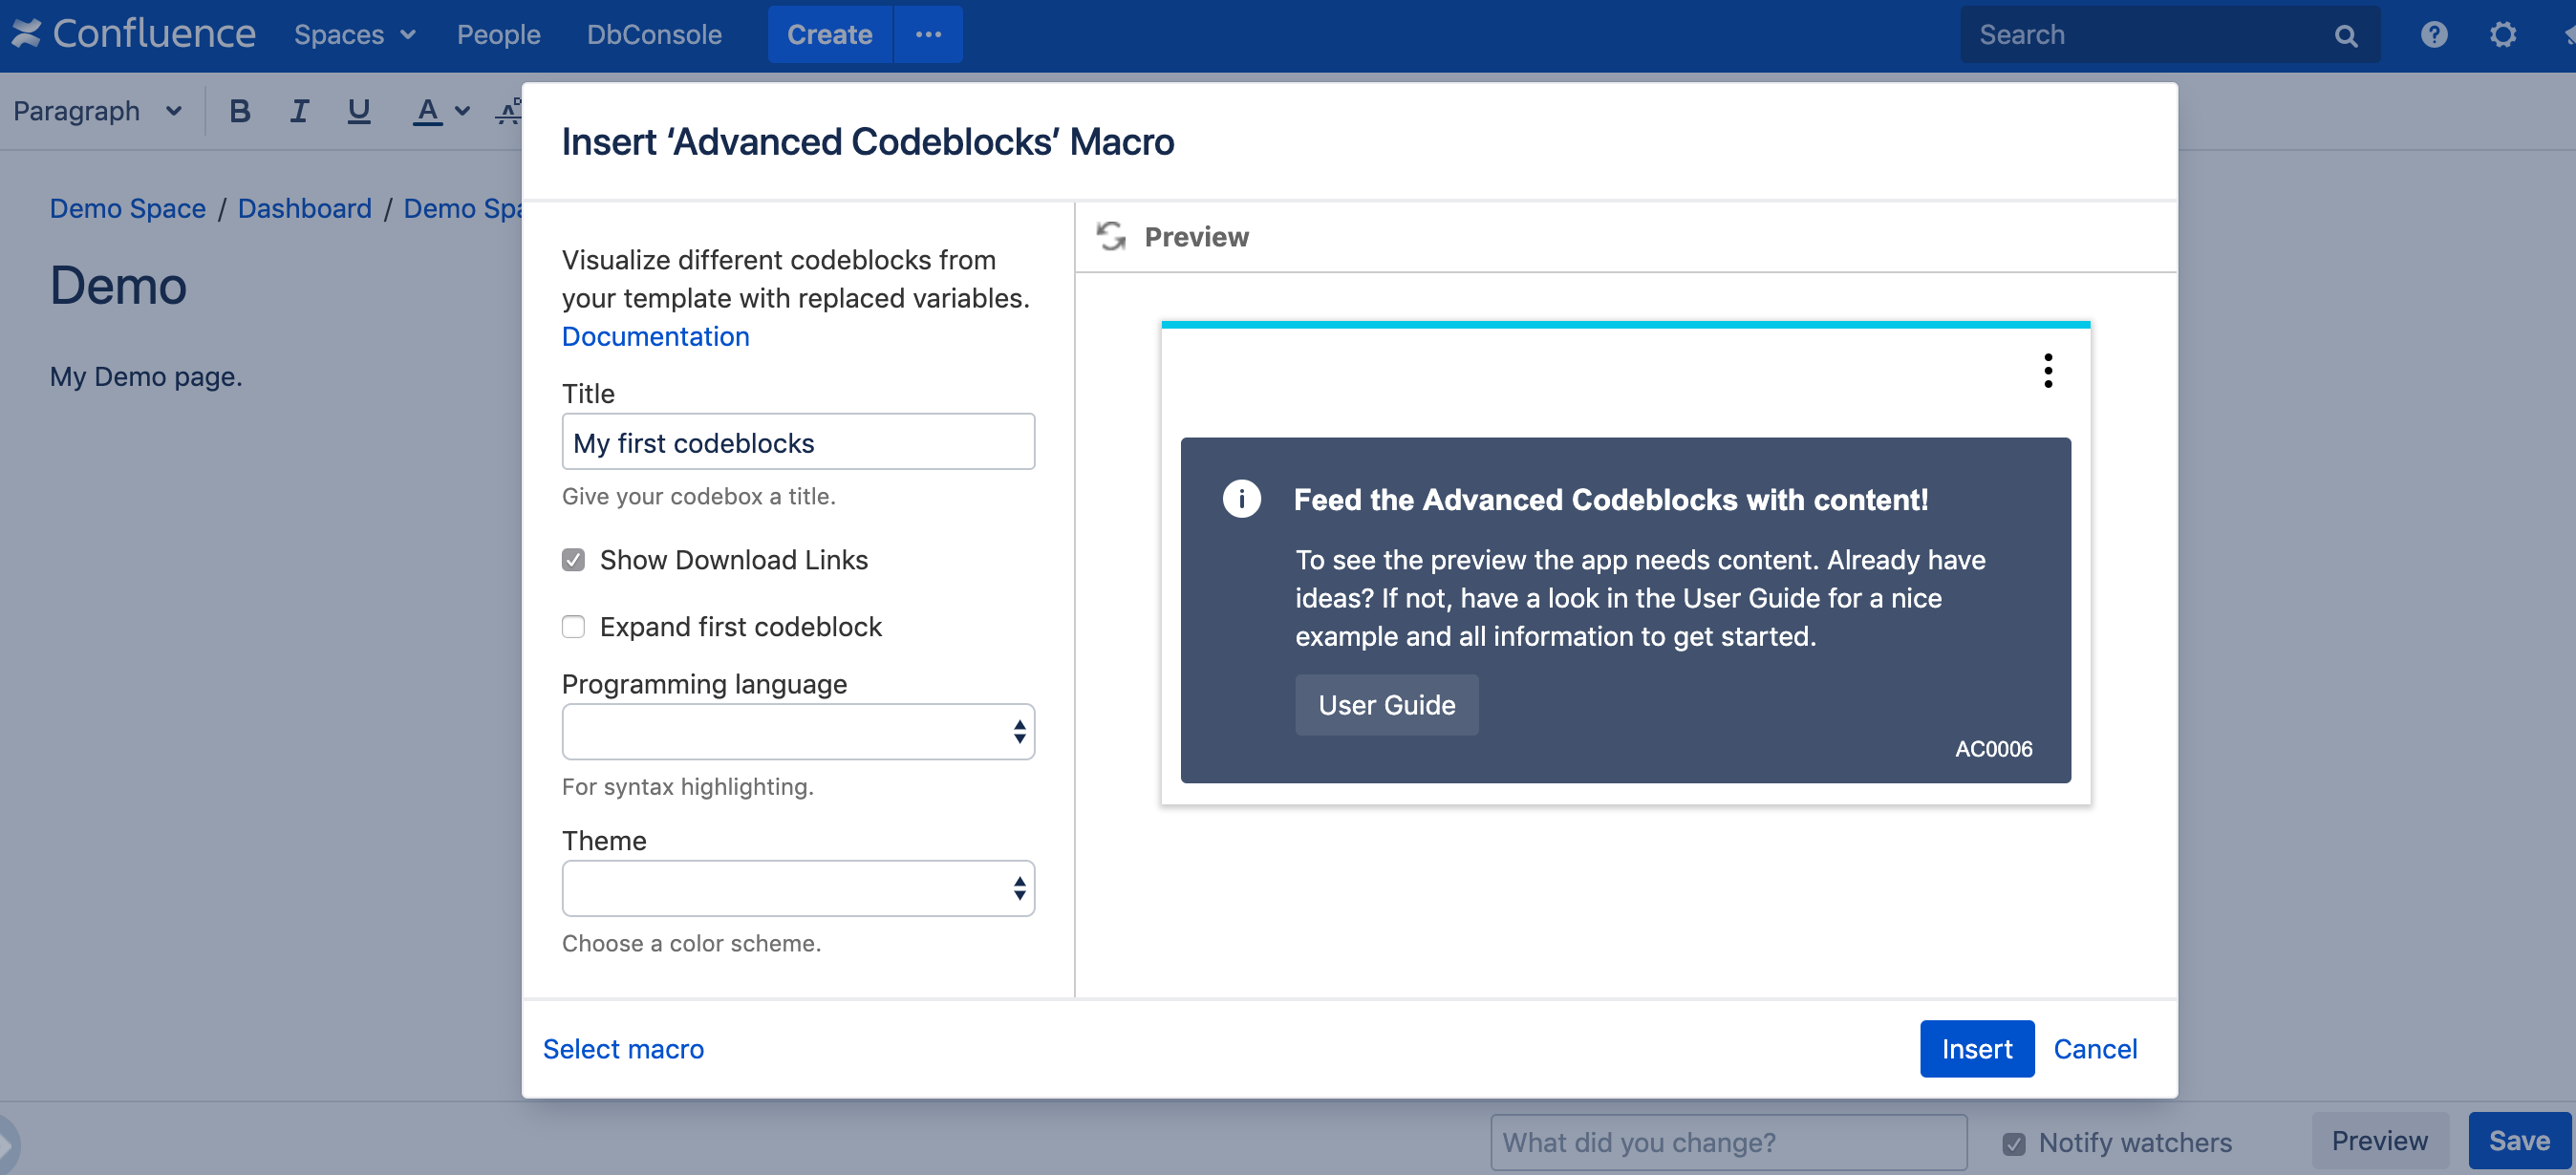
Choose the Advanced Codeblocks.
You will get to the Insert Advanced Codeblocks screen where you can adjust the parameters.
For the beginning we assign our codeblock the Title
My first codeblocksand enable Show Download Links.Click on Insert.
In the preview you see a message that you have to feed the Advanced Codeblocks with content. This will happen in the next step.
Now you get back to your Confluence Page with the inserted Advanced Codeblocks. The codeblocks body is still empty so we're going to feed it with some content.
Copy the following code "My first codeblocks" and paste it into the macro body.
Click on Save.
The output will be a codebox with two codeblocks testsystem 1 and testsystem 2.
[testsystem 1]
server.domain = www.myserver1.com
document.root = /www/server1
[testsystem 2]
server.domain = www.myserver2.com
document.root = /www/server2

[content]
Listen 80
<VirtualHost *:80>
   ServerName ${server.domain}
   DocumentRoot "${document.root}"
</VirtualHost>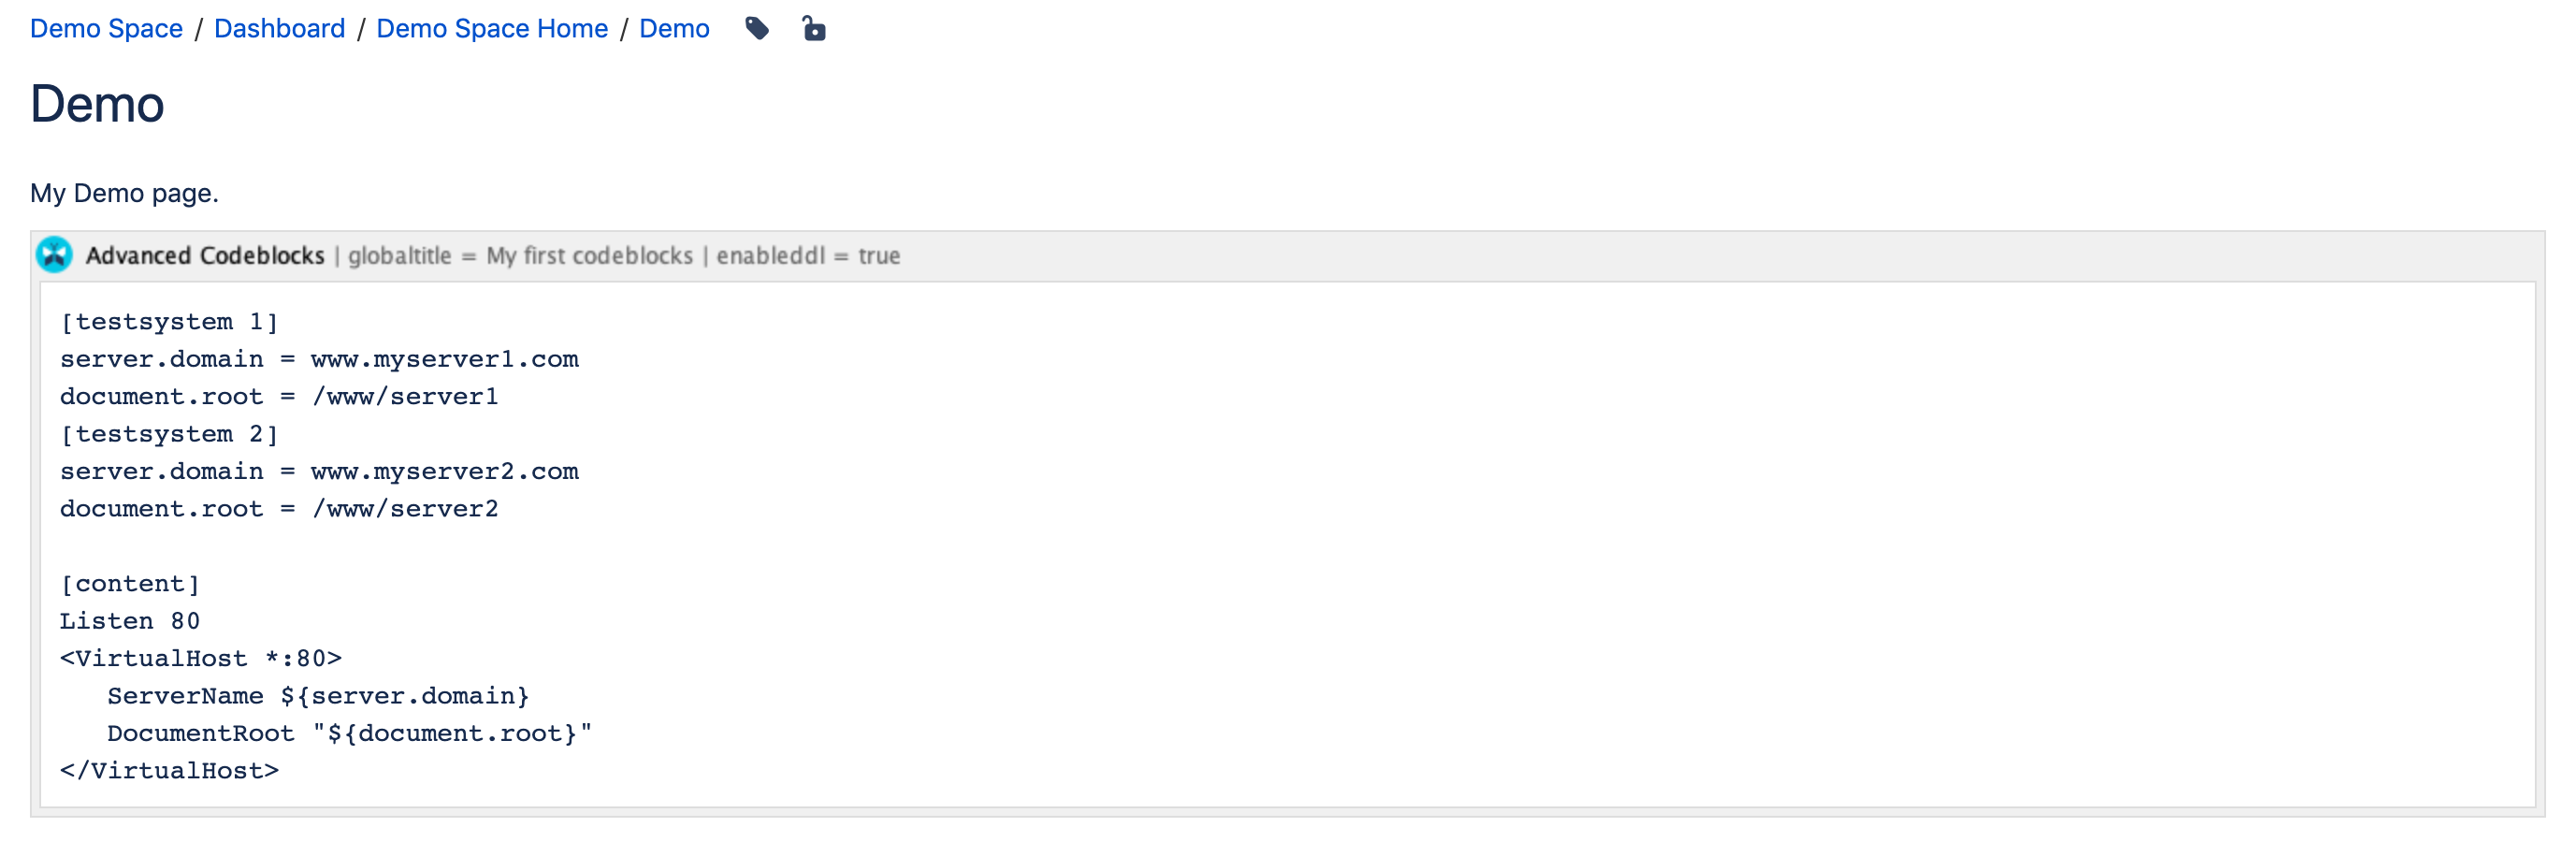

Celebrate!
Congratulations. You have created your first codebox with two codeblocks and can now explore the user interface.